
Inside the Mix: Red Hot Chili Peppers w/Andrew Scheps
02h 32min
(69)
This is your chance to see how Grammy-winning engineer/producer Andrew Scheps mixed the legendary rock band Red Hot Chili Peppers' song Pink as Floyd.
Learn how a multi-platinum mix engineer collaborated with the band and producer Rick Rubin to record and mix the group in both large-format studios and home studios.
Hear how he captured the band’s characteristically funky and energetic vibe then translated that into a punchy and finished mix. Andrew teaches you how he applies and adapts his mix template to craft the mix quickly with dynamics and vibe.
Andrew dissects his final mixing session and shows you how to:
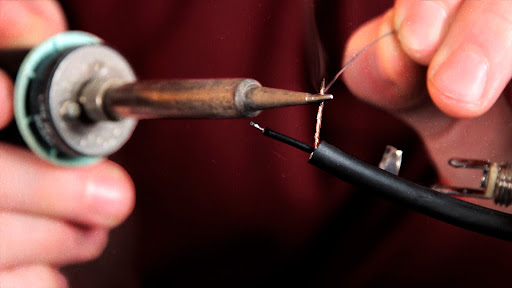
- Combine close mics, overheads, and room mics to create a cohesive sound to the drums as one instrument
- Use shared compression for a night and day difference on the drum tone and add dynamics to the entire arrangement
- Take a mix from sounding "awesome" to sounding "finished"
- Setup mix bus processing to do more with less in terms of processing
- Get Flea's signature bass tone using a combination of mics and DI
- Make acoustic and electric guitars sit perfectly in the mix
- Use both subtractive and additive EQ to enhance the sound of individual tracks
- Add creative special effects to spice up the bridge and take it into a new space
- Keep the Anthony Kiedis’ lead vocals sounding present and powerful even when the mix is dense and layered
- Judge and tweak the gain stage the entire mix based on the 2 bus compressor
- Use stereo width manipulation with hard panning to make a great stereo image in headphones and speakers alike
Pick up dozens of tips and tricks from Andrew's decades of experience and learn the process and mixing system he uses on one of the most successful bands ever.
BONUS: Download the exercise files and practice mixing the song for yourself! The artist and their label were gracious enough to allow pureMixers the chance to try their hand at mixing a portion of the song using the same raw multitrack stems Andrew mixed. Put your skills to the test and apply some of your new found techniques.
Parts of this site and some files are only accessible to pureMix Pro Members or available to purchase. Please see below our membership plans or add this video to your shopping cart.
Once logged in, you will be able to click on those chapter titles and jump around in the video.
- 00:00 - Start
- 08:13 - Session Layout
- 15:17 - Drums
- 28:31 - Kick
- 34:13 - Snare
- 42:17 - Overheads
- 48:25 - Toms
- 52:37 - Room Mics
- 00:00 - Start
- 00:0 - 2-Bus Chain
- 12:47 - Rear Bus
- 14:03 - Percussion
- 16:02 - Bass
- 19:45 - Guitar
- 32:10 - Piano
- 00:00 - Start
- 00:0 - Vocals
- 16:55 - Background Vocals
- 27:50 - Strings
- 39:31 - Automation
- 43:06 - Bus Compression
Part 1 | Part 2 | Part 3 |
00:00:07
Hello children!
Welcome to Monnow Valley
Studios in Wales,
which is a studio I've partnered with,
and you can see a bunch
of gear in the background
that we're not going to use
in this particular video.
00:00:18
Today we are here to mix
a song called 'Pink As Floyd'
by the Red Hot Chili Peppers.
00:00:24
And very briefly, I'll just give you
the story behind this song.
00:00:27
For the album 'I'm With You,'
Rick Rubin produced,
Greg Fidelman did
all of the basic tracks,
and then he and I did a lot
of the overdub recording,
and then I mixed
the bulk of the album
while Greg was still recording,
and then he mixed a couple
of songs, etc., etc.
00:00:45
While working on the album,
the band cut 50 songs,
and not just basic tracks of 50 songs;
actually, almost finished
recording 50 songs,
including final lead vocals.
00:00:56
So, all we left off
were some of the guitar overdubs
and keyboards and things like that,
and then background vocals.
00:01:03
They then went through the songs,
decided what they wanted
to go on the album,
those songs got finished
and mixed, etc., etc.
00:01:09
But there were so many great songs
that didn't make the album,
just because there were so many,
that we then did a series
of 7" releases afterwards
where we had 17 of the songs
that didn't make it.
00:01:19
And you might be saying to yourself,
'17 is an odd number, Andrew,
and you said it was 7".
Those have an A-side and a B-side.'
Well,
part of the release
was one very long jam
that was actually Side A
and Side B of the 7".
00:01:34
And not to go off
into the weeds too much,
but, because we were cutting
vinyl and all of these,
we tried lots of little tricks,
and on that particular 7",
Side A plays from the outside
to the inside,
then you flip it over, drop the needle on
the inside, and it plays to the outside.
00:01:49
Quite cool!
Anyway, this is one of those songs,
'Pink As Floyd,'
and all of the B-sides were collected
into a Record Store Day release
called 'I'm Beside You.' Get it?
But, in a lot of ways,
the band never really looked
at these as B-sides.
00:02:05
It's not that these were sort of songs
not good enough to make the record,
it was just there were too many songs.
00:02:11
And I think, after 'Stadium Arcadium'
they just figured another double
album wasn't really the way to go.
00:02:16
What was cool about this, though,
is it meant that we had
this very sort of relaxed
schedule to releasing because
we were releasing only 2 songs at a time
and they wanted at least
a month in between.
00:02:26
The band was on tour, so,
whenever Josh — who was the one
who had the most recording
to do on these songs
after the fact anyway —
whenever he was in town
and we had time,
we would just do as much
as we could get done
and then he would leave town
and I would mix stuff and I would send it.
00:02:39
So it was a really fun
low pressure process
compared to actually making
a Red Hot Chili Peppers record,
which is a lot of fun,
but there's a lot to it and you're
finishing a lot of songs at once,
you're always up against
the deadline, etc., etc.
00:02:51
So, anyway,
this particular song,
slightly odd song structure,
which we'll get into in a minute.
00:02:58
It has a string quartet on it,
which is, I believe,
the only song on the entire set
that we actually added strings to,
so, that was a lot of fun.
00:03:08
Otherwise, it's pretty straight-
ahead instrumentally,
so what I'm going to do now
is I'm going to play you the entire song.
00:03:14
So for 5 minutes you're going
to listen to the Chili Peppers
and I'm going to sit uncomfortably.
00:08:11
There you go!
Pretty straight-ahead.
00:08:13
Before I actually get
into the mixing, though,
I want to walk through the arrangement
because it's actually kind of clever.
00:08:20
The good thing is,
in terms of trying to build the song
you have a very natural build
in the beginning
going from strings
to a very minimal band,
you save the drums for quite a while,
things like that.
00:08:31
And then it breaks down
again in the middle,
but then you actually build
the track up much, much faster.
00:08:36
So, I just want to go through sort of
what elements are in each section,
and you'll see
— once we get into the way
the end of the song,
especially, is mixed —
there's a lot of kind of getting
things out of the way of other things
so that everybody can have
a little tiny moment,
but then, hopefully,
you don't actually notice
any of that is going on,
you don't realize the strings
have disappeared for a second
and then they come back,
but when they come back,
all of a sudden the track is bigger
but then they disappear
so you can hear the bass run, etc.
00:09:02
So, that kind of stuff,
and some of that is just
in the musical arrangement alone,
some of that is me doing rides,
it's changing some of the
string arrangement.
00:09:11
Actually, ditching some of the stuff
that we recorded and things like that.
00:09:15
We start off with just strings,
and interestingly,
when we worked on the song during
the album, there weren't any strings.
00:09:22
This was all cut as part
of finishing up for the 7".
00:09:24
So, without the strings,
the song just started with the guitar.
00:09:32
Single acoustic guitar.
00:09:34
Very quickly, this drum kit,
all the drums up top,
this was from the original
tracking, obviously.
00:09:41
The bass is from the original tracking,
this guitar here,
this electric guitar which has
the 'close' and the 'combo' amp,
that's from the original tracking.
00:09:50
Then there would've been
a scratch vocal
and I don't think there's anything
kept from the scratch vocal on this song,
so that's the actual basic track.
00:09:57
And then, very quickly,
they put on a couple
of these other guitars.
00:10:02
Like the guitar in the breakdown,
it was re-cut almost
immediately because,
just sonically, there wasn't one tone
that was going to work for the body
of the song as well as the bridge,
so Josh re-cut that.
00:10:14
The wah guitar was put on
not too long after,
and then this acoustic guitar was cut.
00:10:19
I think it's one of the last
guitars that got cut,
and that was more because
they didn't want to start
the song with the electric,
and they wanted the electric guitar
when it came in
to be complimenting the acoustic guitars.
00:10:30
From the very beginning,
the acoustic guitar and main
electric guitar arrangement
was sort of the idea.
00:10:36
Then once we started cutting strings
to flesh out the arrangement,
we asked the string players to do
something that most string players hate,
which is to play things
that are not written out.
00:10:46
So what we basically told them is,
'We want the end of the intro to be...
00:10:53
...that chord.'
And we said, 'We want you guys
to noddle around for a while
and then end up on that chord,
and we don't know how long,
and don't worry about it.'
We just recorded them... free,
not to a click, not to the song,
and then I just lined
these two takes up.
00:11:08
So, it took a while, but...
00:11:10
I unfortunately cannot remember the name
of the string quartet at the moment,
but they are a contemporary
string quartet in Los Angeles
and they are a little bit more used
to the idea of improvising
than a lot of just strict
classically trained players are.
00:11:22
But we ended up with these
great clouds of strings.
00:11:25
Then, into what I talked about before,
which is the acoustic guitar
leading into the electric guitar.
00:11:30
By the time you get to that first verse,
even though it's really just...
00:11:34
that's it, just electric guitar,
acoustic guitar, and vocal,
it's a very Chili Peppers-sounding thing.
00:11:39
The sound of that electric guitar
obviously sounds like Josh,
but it sounds like the Chili Peppers
all the way back to Hillel.
00:11:45
They've always had this kind
of clean Strat or Tele Fender sound
that's a lot of their rhythm guitars,
so you get to the first verse...
00:11:58
And Anthony's voice
on top of clean guitars,
Chili Peppers, easy!
Then you go halfway through the verse
and Flea comes in along with a shaker.
00:12:12
Get it? 'Shake it for me' and...
00:12:14
...get the shaker.
00:12:16
Well played!
And then, when you get
to the end of that section
to what's being called the chorus...
00:12:20
This song was always nebulous
as to what's the verse
and what's the chorus
and things like that,
so we're calling this next
section the chorus.
00:12:26
And this is where you
actually get the drums:
And now you're actually
at the core Chili Peppers quartet.
00:12:40
There's bass, drums,
electric guitar, vocal,
that's it for the first half
of that verse.
00:12:45
Then you just get a little...
00:12:46
I'm going to call it a verse
because it's actually
treated lyrically like a verse.
00:12:50
Then halfway through that verse
you kind of get this signature
guitar overdub for the song:
Those little wah fills become a feature,
they're a part of the verse/chorus
section that comes next,
and they will keep coming in and out.
00:13:09
So that's really the basis of the song:
it's the electric rhythm guitar,
sometimes with an acoustic going with it,
drums, bass, vocal.
00:13:18
Aside from that,
you've got a couple of extra guitars
that happen in the bridge.
00:13:23
When we get to the bridge
and it breaks down,
the main guitar switches tones.
00:13:34
We get the strings back
as sort of a feature there,
though they have come back
in an earlier section.
00:13:39
We'll hear that.
00:13:40
And then, to climb out of this bridge,
we actually break down even more.
00:13:45
A lot of this is about
resetting the dynamic,
but it's also the storytelling
of the song.
00:13:50
But to be able to reset the dynamic
and go into this final verse,
as actually the quietest
verses of all
because all of a sudden
we barely have any strumming,
the guitar goes much simpler,
we have some very simple piano,
it's the first time the piano enters.
00:14:05
Listen to the end of the bridge,
just going into the beginning
of the next verse:
Whole notes, half-time drums,
all very simple,
and then it builds up
over the next minute or so
to have absolutely everything,
so by the time we get to the end
you've got a doubled string quartet
doubling the bass runs,
you've got much busier piano,
you've got every guitar that has
ever played in the song is now playing,
plus the bass, plus the shaker,
and obviously, the full drum kit.
00:14:54
It's kind of this great
accordioned-out version of the build
in the first half of the song,
and really introducing the band.
00:15:03
Then you breakdown,
do the middle eight,
which gives you a musical change,
then you get the exact same song form
again but super condensed
and actually building up to a larger
dynamic than you've ever had before,
you have more background vocals
than you've had before, etc., etc., etc.
00:15:17
All right, now we've talked
about the song as a whole.
00:15:20
I'm gonna go back up to the drums,
I'm going to bypass all
of the kind of mixing stuff,
and show you what
we've got for drum tracks.
00:15:27
There are quite a few tracks
because of the way
the drums were being tracked
for 50 songs at once.
00:15:33
And I'm not using all of them,
but I'll play you what all of them are,
and if I can remember why I decided not
to use a particular mic, I'll tell you,
but otherwise, just trust that it sounded
better without it on this particular song.
00:15:43
But it's not that all
of these microphones
were set up very specifically
for this song.
00:15:49
These microphones were being
recorded for all of the songs,
so it was always meant to be
a kind of decision-making process
when we got further into the song.
00:15:57
Sometimes the microphones
would have been turned off
as soon as we got into the overdub
portion of working on the song,
sometimes we would have left them
until it was time to actually mix.
00:16:05
I'm gonna go through,
get rid of all the plug-ins
because that's fun, right?
And I'm actually going to
make things inactive
that were bypassed.
00:16:16
I'll mute stuff that is...
00:16:21
...parallels.
00:16:24
I guess we'll leave that,
that's on an Aux.
00:16:29
You see there's not
a whole lot going on.
00:16:33
And then I'll come down here
and I'm gonna mute
all of my parallel drum stuff,
which if you've watched my session
setup video and template video,
you'll know exactly what this is.
00:16:41
Not all of this is being used,
but, we'll take it all out.
00:16:46
Soloing up the drums.
00:16:48
This is what the drum kit
sounds like completely dry,
though my 2-bus processing is still on.
00:16:53
When we talk about that you'll see
what that does to the whole mix,
but I don't think it does us a whole
lot of good to get rid of it completely.
00:17:07
Pretty natural-sounding kit.
00:17:08
This was actually recorded
in EastWest Studio 2,
which is a room that the Chili Peppers
have used quite a bit.
00:17:16
I believe 'Blood Sugar Sex Magik'
was actually cut in that room as well.
00:17:19
And now I'm just gonna go through
the drum microphones one by one
so you can kind of hear what they are.
00:17:25
So here's Kick In:
Then normally with hi-hat,
I call it the mic voted least likely
to ever get used in a mix.
00:18:03
With Chad Smith,
that is a very different story.
00:18:06
The way he uses
his left foot on the hi-hat
is a huge part of the way
he plays drums,
the way you kind of hear it
sizzling and opening a tiny bit,
and the sort of rhythmic change,
even in a closed hi-hat sound.
00:18:21
So, on this particular
song, it's in there.
00:18:23
I'm not making a big deal out of it,
but if you're not getting
enough out of the overheads
of that particular sound with Chad,
I will always go looking
for the hi-hat mic to add it in,
because to me,
that's almost the most defining part
of the way he plays drums.
00:18:38
His tone and his groove
are just ridiculously good,
but that's the thing that nobody
else does that I've ever heard.
00:18:43
Here are the overheads:
Ride mic.
00:18:57
Barely hear it.
I think it was just on
because no one ever
bothered to turn it off.
00:19:01
I don't think we need it on there.
00:19:03
The toms,
I'll go ahead and solo them up
in a spot where he hits them.
00:19:12
Pretty straight-ahead.
00:19:14
Again, great sounding toms,
and he...
00:19:17
...is somebody who makes
toms sound great.
00:19:19
So now we get to the Close Room,
this is the one that I bounced
through a couple of extra compressors.
00:19:24
So here's the Close Room
as it was recorded:
Just a fantastic sounding room,
I love this drum room.
00:19:37
It doesn't sound reverby at all,
but it sounds super dense
and it's like a room.
00:19:43
It really, really sounds like a room
but you don't feel as though
the drums have moved
20 feet away when you bring it up.
00:19:49
And as part of the overdub process
in all of these songs,
the 17 that we put out
after the 'I'm With You' record,
I was at Joe Barresi's studio
doing some overdubs
and he said, 'Dude,
you gotta check this out!'
as he always does,
and he had a Vocal Stressor set up
and a pair of LA500s,
these 500 Series compressors from JLM
which are basically LA-3As
with a high-pass on the detector circuit.
00:20:14
And they sounded so good
I just decided to bounce
all 17 songs worth of overheads
through these compressors,
and then just have them available
on the different songs.
00:20:23
What I'm going to do while it's playing
is I'm going to switch
from the dry overheads
to each of the two compressors.
00:20:29
If you watch the screen,
these blue ones
that are solo'ed right now
are the microphones as recorded.
00:20:35
The red track down
is the Vocal Stressor,
and then the green track
is the LA500s.
00:20:57
So, really different character.
00:20:59
On some of the heavier songs
I made much bigger use of these,
but what I'll do now
is I'm going to solo up the mics
and I'll add these to it.
00:21:07
And you should hear
how it just gets thicker,
and this is something that I do
with parallel compressors,
usually live, just leaving
them on inserts
all the time,
where I bring parallel compressors
in and out on the drum kit
to help grow the kit.
00:21:20
In this case I just decided
to bounce a couple,
and that way they're done.
00:21:37
Just sounds like he's playing harder
and this is what I love about
parallel compressors on drums.
00:21:42
You'll see in the arrangement
that I actually use region mutes
to make the Vocal Stressor
part of just the loudest sections,
so this big sort of second verse,
which is actually
the second chorus lyrically,
and then the end section.
00:21:56
Whereas the LA500
I'm using to be kind of part
of the sound of the drum kit,
but in that breakdown verse
after the bridge,
which I played you earlier, which is
the quietest part of the whole song,
I actually take that out
and then fade it in
as we build out of that verse
into the next chorus.
00:22:15
I could have done this
with an Aux, but I didn't.
00:22:17
I bounced some gear and then
did some fades, later on.
00:22:20
Now we'll get down
to the more random mics,
and not all of these
are used on this mix,
but there is a far room,
which I guess I'll turn on for you
so you can hear it,
but we're not using it on this mix.
00:22:32
This is a much bigger room.
00:22:39
It's a little further away,
it wasn't appropriate.
00:22:41
This song needed to be
a little bit more intimate.
00:22:43
I'll actually make those guys
inactive because I'm not using it.
00:22:46
Then there was a 251 on the drum kit:
Nice mono representation of the kit.
00:22:56
This was always meant to be crushed
and I've got some plug-ins on it
which crush it,
some of which maybe were put on
during the overdub process.
00:23:03
Then there was an SM57 room mic,
which we didn't use.
00:23:13
I believe what this was set up for
was in case Chad had
a second snare drum,
if he was using a timbale snare
or something like that,
it was in place, but if it's set up,
why not record it anyway?
So point it away from the kit,
you got yourself an extra room mic.
00:23:25
Didn't use it on this song,
I'll make it inactive.
00:23:28
Mono overhead, to differentiate itself
from the mono kit.
00:23:31
That '251 kit' mic
is most likely down low,
either behind the kit or in front
of the kit on the floor tom side.
00:23:39
I'm saying that because I know
the way Greg records.
00:23:42
If it didn't sound good there,
it would have been moved,
but I'm guessing that's where it was.
00:23:46
Whereas this mono overhead
would be a mono overhead,
more than likely somewhere nearer
the drummer than the drum kit.
00:23:58
That's just yet another mono mic,
it's just used as glue.
00:24:01
Then there's a PZM,
this is something Greg tracks with,
it's a pretty cool sound.
00:24:10
It's on the floor underneath the snare
drum, near the front head of the kick,
so you get a really cool
pointy attack on the kick
and you get a lot of snare bottom in it.
00:24:19
On heavier rock stuff
this can be a really handy mic
to kind of keep the drums sounding
present, but in a dirty way.
00:24:26
It didn't need that on this song,
so we'll make this inactive
because we didn't use it.
00:24:30
And then the talkback mic, this is
a 57 that's pointed at Chad's head.
00:24:34
And as most people who have
tracked drums know,
after doing it a little while,
the talkback mic sounds awesome.
Always record it.
00:24:41
I've seen some people
leave the talkback mic
just going through an input
to people's headphones
and not recording it
while they are tracking.
00:24:48
Everything sounds amazing,
then they listen back
and they're like, 'Oh, the drums sound
a little flat. I wonder what happened.'
It's because it's the talkback mic.
00:24:55
It's just a balanced microphone,
it's the indirect recording approach,
and it's also pointing at
the drummer's head, which...
00:25:01
They're wearing headphones,
so they're not really balancing the kit
based on what they're hearing,
but they do tend to balance the kit
based on what they hear,
and this way they learn
to be drummers.
00:25:11
So must drummers are — unless
they're completely unbalanced —
will have the kit sound pretty balanced
right where they're sitting,
so that's what this talkback mic is.
00:25:24
And you can hear
it's pretty highly compressed.
00:25:27
Now, that would be
compressed for two reasons.
00:25:29
One, because it sounds
awesome as a drum mic,
but what it really is is so that while
Chad is playing really loud,
it's not incredibly loud
in the headphones,
but as soon as he stops playing,
because it's so heavily compressed
there's a lot of input gain
into the compressor,
now everybody can hear him talk.
00:25:46
Now, you would think having all the rest
of these microphones around the drum kit
you would hear Chad no matter what,
but overheads are your best bet,
and if you're not listening
to the overheads loud,
you actually cannot hear the drummer,
and there is nothing more
frustrating for the drummer
than to not be given
a talkback mic.
00:26:02
And then the band all starts
talking into their 57s
and they sound like radio announcers,
and the drummer sounds like he's
yelling from the back of the room.
00:26:10
So, it's important for just
the band dynamic, and it's also...
00:26:13
For me now, it's a huge part
of the drum sound on everything I do.
00:26:16
Those microphones put together
to be the drum kit
sound a little bit like this.
00:26:21
And again, this is without
any additional processing,
so no plug-ins on after the fact,
and none of the parallel processing.
00:26:28
The only thing you're hearing, which
you've heard on all of the microphones,
is my 2-mix chain
which we'll talk about later on.
00:26:33
Let me solo up the drums.
00:26:42
Very natural, in a room,
the sound of a great
drummer playing well.
00:26:46
It's...
00:26:48
It's a gift to be given
something like that.
00:26:50
And then later on,
when he is playing louder:
Another thing you can hear
about Chad's drumming,
which to me is very impressive and it's
all part of his internal dynamics, is...
00:27:08
I'm gonna play that section
again in a second.
00:27:10
Listen to how much tone
there is in the ride cymbal,
but then when he goes
to the crash, he smashes it.
00:27:15
Whereas a lot of drummers,
because they're in
the loud part of the song,
would be treating the ride cymbal
like a crash/ride.
00:27:22
They'd just be slamming on it,
but that is not what this drum
performance is supposed to be.
00:27:27
It's supposed to be
still the sort of lyrical...
00:27:30
...bouncy drum track,
but it's got to be loud,
so all the crashes need to be smashed,
but the ride needs to still be riding.
00:27:38
You need to hear all the individual
attacks on the cymbal,
and that comes out
beautifully in this.
00:27:52
It also gives it somewhere to go,
you hear before the drum fill
he's playing a little quieter,
then he builds it into the drum fill,
and then comes back to it louder.
00:28:00
That is genius,
and that is what makes a good
drummer into a great drummer.
00:28:06
It's all that little stuff, because,
if you don't do it, the drum track
will still work for the song,
but what will happen is,
as a mixer you're gonna have
to build all those dynamics with rides,
and try and make the drummer
sound like he was doing all that stuff,
whereas for me, all I gotta do
is make sure you actually hear him.
00:28:22
So, it's a huge thing to have that.
00:28:24
So now, if we go back and look
at some of the individual things,
I'm not doing a whole lot to the drums
but there are just a few
plug-ins here and there.
00:28:32
So, let's go back to the Kick In,
and what we're going to do
is I'm going to go
through the plug-ins,
but I'm also gonna start turning on
some of the parallel stuff
because that's what really
helps shape the drum kit.
00:28:43
So here's the Kick In,
and all I'm using is a Lo-Fi
and a Scheps 73.
00:28:49
I would say that's my plug-in chain
on just about every kick
and snare that I mix now.
00:28:56
And we're not going to see that
over and over in this session
because there's not a whole lot
that has been done.
00:29:02
It's basically a little bit of distortion
and a little bit of EQ,
and I'm not using the preamp side
of the 1073 emulation,
I'm really just using it for the EQ.
00:29:12
And it's because I am a Neve kid,
I grew up on Neve consoles,
it's what I learned
to record and mix on,
so this is the EQ
that sounds musical to me.
00:29:21
The frequencies make sense to me,
and I'm also a fan
of not having infinite choices.
00:29:27
A fully parametric EQ to me
is just an invitation to wank.
00:29:31
You're just going to be looking
for the right frequency forever,
and, 'Oh my god! What if I have
the wrong frequency?
And what if my bandwidth
isn't right? And...'
I don't want to think that way,
I just want to crank some stuff and,
'Ooh! It sounds better! Move on.'
Here's with and without the Lo-Fi,
which, you're also
going to get some gain,
but basically, it's a clipper.
00:29:50
I'm not using the Noise,
I'm not using the Saturation,
I'm not using the Antialias,
Sample Size, or the Sample Rate controls.
00:29:56
It's just distortion.
00:30:09
It just sounds more alive to me.
00:30:11
And then, the EQ is basically
a 'happy face' EQ,
which is kind of what I do.
00:30:16
The high-pass filter is not in,
so I'm letting all the low end through.
00:30:19
We've got a low shelf at 60,
we've got a little bit of 7.2 k,
and a tiny bit of the 12 k shelf.
00:30:26
There are a lot of people who will EQ
midrange into a kick drum
because it's where the attack lives.
00:30:31
It just always sounds
really midrangey to me,
I would much rather get
that attack way up high.
00:30:36
And that also tends to keep it
from being right in the same range
as the vocal and electric guitars,
if you've got a lot of them,
and even the cymbals.
00:30:44
It sort of puts it
in a different space,
so here's with and without the EQ:
Do you hear the drum
resonating a little more?
That's that 60.
00:31:06
And then the combination
of the 7.2 and the 12,
which most people
would think on a kick drum,
especially on an inside mic,
like, 'Well, what's the point?
Unless you're mixing
a Metallica record
or something that really has
to have that point.
00:31:17
Pantera, those kinds of bands.'
Generally, you don't think in terms
of point as being up that high,
but for me, it actually makes it
more musical and less aggressive.
00:31:25
That's just the way I hear it.
00:31:27
So that's the Kick In,
and then, what I'm also going to do,
I'm going to leave off the sort of
main stereo parallel drum compressor,
but I'm going to turn on
the Kick/Snare Crush.
00:31:36
So this is just a shared compressor,
and it is shared by the kick
and the snare,
and it is a dbx 160 VU.
00:31:47
At four and a bit to one.
00:31:49
I don't know, 4.5:1.
00:31:51
A tiny bit of output gain, makeup.
00:31:53
And then, what it should be,
and you may not see this properly until
the kick mics and the snare mic are in,
is that this will just
tickle the threshold.
00:32:01
It's a way to get the kick
and snare louder,
because all of the uncompressed stuff
is coming back sounding
basically the same,
though the 160 does
definitely have a sound
just going through that VCA
and going through the input
and output stages.
00:32:14
But then the attack,
because it's such a slow attack time
on this particular compressor,
the attack will be much louder
than the sustain,
but then the sustain comes up,
so it just gives it a great shape.
00:32:25
I've unmuted it down here,
so I will mute the send.
00:32:28
And I'm just going to unmute
and mute the send
and you can hear what this does.
00:32:44
I just love that,
I think that sounds great.
00:32:47
And especially when we come back
to having the kick
and the snare in, together,
you'll hear how that really
helps them interact as well,
which is a big part of getting
the drums to work for me.
00:32:56
Next down is the 'Kick Out' mic.
00:32:58
I apparently did absolutely
nothing to it because it was fine,
and I'm also favoring the Kick In.
00:33:03
What I'm going to do is
I'll play a little bit of that,
but then I'm going to add
the Kick In as well
and then I'll take the Kick Out
in and out, leaving the Kick In.
00:33:11
So you'll hear the kick sound
with and without the Kick Out mic,
as opposed to just listening
to the Kick Out on its own for too long.
00:33:35
Again, it's more about the resonance
of the drum than anything else.
00:33:39
To me, that's adding
the exact same thing
that the EQ on the Kick In
mic is adding.
00:33:44
It's just this sort of length,
and there's something
natural-sounding about it to me.
00:33:49
And I'm using that
word only because
I'm trying to explain
the feeling of actually...
00:33:56
...hearing the drummer,
not just the drum.
00:33:59
There's something about
the sound of those two together
that is more like being in the room
with a drum kit than not.
00:34:06
Even though these microphones
are both incredibly close to the drum
and you definitely wouldn't
want to put your head there,
that sounds like what it sounds like
to me when I hear a drummer.
00:34:15
Let's move on to the snare,
and then you can hear
the K-S Crush with everything.
00:34:19
So I'll turn off the K-S Crush.
00:34:21
And on this particular snare track
all I did was a little bit of EQ,
so I'll just take that in and out.
Again, Scheps 73.
00:34:28
The high-pass is in just to clean up,
it's down at 50 Hz.
00:34:31
I'm adding some 220.
00:34:33
Again, I love the Neve EQ
for most things,
but these frequencies
are so well-chosen;
60 or 35 is always the bottom
of the kick drum,
220 is always the body
of the snare, for me.
00:34:46
And then, some 7.2
and some 12 k again.
00:34:49
What I'll do here is I'm going to
take the EQ in and out overall.
00:34:53
Then I'm going to take just
this 220 in and out,
leaving the rest of the EQ in
so you can hear how
that body really changes.
00:35:26
So, with this EQ,
again, the top end
is pretty obvious on the snare
and you hear how much
that 220 is doing.
00:35:32
Now, me listening,
solo'ed right now,
I'm thinking, 'Wow,
that's too much 220!'
It's actually sounding
a little less natural,
that kind of drummer-in-a-room thing.
00:35:42
But, one thing to keep in mind:
on these videos we spend
a lot of time soloing things
and we spend a lot of time
talking about the individual bits
we've done on plug-ins.
00:35:52
Most of this stuff, though,
would be done in context.
00:35:56
And it may be done in the context
of the entire drum kit,
but most likely, this amount
of low end was added to the snare
in the context of the entire mix.
00:36:05
And it's what the snare needed
to keep up with other stuff
that was going on,
so what I would bet is because
the guitar is pretty clean,
it's gonna have
a lot of low mids to it,
and it was starting to suck
the low mids out of the snare
and the snare was sounding thin.
00:36:21
And so, adding all those extra 220
is what was helping.
00:36:24
That said, what I'm going to do now
is I will turn on the
Kick-Snare Crush send,
so you'll hear that dbx 160.
00:36:33
Then I'm going to solo up
both kick mics and the snare,
and that way you'll really hear
what the K-S Crush is doing,
so I'll take that in and out.
00:36:40
So the first thing is gonna be
turning on the K-S Crush for the snare,
then I'm gonna add the kicks back in,
and then I will mute
and unmute the K-S Crush
so you hear just the microphones,
and then with the parallel compression.
00:37:27
Obviously, the kick and snare
are louder with the K-S Crush.
00:37:30
A part of parallel compression
is your level comes up,
but,
this is a really good
succinct example
of why I use so much
shared parallel compression,
and by that I mean
sending more than one thing
to the parallel compressor.
00:37:47
I love what the dbx 160
did to the kick drum,
I love what it did to the snare drum,
but what I love even more
is what it does to the kick and snare.
00:37:56
And it's very different
to what would happen
if we had two compressors,
one for the kick
and one for the snare.
00:38:02
I'm going to play this again.
00:38:03
Listen to the difference,
with and without,
into how the length of the snare
goes right up to the next kick drum,
and the length of the kick
goes right to the next snare,
and it's because
that compressor will release,
bringing up the noise
until the next transient.
00:38:18
And it doesn't know
whether it's a kick or a snare,
but whatever it is,
it's going to cut off whichever
thing hit beforehand.
00:38:25
And it completely changes the feel
of the kick and snare.
00:38:28
Again, it just glues them
back together
and it sounds like a person
playing drums to me,
a lot more than the individual
kick and snare do.
00:38:51
Just night and day, to me.
00:38:53
I'm a big fan of that.
00:38:54
Now, I've noticed,
because I came down here
in this part of the session
that the Fatso, which is another
shared parallel compressor,
is actually unmuted.
00:39:02
I'll just show you what that
stereo compressor is doing.
00:39:05
It's basically a Fatso.
00:39:06
In this session,
I think that I'm...
00:39:09
It's the only stereo compressor
I'm using on the drums,
that's all there is.
00:39:13
Really quickly, on the whole drum kit,
all we've got is K-S Crush on the
Kick In mic and the Snare Top mic.
00:39:19
We've got this Fatso,
which is on those 3 mics
for the kick and snare,
as well as the Snare Bottom.
00:39:27
It is on the rooms and the overheads.
00:39:31
So this is a stereo compressor
for all of the drum kit,
and actually, looking at the session,
I'm not using it on the overheads.
00:39:40
I'm not sure why I wouldn't be using it,
because I usually would,
but I'm not on this particular session.
00:39:46
You'll see when we start
looking at the overheads, though,
I have a parallel compressor
just for the overheads.
00:39:52
What I'll do is play you that kick and
snare again and take the Fatso in and out.
00:39:55
And you'll hear
sort of the same thing happening
with the length of the kick and snare,
but listen more just for the character
of the decay of the drums,
because once the rest of the room mics
are in that parallel compressor,
it's really going to change.
00:40:07
So it's not as specific to the kick
and snare the way the K-S Crush is.
00:40:27
Not night and day, but it just
brings up some of the room,
and again, every single
step of the way,
the drums sound more exciting to me.
00:40:35
They just sound more
like a drummer in a room
having fun playing music,
and that's, to me, what you're
always trying to capture.
00:40:43
Not necessarily fun
if it's not supposed to be a fun song,
but it's gotta sound like
emotion of people,
and that's what all of this parallel
compression really does for me.
00:40:55
It's not just about, 'I need the kick
drum to poke through
at these frequencies.'
It's about the feel.
00:41:01
Now let's get away from
those kick and snare close mics.
00:41:04
I'm not gonna bother with the snare
bottom, it just is the snare bottom.
00:41:07
I'll add that to the kick
and snare really quickly
so you can hear
what goes on with that.
00:41:18
Not much.
00:41:20
It's pretty quiet, so I'm not that worried
about what's going on there.
00:41:23
The only other thing that's up here
is there's something called 'Band Verb,'
which I guess started live
as a reverb for the whole band.
00:41:30
And then, in this particular session
it just became a snare reverb.
00:41:33
H-Reverb.
00:41:35
It's pretty generic,
not a lot going on.
00:41:37
What this would be is just
to give me a little extra length.
00:41:40
This is really trying to be
like a snare room mic.
00:41:43
So you get extra length
on the snare, but only the snare,
as opposed to just
bringing up room mics.
00:42:00
So with these microphones solo'ed
it sounds a little unnatural,
a little bit too much of it,
but, that's because these
microphones are solo'ed.
00:42:07
In the context of the drum kit,
especially once the rest
of the instruments are in,
I'm sure this is here because
the snare was just feeling too dry
and too close, and I want
to be able to back up
so you're hearing the drum kit,
not the individual drums.
00:42:19
All right, let's move on
to the overheads.
00:42:23
Basically, all that's happening here
is there's a bypassed high-pass filter
at 58 Hz.
00:42:31
So, here's the overhead:
Not doing a whole lot, it's just
getting rid of some mud down there.
00:42:47
Now, you'll notice the routing...
00:42:49
I haven't talked too much
about the entire session setup,
but basically, in this session
there is a bus called 'Router.'
This is an internal bus,
and this is my mix bus.
00:42:58
In later versions of my template
I actually started calling it
'Mix Bus' instead of 'Router,'
but that's feeding an Aux
down at the bottom of the session
which collects that bus
and is actually called a 'Router.'
It's got my 2-bus chain on it,
which we'll talk about in a little bit.
00:43:13
And that then feeds the audio track
that I print my mixes on.
00:43:16
So, when something is going to Router,
that's going as far down the audio chain
as it can possibly go.
00:43:22
So, the kick and snare microphones
are going straight to the mix bus.
00:43:25
Now, the overheads though,
are going to Bus 5-6,
so I must have decided
very quickly to set this up.
00:43:30
I didn't even bother naming the bus.
00:43:32
So if you look here
we've got the hat,
the overheads, and the ride,
so we're just treating all four
of those microphones as the overheads.
00:43:43
And it's feeding two Auxes.
00:43:45
We've got two Auxes here
that both have their input as Bus 5-6,
and then their output is the Router.
00:43:50
We've got two copies of them
going to the mix.
00:43:53
One is completely unprocessed.
00:43:56
That's this one:
And then one has
Smack on it,
on the Drums preset
because it's drums!
So here's the Drums preset.
00:44:11
So this is just smashing up, it's a
parallel compressor for the overheads.
00:44:14
I could have done it with a send,
which is the way I normally do
parallel compressors,
but I didn't.
00:44:20
So there you go, this is just yet another
way to do parallel compression.
00:44:24
The thing that is less
flexible about this, though,
is that if I wanted
to EQ the overheads,
I could do it on this Aux right here,
the one that doesn't have
any other processing,
but that wouldn't change the way
the parallel compressor sounds
because that's downstream
of where the audio is getting sent
to that parallel compressor.
00:44:43
The other thing is,
if I wanted something else
in this parallel compressor,
I would have to physically
send it to Bus 5-6,
which is really my overheads Aux.
00:44:52
So, it's less flexible,
but what it means is that this is
a very purpose-built
'just for the overheads'
parallel compressor.
00:44:59
So, here's what it
sounds like on its own,
and then I'll add
the dry signal back in:
It does all the things a parallel
compressor normally does.
00:45:22
Now, also,
something that's peculiar
to this session
— I didn't usually do this —
is I used a master fader.
00:45:29
And it must be because
I set up this audio routing,
and then realized, 'Wow.
That's less than ideal.
00:45:34
I don't really have
as much control as I want,
but the balance is good
and I don't want to mess with it,
but I need to do something
to the overheads.'
The first thing is
there's another Smack
on the overheads themselves.
00:45:45
Realize, though,
if I put this up here
and we adhere to my theory
that audio is like water
and it flows downhill,
the audio from these 4 tracks
flows into Bus 5-6
through the plug-ins
on the master of Bus 5-6,
and then, into these Auxes.
00:46:03
So if I put the compressor
on this master fader here,
this will affect both
the unaffected channel down here,
which is just passing
the overheads to the mix bus,
as well as my parallel compressor.
00:46:13
So this is a very roundabout way
to do the parallel compression routing
the way I normally do,
but it works just as well.
00:46:20
I've got a compressor,
then I've got an EQ,
and then I've got a limiter.
00:46:26
The limiter is not doing anything
except keeping stuff
from overshooting.
00:46:30
This might be a leftover from when the
song was originally mixed on a console
just to keep the outputs from clipping,
so I'm gonna go ahead and turn this on
because it won't really do anything.
00:46:39
And then we'll hear the compressor,
and then I will add the EQ.
00:47:09
This is an example
of how I use EQIII quite often,
which is this sort of
seek-and-destroy
to find the midrange frequencies
that are bothering me.
00:47:17
In this case I think
it was less about the cymbals,
which is where I'm usually looking,
which should be more
in this kind of 3.32 range.
00:47:25
But there must have been
something about the snare,
because when I have this EQ in,
the snare sounds a lot better to me.
00:47:31
So there's a bit of a ring around 1 k,
so let me take this EQ in and out.
And also, I'm adding a little bit of top.
00:47:36
I'll take this out again
and just listen to the snare:
So there must have been something
about the ring of the snare
that was fighting with something else,
because out of context like this,
it's not bothering me very much,
but I'm sure with the whole
drum kit in the mix
there was something
really bugging me.
00:48:00
I'll go to the end of the song
where there are a lot more cymbals too.
00:48:13
You can hear it's also kind of
cleaning up the ride cymbal,
it's taking out some of the...
00:48:19
...sort of rolling buildup,
which in this case
happens to be in that 1 k range.
00:48:24
So those are all of the close mics
that are being used
other than the toms.
00:48:30
And on the toms
there's nothing going on.
00:48:32
I've got a limiter here
just to turn them up
because they weren't loud enough.
00:48:35
And then the only other
thing that's on the toms
is some reverb.
00:48:40
And I'll play you that
because that's worth
listening to, I suppose.
00:48:44
So here's a tom fill
without the reverb:
So it's a very unnatural-sounding reverb,
and that's because it is filtered
to get rid of the top end.
00:49:03
And that's more about
the cymbal bleed into the toms
than it is about the toms themselves.
00:49:08
Because cymbals in reverb
is a bad thing in the middle of a song
to have show up
and then disappear again.
00:49:14
So that's to get rid of top end
going into the reverb,
then there is the Little MicroShift
because the big MicroShift
wasn't out yet,
and that's just getting
some chorusing.
00:49:23
And then into an ambient reverb,
and it's a very kind of
dense, bright thing.
00:49:28
And again,
out of context,
this sounds ridiculous.
00:49:32
In context, it just makes
the toms sound
a little bit more
like they're in the room.
00:49:38
This is just like that snare reverb,
so now, even though I'm just
working off close mics,
it's almost like I was
able to reach in
and change the balance
in the room mics,
because now there's a bit more
of room sound
around the snare
and around the toms.
00:49:52
When we listen to the whole
drum kit in a second,
after we go through the room mics,
I will take those reverbs in and out
and you'll kind of hear
how those drums will dry up
and sound a little less natural
in the context of the kit.
00:50:05
I've been talking about
what makes sense in context
and out of context,
and by out of context
basically I mean
not listening to the whole mix.
00:50:13
And you've also heard me
a couple of times already,
and it's probably going to happen more
as we go through the rest of the tracks,
talk about, like,
'Oh, well, normally I do this,
but in this case I did something else.'
Usually what happens is
the stuff I do normally
is what I do when I'm going
through track by track.
00:50:30
I normally put a Lo-Fi and a Scheps 73
on the kick and the snare.
00:50:33
In this case, I didn't even
put a Lo-Fi on the snare,
but that's what will usually happen.
00:50:39
All the stuff I don't normally do
is the stuff that happens
based on what I react to
once the mix is actually in progress.
00:50:46
And the sound of the snare,
when it's solo'ed up,
has nothing to do
with what it sounds like
once you actually put the vocal,
and the cymbals, and the guitars,
and the 2-bus compression, and everything
else that is going on in the mix in.
00:50:57
So there's lots of stuff
I do as a reaction,
and I do it very quickly,
so what will happen is I'm
working on, let's say, the vocal,
and the snare is bugging me.
00:51:07
I will scroll up to the top
of the session,
I'll do something to the snare drum,
and then scroll back down
to the vocal
because that's what
I'm concentrating on,
but the snare was
distracting me so much
I had to deal with it then and there
so that I could work on the vocal.
00:51:21
So that work on the snare was actually
part of working on the vocal,
and it didn't bother me until
I was working on the vocal.
00:51:27
So, this is where the stuff
that is definitely one-off
for certain mixes comes into it.
00:51:33
And, percentage-wise,
it's very hard for me to say
how much stuff is what
I would usually do
and how much stuff isn't.
00:51:40
Because of course, everything in my
template is stuff I would usually do,
but how I use the stuff in my template
could change mix to mix,
or what gets sent to certain
compressors changes from mix to mix.
00:51:49
But it's a really important
concept to get across.
00:51:52
I think that there is sort of
a 2-stage process to mixing.
00:51:56
One is the 'What the hell
do I have here?' stage,
and, 'How do I make it
all work together?
And how do I just make it
so that when I hit Play,
I don't hate myself and the song?'
And then there's the
'Oh, god! This is sounding so awesome!
How do I finish it?
And how does everything work together?
And is the snare bugging with the vocal?'
or 'Wow! I want to hear
the toms a little more
but they sound too dry.
Let me put some reverb on them.'
That's the more fun part,
but it's also the 'in context' part.
00:52:23
It's the part where every
single thing in the mix
relies on everything else in the mix.
00:52:28
And it's after you've fixed problems,
gotten your general balance,
and now you're actually mixing.
00:52:34
I don't even consider
that first part mixing,
because I like to think that mixing
is fun and that stuff isn't always fun.
00:52:40
That said,
let's move on to some room mics.
00:52:44
We've got our Close Room,
which we talked about earlier
having these extra compressors,
so we've already heard these guys.
00:52:50
And they're going
straight to the Router,
but they also do go to the Fatso,
so they're in with that
stereo drum compression.
00:52:57
So, I'll play it for you
with and without the Fatso
just so you get a better idea
of what the Fatso is doing.
00:53:24
So, to my ears,
the actual attack
of the kick and snare
are not changing.
00:53:30
They're basically exactly the same,
but the character of the room
and the excitement of what's
coming back changed completely.
00:53:36
That's why I do it.
00:53:39
We've got three of these sort of
miscellaneous microphones
that we are using here.
00:53:43
The 251, which...
00:53:45
I believe some of these plug-ins
were actually put on very early on
in the tracking stage.
00:53:49
Yes, this was put on during the tracking,
so I should have really left this on.
00:53:53
There's no point in hearing
this microphone dry.
00:53:55
So this is kind of a crushed up
mono kit mic:
You can hear it's a very
transient microphone
and we're not trying to get
kick and snare out of this mic,
we're trying to get drum kit.
00:54:19
And then, further down the chain,
RBass.
00:54:23
Okay, I decided I wanted
some extra low end out of this,
because I liked the way
the kick was feeling.
00:54:48
So you can hear it totally different
in terms of what it does to the kick.
00:54:51
Again, out of context
means nothing.
00:54:53
Once we get the whole
drum kit together,
that's going to really give
the kick some length
that it wouldn't normally have
just from the close mics.
00:55:00
So you can see I've got three different
places I'm getting length on the kick:
I've got EQ on the Kick In microphone,
I've got the Kick-Snare Crush,
and then I've got this 251 kit mic.
00:55:10
All of them add up
to giving the kick
more length and more size.
00:55:15
You could do it all
just on the Kick In mic,
but, I think you'd find
that you'd have to wrench it
around a lot harder,
and to me, the more extreme
the processing gets,
especially with EQ,
the more you hear it,
because if the sort of pitch
of the drum
changes at all because he is
hitting it harder or choking it,
all of a sudden the character
of that EQ will change a lot.
00:55:38
If the fundamental shifts up
because the beater is left on the head
instead of coming off the head
or something like that,
now your EQ is no good.
00:55:45
Whereas with two different
parallel compressors,
one being a totally different microphone
and one being a compressor,
you sort of get some consistency
out of how you're getting
the length in your kick drum.
00:55:56
It's also just because
it sounded good.
00:55:58
So, there you go.
00:55:59
So we're gonna leave that in,
and then what do we have
on the back end?
We got another Smack
because it wasn't compressed enough.
00:56:21
So this is interesting.
What I'm going to do now
is I'm going to bring up
the RBass plug-in.
00:56:25
Because we are not actually
hanging on to that low end,
we're letting this compressor
just kill it.
00:56:30
I'm going to let you listen
with the Smack in,
and I'm going to take
the RBass in and out,
and what you should hear
is with the RBass out
the compression is going to be
almost completely about the snare
and not about the kick, and it's
not going to pump in the same way.
00:56:43
Whereas adding that huge
low end to the kick drum
— of course, I just told you
it was for the sound of the kick.
00:56:49
Turns out I was lying —
it's going to be more about
the character of the compression,
regardless of the low end.
00:57:10
So you can hear that a lot of that
extra low frequency information
isn't actually making it
through the compressor,
but it completely changes
how that compressor reacts
to the microphone in front.
00:57:20
Now, I would love to tell you
that that was my fantastic idea,
'I heard the way the Smack
was working and decided,
Man! If I just had a little
bit of sub on the kick and...'
I doubt it was that way.
00:57:32
I have a feeling as I was going through
the individual microphones
I thought, 'Wow, the low end
is really cool on that microphone.
00:57:39
If I put some RBass on it...'
And then later on I decided,
'You know what? It's way too clean.
00:57:44
I'm getting enough transient
out of the close mics,
so let me try using this as more
of a smashed up microphone,'
and I just left the RBass.
00:57:51
But I doubt I would have liked
the Smack as much without the RBass.
00:57:54
So, happy accident,
or genius?
Not really sure.
00:57:58
Let's go for genius.
00:58:00
Next is just two
of the other microphones
which we've already listened to,
the mono overhead and the talkback.
00:58:06
They're not a huge part
of this particular mix,
they're just in as part of the kit.
00:58:10
They're panned right up the middle,
they're quiet,
there's nothing on them,
they go to the Fatso.
00:58:14
I'll just remind you
what they sound like,
but then we're gonna go
and just put the whole drum kit in.
00:58:19
I'm gonna take the Fatso in and out
so you can hear what that does.
00:58:37
All right, let's get
to the whole drum kit!
Shall we?
Here's without the Fatso:
I don't even know
what to say about that
other than I like it a lot.
00:59:14
As I'm taking it in and out,
it sounds like the drummer
is playing a different dynamic.
00:59:18
It sounds like Chad is playing
two bars quiet, two bars loud.
00:59:21
Or one bar?
It's...
00:59:24
...still natural, it still
sounds like the drum kit,
it just sounds like a much more
exciting version of the kit.
00:59:31
And, look,
I'm dealing with really well
recorded tracks
of an impeccably tuned drum kit
played by one of the best
rock drummers ever,
basically.
00:59:42
Certainly one of my favorites.
00:59:44
So it's not like I'm dealing
with bad tracks here
and I need this stuff
to make the drums work,
but the fact that even
when your tracks are good
this stuff is still really, really adding
to the feel of the drum kit...
00:59:58
Well, it kind of indicates
my entire career, basically.
01:00:01
In a lot of ways, but...
01:00:03
It just makes me happy.
01:00:04
It makes me happy
that this stuff can work,
and it will work just as well
on terribly recorded,
terribly played drums.
01:00:10
You're gonna have to do other stuff
to make it work
in the context of the song
if you get something
that's really crazy,
but these techniques just work.
01:00:19
And if you've seen
any of my other mixing videos,
you see almost the exact same thing
happening over and over and over
in slightly different
amounts and flavors,
but it's because the general
concept always works
and it's all about making the kit
sound big in a room,
but present
— I'm not a fan of, like,
roomy drum kits —
and also exciting.
01:00:41
And all of the excitement
is what happens in between
the transients, to me.
01:00:46
It's the sound of the kit itself
rattling and growling and doing stuff.
01:00:51
I have some other
parallel processes that are here
because they were
part of my template,
but none of them
are actually being used,
so, we don't get to hear about those.
01:00:59
We're gonna have to check out
a different song to hear about that.
01:01:02
00:00:00
While we've got one instrument up,
what I think that I'm going to do
is skip to my 2-bus chain
because we are actually
hearing that the whole time,
which is an important part
of the way I mix.
00:00:10
My 2-bus chain is in
from the very beginning.
00:00:13
This chain is slightly simpler
than what's in my template right now,
but it's very similar.
00:00:18
Things have changed order,
but the types of tools are the same.
00:00:22
We are listening through this track
in Input the entire time.
00:00:26
That means that this is the way
the Pro Tools mixer sounds for me.
00:00:30
I'm not somebody who likes
to build up a mix
and then see what's going to
work on the 2-bus.
00:00:35
The 2-bus is there before
I solo up my first track.
00:00:38
I'm EQ'ing the kick drum
through the 2-bus,
because otherwise,
I could go too far
and I'd have to backtrack
and undo things I've already done,
because some of it
is being done by the 2-bus.
00:00:48
I'm also a fan of doing things,
basically, in as few places as possible.
00:00:56
If I can EQ the overall mix bus
by adding some top end
and some bottom end,
doing a bit of a 'happy face' EQ,
and that means I have to do
much less individual EQ,
I'm a happy man.
00:01:07
The less processing, the better.
00:01:09
For two reasons: one,
I'd have to put in plug-ins
all over the place
and EQ separately,
and it's kind of boring.
00:01:15
And again, you have this fear of,
'Have I EQ'ed this thing properly?'
as opposed to, 'That sounds great!
I don't need to do it.'
Part of it is a laziness factor,
but that real laziness
comes from being able to just mix.
00:01:30
I don't have to EQ everything
because stuff is already sounding good
as it goes through the mix bus chain.
00:01:37
That said,
I'll bypass the first four parts.
00:01:41
At the very end is a limiter.
00:01:43
I always have a limiter, it's always
in this kind of configuration.
00:01:47
Anywhere from 0.2 to 0.5 dB
on the threshold,
and then my output ceiling
is set to be whatever
is the loudest it can be
with the red lights off.
00:01:58
So I look like a genius,
but my mixes are loud.
00:02:00
That's what I want.
00:02:01
Now, because we're
in a floating-point architecture,
this -0.5 dB threshold
does not mean we only have
0.5 dB of limiting.
00:02:09
There could be 20 dB of limiting
because it's floating-point,
it can overshoot an infinite
number of decibels,
and as long as I don't shave it off
somewhere along the line
before it gets here,
this limiter is where
it will finally happen.
00:02:21
What is important to me
is the gain structure
as I hit this 2-bus chain,
and then what it sounds like.
00:02:28
There will probably be anywhere from
2 to 6 dB of limiting on the back end,
but that's because I let my transients
carry all the way through the mix.
00:02:36
That uncompressed kick
is coming straight to the mix bus.
00:02:40
It's not going through
a Drums Aux that has some stuff
that then goes through a rhythm
section Aux that has some stuff.
00:02:47
That kick drum comes
straight to the Router.
00:02:52
A lot of tracks.
00:02:54
And that Router...
00:02:56
...feeds these plug-ins,
and the only thing in between
is a Master fader that allows me
to turn my entire mix down
until I'm hitting the sweet spot
in the plug-ins I'm about to talk about.
00:03:08
The very first one is just color.
00:03:10
The threshold is all the way down.
00:03:11
The way the Fairchild works
— this is a Fairchild 670 emulation —
is the threshold knob is like a send
to the detector circuit.
00:03:19
Every compressor is exactly the same:
there is an audio path
and there is a detector path,
and the detector path
is what has a threshold on it,
and when you go over the threshold,
it turns down the audio path.
00:03:32
That's the way it works.
00:03:34
The way they're set up
are all totally different.
00:03:36
Some of them have a threshold knob
where you're actually
changing the threshold.
00:03:40
Some of them have a knob labeled
'Threshold,' like this one,
which is changing how much audio
gets sent to the actual side-chain.
00:03:48
Some of them have input controls
where it has a fixed threshold
that it never even talks about
and you have to crank the input
to change the amount of compression.
00:03:56
Doesn't matter. In this case I've got
the threshold all the way down,
which technically should mean
I'm never compressing.
00:04:02
I've got the Wet/Dry control
only 50% Wet.
00:04:05
So, I'm going through this
for the emulation of the wire.
00:04:09
The Fairchild and the compressors like it,
like the RCA BA-6A, the Federal,
things of that age
were built to a military spec
where every component had to be working
about half as hard as it could work
so that you had many fewer component
failures inside of the unit,
because they were used
both for military transmissions,
for radio transmissions,
but then also used
in broadcast quite a bit.
00:04:34
The Fairchild was also then built
to be put on the front end
of a cutting lathe for cutting vinyl.
00:04:40
But basically,
there's just a ton of wire,
there are transformers,
there are tubes,
there's all kinds of stuff,
so it has a sound.
00:04:47
All of that said,
we're just gonna listen to the drum kit
and we'll listen to the Fairchild.
00:04:52
There's gonna be a bit of a gain bump.
00:04:53
As you pick up harmonic distortion
you also pick up level,
so, don't be fooled
completely by the level,
but it's just a little bit of color.
00:05:15
So it's subtle, but there's
a little bit of harmonic distortion,
especially in the low mids.
00:05:19
In later versions of my template,
this actually moved after what's next,
which is a 33609 compressor,
because on a really loud dense mix,
that amount of color
would actually make the compressor
not work the way I wanted it to work.
00:05:34
I wanted it a little bit cleaner
going into the compressor,
and then get the dirt put on
by that Fairchild emulation.
00:05:41
On this particular mix
and in this stage of my career
— this was a couple of years ago —
I was fine with how the color sounded.
00:05:49
I would probably have to turn the mix
down a little bit more going in, though,
to make sure of what was going on.
00:05:54
Next in the chain is a 33609,
it's a Neve compressor.
00:05:58
Very particular sound when you use
the 100 millisecond Recovery.
00:06:02
It's an auto-attack, you have no control
over the attack time.
00:06:06
The Limiter is out,
so these knobs do nothing.
00:06:09
The Threshold is all the way up,
so I'm doing as little as possible.
00:06:13
I've got 2 dB of Makeup Gain
because you do lose that amount
going through the compressor,
and the Ratio is at 1.5:1.
00:06:20
Later on, once the whole mix is in,
we'll come and have a look.
00:06:23
I almost never have the gain reduction
meters go over 4 dB.
00:06:26
That just sounds terrible to me
and I would hear it
long before I would see it,
and that's when I would come down
to my Master fader
which is controlling the mix bus level
as it goes into these plug-ins
and I would turn it down.
00:06:37
You can see that this Router
is down at -9.9.
00:06:40
That means as I built my balance,
especially for the end of the song,
the mix was really loud.
00:06:45
In fact, it was almost 10 dB too loud.
00:06:48
So I just pull it down here,
the magic of the floating-point mixer,
and that turns the mix down
keeping the balance intact,
and lets it go through these plug-ins
at a much reduced level.
00:06:57
That said, here are the drums
with and without the compressor:
This just has more of the thing
that I've been talking about
the whole time,
it's more of what the EQ
on the kick does,
more of what the K-S Crush does,
more of what the Fatso does,
more of what everything does.
00:07:31
It just sounds a little more alive,
a little more energetic.
00:07:34
That's it!
Next in the chain is an EQ,
but it's a very versatile EQ,
there's a lot of stereo processing.
00:07:42
Basically, I'm not doing much here.
00:07:44
It's in Mid/Side mode,
which means that this side of the EQ
is for whatever is in the middle.
00:07:50
This side of the EQ is for
whatever is on the sides,
meaning whatever is not
completely mono.
00:07:56
Sometimes when people think Mid/Side,
they think that the middle is pretty wide
and that the sides
are just what's out here.
00:08:02
The reality is that the Mid
is incredibly narrow,
it's only what is completely mono.
00:08:08
As soon as something
is even slightly stereo,
it's on the sides.
00:08:12
I've got a high shelf,
I'm adding 1.3 dB at 8 kHz
on the sides.
00:08:17
Why am I not doing that in the middle?
It's leftover in my template,
it's just to brighten up
cymbals and things,
but, I would never end up
making my vocal more harsh.
00:08:26
So the vocal is right in the middle,
except for the effects on it,
so I know I'm not going to affect
the vocal, that's fine.
00:08:33
The other thing I am using
is a Stereo Width control
up at 141%.
00:08:37
This is just widening the mix,
because the only thing that sounds
better than louder is wider.
00:08:42
So here's with and without,
just on the drums:
This, again, once the whole mix is in,
will do a little bit more
to probably the strings,
how wide that sounds,
the panning on the guitars.
00:09:17
Another thing that's really
interesting, actually,
that any of the stereo width
controls will do for you:
when I'm mixing on a console,
and still sometimes
when I'm mixing In-The-Box,
I will do a lot of hard panning.
00:09:27
Sort of LCR, I never learned it
being described that way,
but it's sort of saying something
is hard left, in the center, hard right.
00:09:34
Even if you don't necessarily
mix that way,
you will very often have something
hard left or hard right.
00:09:40
And in this particular mix,
if we look at the guitars,
and I'm jumping out of order,
but, the acoustic guitar is hard left,
and the electric guitar is hard right.
00:09:48
In headphones,
especially because the intro of the song
is just the acoustic guitar,
that can be very disconcerting,
to listen to a mix that only
has something on the left.
00:09:57
When you use the Stereo Width control,
what it's doing is playing
little phase tricks
so it adds some out of phase stuff
to the other speaker,
which makes it sound
like the thing that is hard left
is further to the left.
00:10:10
But in headphones,
what you're actually getting is
some of that guitar
is back in the right.
00:10:15
Really quickly,
I'm gonna go solo the acoustic guitar
and I'm going to take this in and out.
00:10:21
And what you're hopefully
going to hear,
or even see on the meters,
is a little bit of this acoustic guitar
is going to show up in the other speaker.
00:10:43
Shazam!
So now on speakers, and even in
headphones to a certain extent,
the mix will sound wider,
especially when it's dense.
00:10:51
But also, at the beginning of the song,
when you listen in your earbuds,
which is the way most people
listen to everything now,
it's not that weird 'sucking the other
eardrum out of your head feeling
because there is absolutely
nothing on the other side,'
so it saves me from having
to add reverbs,
or to even think about the fact
that I'm hard panning.
00:11:09
And this is something that has been
on my template for a while now,
and it stays in on every single mix
unless it causes a problem,
which it can do.
00:11:17
One thing to watch out for
with plug-ins like this
is what will happen in the low mids,
if you have a cleaner guitar
that is sustaining,
you can actually end up getting
crackly distortion
because of 'stereo width-type'
phasey plug-ins
that goes away
as soon as you bypass it.
00:11:32
I don't know why
they are so susceptible
to that kind of material,
but they are.
00:11:37
And last but not least
in the mix chain
is the Pultec.
00:11:41
Just another 'happy face' EQ.
00:11:43
We've got +3 at 100 Hz,
and +3.5, nice and broad,
at around 10 kHz.
00:11:48
Again, this is just to keep me
from having to individually EQ things.
00:11:53
I just have a nice bright mix bus
with a bunch of low end.
00:11:57
Got the drums solo'ed back up.
00:12:18
Sounds like music,
that's what it sounds like!
We got our 2-mix chain in.
00:12:24
Again, this master fader
is taking whatever is going to Router.
00:12:29
In this session, that is my mix bus.
00:12:31
It's turning it down 9.9 dB
before it gets into these plug-ins,
and then it comes out
of these plug-ins
and goes down into
the actual mix track,
and we're listening in Input
through that audio track.
00:12:45
Very, very simple setup,
but that's what I've got going on.
00:12:48
Let's look at some other
instruments, shall we?
One thing that I'll mention quickly,
and again, there is another video
where I talk about my template,
and that's so I don't have to spend
too much time on it here.
00:13:01
I have a stereo parallel compressor
that is for everything except drums.
00:13:07
That's the basic rule.
00:13:08
Sometimes the drums
get sent to it a little bit.
00:13:10
In this particular session
I've got the percussion
going to the Rear Bus,
and it's just an 1176 dual mono.
That is the key.
00:13:18
And this was actually...
00:13:20
Oh, this was back in the day
before UAD supported dual mono,
so I had to build my template
with two...
00:13:28
...Auxes that are mono,
grabbing the left and right side
of the Rear Bus send,
and then there is a group
that is actually grouping the controls
in case I need it to come in
and tweak these.
00:13:39
Now, on this compressor,
if you want to see in detail
what's going on,
I talk about it more
on this other video,
but the only control I would ever
mess with anyway is the Release time,
and it's only if the mix
is sounding a little weird to me
but it's not what's going on
in the mix bus processing.
00:13:53
Then the next place
I would check is the Rear Bus
because it's handling
so much of the mix itself
in the parallel compression
that it can have an effect
in just how the mix feels.
00:14:03
We come back up to our shaker
and tambourine tracks,
and there is no EQ.
00:14:09
They're being panned a little bit
and they go off to the Rear Bus.
00:14:11
It's really straight-ahead.
00:14:13
I mean, this is probably
whatever vocal mic happened to be
set up to do background vocals,
and then we had to do
some percussion.
00:14:19
So here's the shaker:
Nothing too crazy going on.
00:14:32
And then with the drums
you just hear it just adds
a little bit of motion
because that's what percussion is for.
00:14:37
This is very structural percussion,
this is not solo percussion.
00:14:54
You might be saying to yourself,
'Well, that's odd, why does
the tambourine start on the third hit
of the cycle of four?'
There is no real reason to it,
it's more,
'Okay, we get to that section of the song,
we don't actually need the tambourine.
00:15:07
There's enough going on.'
But then we kind of want the tambourine
at some point during the section,
so this is a musical decision,
more of just a mix decision,
and it's kind of this thing...
00:15:18
It used to happen a lot more
when people were recording on tape,
because you couldn't see a waveform
and see that you were missing
the first tambourine of a section,
or you were sharing the track.
00:15:27
So, the tambourine in the chorus
had something else on it in the verses,
and that something else lasted
a little bit over the
downbeat of the chorus
so you punch out and you've just
erased your first tambourine.
00:15:38
And you recorded that three weeks ago,
and then you realize, like,
'Well, musically, who cares?'
So it actually is a way
to kind of build the mix
in a weird organic way,
and once the whole mix is in,
I probably am not going to remember
to play you this spot,
but have a listen when we get to
what's called Chorus 2,
which is sounding
more lyrically like Verse 2.
00:15:57
And that tambourine will come in
in sort of an odd spot
and it just helps build the song
in a musical way.
00:16:02
It's a good thing.
00:16:03
Next is bass, with this
we work our way down.
00:16:06
It's Flea, he is the man.
00:16:08
Very straight-ahead recording,
there is a DI track
and there are two mics on the amp.
00:16:13
One is just called 'bass amp'
and it's a U47.
00:16:16
Most likely they thought
they were just going to have the one,
and then they were missing
something on the sound,
and so Greg added a 421
just as a second mic.
00:16:24
I do this from the beginning
almost all the time on bass amps,
I will have a dynamic and a condenser.
00:16:31
In this case it's a U47 FET,
I'm sure not the tube,
and then a 421, and you just...
00:16:36
I stick them right at the middle
of two of the 10" speakers.
00:16:40
Flea usually records through an 8x10,
just pick any two speakers
and if something sounds weird,
try a different speaker.
00:16:46
And unless something is wired strangely,
they're all in phase with each other,
so I just stick it right in the center.
00:16:52
And the speakers are too small
and the microphones are too big
to get two mics on one speaker,
so that's why I choose two.
00:16:58
It's not for any reason other than the
logistics of trying to mic the cabinet.
00:17:02
Now I'll just cycle through the three
elements of the bass
so you can hear what's going on.
00:17:24
So you can hear
three very different sounds.
00:17:26
The bass DI is very clean,
the bass amp track,
which is the 47 FET,
is actually relatively clean
even though the bass
obviously has some dirt on it.
00:17:36
And then the bulk of the bass sound,
you can tell from the different
levels as I go through these,
is made up from the 421.
00:17:42
Definitely grittier, a little more
presence in the midrange.
00:17:46
And on both of the amp tracks
I'm using a Phoenix,
which is some harmonic distortion.
00:17:52
It's just tape emulation,
but whether it sounds
like tape or a transformer,
I don't really care.
00:17:57
It's just some harmonic distortion
and the settings are probably identical.
00:18:00
There you go. I was lazy
and Option-dragged.
00:18:03
And then there is a Helios model,
so I'm going to show you that
on the 421
because it's the loudest mic.
00:18:11
What there is in the Helios EQ,
and it's captured really well both by
the UAD model and the Waves model,
is the resonance of the EQ circuit.
00:18:19
So there is some resonance
around the frequency,
and it could be just due to
resonant phase shift
or whether there's some
sort of filter design.
00:18:27
I don't really know exactly why,
but check out the difference
in this 421 track
as I take the Helios in and out.
00:18:53
Really big difference in the low end.
00:18:56
All three basses together
sound like this:
A little bit of that DI
to get the sound of the fingers
on the strings, a little clarity,
but the majority of the sound
is that 421 track.
00:19:17
There is a track called 'Bass Crush.'
I think, actually, I got rid of it.
It's not in my template anymore.
00:19:23
This was unused in my template
for a very long time,
and it's unused in this session as well.
00:19:29
The only send here is to the Rear Bus.
00:19:31
This is going in along
with everything else.
00:19:33
I don't think there is much point
in hearing the bass
with and without the Rear Bus
because it's also
all the guitars, the strings,
and the vocals and the percussion.
00:19:41
So once we get more instruments in,
then we'll go back and actually
listen to the Rear Bus.
00:19:45
That takes care of the bass.
00:19:47
The guitars are pretty straight-ahead.
00:19:48
Let me clean up here a little bit.
00:19:51
The tracking guitar is the main guitar
being used on the song.
00:19:55
There is a 'close' mic and a 'combo' mic.
00:19:59
I think they are basically
just two amplifiers.
00:20:01
The 'close' sounds like this:
And the 'combo' sounds like this:
And on some songs those amps
were panned apart,
on some songs they were
put together to make a tone.
00:20:23
This song is definitely one where
they were put together to make a tone.
00:20:27
And all I've got is a little bit of EQ
on this guitar combo just for
a little bit of presence.
00:20:32
I'll take this in and out so you can
hear it before I play them together.
00:20:48
So really it has the effect
of almost cleaning
the guitar up a little bit.
00:20:52
It's bringing out
the presence of the sound
of the pick on the strings
and the tone
the same way the clean bass
DI track does that for the bass.
00:21:02
This EQ is just lifting it,
and I would bet money,
not a lot of money because
I am not really a betting man,
but I would bet money
that this was done in context.
00:21:11
This was done very late in the mix
where I felt like that guitar
was just getting lost,
especially once the rest of the band
came in or something like that.
00:21:19
So together, it sounds like this:
And there is a send to Bus 20.
00:21:35
Let's find out what that is.
00:21:37
I don't actually remember what that is.
00:21:39
It might be to nowhere.
00:21:40
This could have been
a leftover from tracking.
00:21:43
It might have been a send
off to a tuner plug-in,
or a reverb or something like that.
00:21:47
Well, it turns out...
00:21:49
...that that's going nowhere,
so we can make those inactive.
00:21:52
Like I'm using this opportunity
to clean up my own session.
00:21:56
I think that's good.
00:21:57
And then, if you remember from earlier,
when we get to the middle eight,
the main guitar switches
from the main guitar tracks,
which are actually part
of the basic tracking.
00:22:07
So this guitar performance
is from the band's performance where we
got the drums, the bass, and this guitar.
00:22:13
And then we switch to...
00:22:16
...this 'brk' (break)
guitar amp and combo.
00:22:18
So this was done
probably almost immediately
with the exact same setup,
but I've got more EQ on this.
00:22:26
What I will do is bypass the EQ
and whatever else is on here.
00:22:31
And here are the two amps together
that make up this sound:
This could be just pedals
that weren't available at the time,
or it could have been that he needed
to step on five pedals
and that was going to be
way too distracting
while he was actually trying
to play the song.
00:22:54
On the guitar amp
I'm taking off quite a bit of top end.
00:23:00
And the same on the combo.
00:23:14
So it's just to get rid
of a little bit of that ringing,
especially on the top notes.
00:23:19
It's just acting like a filter.
00:23:21
Why am I doing it with a shelf?
I have no idea.
00:23:24
And then, on the guitar amp
I'm adding a little bit
of that 60 Hz again.
00:23:29
What that's going to do on a bass
is really bring out bass, low end.
00:23:33
On guitar, it's going to sound
kind of like cabinet thump,
it's more air
around the guitar itself.
00:23:40
So I'm back to just listening
to the amp track
and I'll take this in and out
so you can hear what it does.
00:23:59
It just sounds better to me,
it sounds more present
and it just sounds like maybe
I backed the mic up a couple of feet.
00:24:05
It just lets the low end
of the guitar develop in a way.
00:24:08
And then, just to hear it,
let's hear the transition
between the one guitar and the other:
Rather than panning, it really does sound
like that's the main guitar.
00:24:24
The panning changes because
we go into spacey land,
so lots of other stuff is happening
and that guitar
couldn't live hard right.
00:24:30
And you can also see
that the amps are split apart.
00:24:33
The 'amp' track is panned
a little bit to the right,
and the 'gtr combo'
is panned almost hard left.
00:24:40
And that would be because
there's another guitar down here,
which I'll play you next,
which is split apart.
00:24:47
But this is more of just effects:
Pedal effects, but that combined
with the main guitar:
That gives you kind of your
main guitar width and effect,
so the effect is sort of octave-up
delayed reverb kind of thing.
00:25:24
But that's very much made
from that arpeggiating guitar.
00:25:27
Our 'Wah' guitar,
which we haven't gotten to,
is also a part of the middle eight,
but I think the idea
of changing the panning
was that because we lose
the acoustic guitar,
which we will actually
listen to next,
which is panned hard left,
that guitar felt too much
on its own on the right,
so I was spreading it back
across the middle.
00:25:44
In context, I don't think you're
going to hear it move quite so much,
the strings are in,
there's all kinds of stuff
going on there,
so this was basically probably
a listening on headphones-type
situation decision
to not let that guitar
stay completely wide.
00:25:59
So the acoustic,
very straight-ahead recording.
00:26:02
Again, I believe overdubbed very quickly
after the take was done.
00:26:13
This is probably done
because the very first time
this song was mixed
it was mixed on this console.
00:26:20
Not in this studio,
but on this console,
and this is a model of the 31102,
which is the EQ that is in this console.
00:26:27
I would bet when I was first
doing this mix In-The-Box
that I was having trouble
making it feel the same,
so I went and got my recall notes
and copied the EQ.
00:26:36
As it turns out,
I'm just adding some 3.2 and some 220.
00:26:39
And then filtering out at 45,
so not a lot,
but here's with and without:
More present.
00:27:04
Now, to me,
the sound of this EQ
is more like what a lot
of people would do
by ducking out some frequencies
between the 220 Hz and the 3.2.
00:27:16
You could absolutely do that,
there is no reason not to dip out
a little 800, 1 k, that kind of thing.
00:27:22
But the Neve EQs are so musical
and they're broad,
that I feel like I can get
the same effect
by adding the frequencies I like
as opposed to taking away
the frequencies I don't like.
00:27:34
If there's a real problem
with the sound,
that's when I reach for an EQIII,
I find the frequency range
that is a problem,
set the Q appropriately,
dip it out.
00:27:42
But if I'm just trying to make
something sound better,
I like to do it by adding,
because to me, addition is better
and subtraction is getting rid
of stuff that is a huge problem.
00:27:52
So it's really more of a philosophy
than a technique,
but I would always tend to try and make
stuff sound better with additive EQ.
00:28:00
And that would usually be
on a Neve or an API-style EQ
because that's what
makes sense to me.
00:28:05
So now, on to the Wah guitar,
which is a big feature of this song.
00:28:10
It's spread across three tracks.
00:28:12
Originally, I think probably left separate
to allow for some panning.
00:28:15
I'm actually combining it down
into a single Aux,
and then that's going off
to the Router,
but it is being sent to an effect.
00:28:24
I want to...
00:28:25
...be clear there is quite
a bit going on,
and then we'll get rid of stuff.
00:28:29
Again, I'm leaving the Rear Bus
on all of this
because it's just part of the sound.
00:28:33
Let me go here
where he's playing a lot.
00:28:35
We've got something called
'gtr 2,' which is here:
Then 'gtr 2' amp 2:
Sounds very much like 'gtr 2.'
And here is 'gtr 2' deluxe,
which would be a separate amp:
And here are those three
amp tracks, all together:
And you are probably
saying to yourself,
'Andrew, that's cool,
but is it cool enough?'
And I would say, 'No!
Let's add 'Wah FX' to it!'
I don't even remember what it is.
00:29:25
Hey! It's Little MicroShift again.
00:29:27
This is just to spread
that guitar out,
there is some built-in delay,
its 100% wet.
00:29:38
Just a great-sounding effect.
00:29:41
Just to finish up with the guitars,
that 'fx' guitar that I played you
while showing you the breakdown
guitar in the middle eight
continues on to the end of the track,
but the panning actually changes.
00:29:50
So, in the middle eight
it sounds like this:
And it's leaning to the right,
which is where the electric guitar
has been for the entire song,
so that helps her
to keep the continuity.
00:30:07
So, as a listener you're not
sort of drawn out of the song
to say, 'Hey! Where did
the guitar player go?'
Later in the song, though, it moves over
to the left and sounds like this:
And along with it is 'fx gtr2'
which sounds like this:
And together, they make this:
And with all of the guitars:
So you can hear a very straight-ahead
acoustic, electric, wah,
and then we have
our really cool 'fx' guitars,
and we could have just done
a stereo effect
like we did in the bridge,
but what is cool about this
is by having two performances
it's almost like there is
some random panning
between the left and right,
between those two 'fx' guitars.
00:31:30
And if you didn't
catch that the first time,
rewind the video about 35 seconds
and you'll check that out.
00:31:36
And that just helps keep them moving.
00:31:38
One of the reasons they need
to keep moving
is because they are competing
with a lot of stuff at that point.
00:31:43
Not just the band stuff,
but the strings are back full-bore,
plus we've got extra background
vocals, things like that.
00:31:49
Okay, I've got one more
musical element
before we get to strings and vocals,
so let me just show you very quickly
what the piano is doing
and then I am going
to play you a bit of the track
and we can actually
have a look at the Rear Bus.
00:32:03
The drums don't go to the Rear Bus,
so, as we listen to that,
stuff is going to change.
00:32:07
It's not the fairest way to hear it,
but you'll get an idea of how that
helps glue everything back together.
00:32:13
Very quickly, I've got piano.
00:32:15
Low and high mics,
not that big a deal, very simple,
coming out of the middle eight
into the breakdown verse.
00:32:30
So basically, like
reinforcement octaves,
but, because all the other
instruments are stripped out,
that becomes the actual piano part,
and then later on:
It's a piano part,
but it's really there for weight.
00:32:59
It sonically will help fill things in
in frequency ranges that other
instruments aren't necessarily covering.
00:33:06
There's a little bit of motion in there,
and I also love that you can hear Josh
doing a backbeat
*click*
in the middle of it,
because he is playing piano
and you gotta feel the beat.
00:00:00
Let's actually deal with vocals
before we deal with strings,
because strings are going
to be quick to deal with,
but they're also not part of the band.
00:00:08
The Lead Vocal,
very, very straight-ahead.
00:00:11
And if you have seen
any of my other mixing videos
or you have seen the video
talking about my template,
you'll know that I set the vocal up
so it's going through two Auxes.
00:00:21
So this is a parallel set of Auxes
that get the lead vocal track.
00:00:26
One of them is very
lightly processed.
00:00:29
There is some EQ,
there is a little bit
of harmonic distortion,
there is a touch of compression.
00:00:36
This is the RVox compressor.
00:00:39
It's not doing much,
but it's just a little bit of glue.
00:00:42
And then there's an L2,
and some of this is leftover
from when I was building things
that were then going out
of D/As to the console,
and I just left it in.
00:00:50
There's no reason for this to be in here
in a floating-point environment.
00:00:54
It's almost never doing any limiting,
but I suppose if I had
20 lead vocal tracks
and in some places they were
all going at the same time,
this L2 would just keep stuff
from getting too clipped on its way
through the rest of the mix bus.
00:01:05
The Lead Vocal Pultec
is a parallel chain
that I'm going to go through
very, very briefly,
but basically it's three plug-ins
that all do one thing:
they combine to make...
00:01:20
...the equivalent of a 3-band compressor
with the high and low bands bypassed.
00:01:27
So the first Pultec
is pulling out 100 Hz,
quite a bit of it.
00:01:33
It is boosting a lot of 8 k.
00:01:36
Then we go into a compressor,
so we've just taken our vocal
and made it mostly about 8 k,
which is presence and getting
into the top end,
but it's really where
the kind of crazy harsh
'getting into air' part of the vocal is.
00:01:53
It's also where it's very intelligible.
00:01:55
Sort of 3 k and up is where
the intelligibility comes from.
00:01:58
And this boost is pretty wide,
so we are reaching down
probably to at least 4 k
when you are boosting this much.
00:02:05
Then we go into a compressor
which has the high pass filter
on the detector circuit
cranked all the way up.
00:02:12
So, this was something on an LA-2A
where this knob was on the back
and it allowed you to use
the LA-2A as a de-esser
so it wouldn't react
to the low frequencies;
it would only react
to the high frequencies.
00:02:22
So we are cranking up
the high mids,
then we're only having the compressor
deal with those high mids and above.
00:02:28
We are compressing the hell out of it.
00:02:30
Then we are going into a second EQ
adding the low end back in.
00:02:35
And in some cases I would actually
have this taking away some 8 k,
but in this particular case I don't.
00:02:41
And what this sounds like
is a very poppy hyper-compressed
version of the vocal.
00:02:47
So, now that I've said all of that,
forget about the fact that there are
a bunch of other sends
on things like that. We're going
to deal with that in a second.
00:02:54
What I'm going to do, though,
is go to a part of the track
where I am using this Pultec
ad we will listen to just
the Lead Vocal track,
then just the Pultec,
and then back again.
00:03:04
Because I've got mute automation,
I don't want to stop
and start each time.
00:03:08
So just watch the screen,
you will see exactly what's playing.
00:03:34
So you can hear
with that Pultec chain in,
which is actually more about
the LA-2A than the Pultec,
it's just a much more compressed
compartmentalized vocal.
00:03:44
There's a lot of upper mids going on,
but what that does in context
is it allows you to hear the vocal.
00:03:51
And you can see is, we're looking at the
mute automation right now for the Pultec,
it comes in when the drums come in,
and then it comes back out
for the breakdown/bridge
and breakdown/verse,
and then comes back in
as the track starts to build.
00:04:06
Now, I don't have a very definite point
at which the track gets loud again,
so I basically left it out
of this section,
this build-up verse,
until I felt like I
started losing the vocal.
00:04:17
And then rather than riding the vocal
it's like, 'Well, after that line,
let's try bringing in the Pultec.'
So what I'm going to do now
is unsolo the vocal
and just play...
00:04:27
Let's see.
00:04:28
I will get rid of the mute automation
so the Pultec doesn't come in,
and then I'm going to play past the point
of this build where I brought it in,
then I'll go back, reautomate,
and you'll hear how the Pultec helps
the vocal just keep up with the track.
00:04:41
You won't hear as drastic a difference
in the vocal sound
because we've got guitars and cymbals
and lots of other stuff sort of around it,
but what hopefully you'll hear
without the Pultec
is the vocal starts to get lost.
00:04:51
With the Pultec, it keeps up.
00:05:12
All right, here's that same spot
with the Pultec coming in:
Et voilà! Just saved myself a vocal ride.
00:05:37
And the other thing is
it's not just about volume,
it really is about the sound.
00:05:41
If I turn the vocal up
but leave it sounding
the more intimate version
that I have in the quieter
spots of the song,
I would actually have to turn it up
even more than I do
by bringing the Pultec in
before you could hear it.
00:05:54
And what would be coming up with it
are all the low mids
because he's not singing that loudly,
so it's still got more of the proximity
effect because he is up on the mic.
00:06:03
And these vocals
were recorded with an SM7,
so it's a hypercardioid mic,
there's a lot of proximity effect,
it would just get boomy,
and it wouldn't necessarily
be easier to hear,
but it would be too loud.
00:06:15
Whereas the Pultec really lets it
help poke through the mix
in a really great way.
00:06:20
You can do this with any sort
of parallel compressor,
but I built this because it models
a '90s vocal technique.
00:06:26
It's very 'poppy' sounding.
00:06:28
I would never use it on its own.
00:06:29
That would scare the hell out of me
if a vocal sounded like that on its own,
but, blending a little bit
of it in is genius.
00:06:37
Going back a little bit,
on the vocal track itself
just so you can see,
I've got another Phoenix
to add a little bit of color.
00:06:44
And then I've got another RVox.
00:06:45
So, I'm doing a little bit
of compression overall,
and we can hear
with and without that.
00:06:50
I'll go back to the first verse,
which is the most exposed
the vocal ever is.
00:06:53
It's the quietest he is singing.
00:07:09
Just helping to even the vocal out,
it's not sounding compressed really,
but it's saving me vocal rides.
00:07:17
So like I said, the vocal track,
and then there's one other here:
So this is just a delayed
version of the vocal,
and all this is is a vocal effect
that we only wanted on a couple of lines
in the ending of the song.
00:07:40
And rather than automate a send
where I either have to be showing
an extra automation lane
to know when this effect is being used,
or I don't know when it's being used
and it can come and go,
I make a quick copy of the vocal track
and just unmute the audio
that I want to go to this effect.
00:07:55
So, what this is is...
00:07:57
The way Anthony is singing that line:
It's a lot less
of the character of the rest
of the vocal of the song
and it's more of like a carnival
barker kind of thing.
00:08:15
We just decided, 'Let's have
a special moment for it.'
And on a lot of these songs with Josh
as we were finishing them up
for the 7" collection,
we were running vocals
through the modular synth
— check out the other video —
doing a lot of processing to vocals,
and we just decided on this one.
00:08:31
It was a pretty straight-ahead vocal.
00:08:32
Delay effects, so we will
go ahead and do it here.
00:08:35
So, let me play the vocal
from a line before
and you'll hear
this delay come and go:
All right, now let me
play you that in the track.
00:09:00
You're definitely not going
to hear that delay,
but it will change the character
of the vocal there.
00:09:24
So it just makes the vocal
a little bit bigger
and it pushes it a little bit
further back in the track.
00:09:29
And we don't have the background
vocals in, or the strings,
so, in context,
you don't hear it a lot.
00:09:34
Something we wanted to do,
and then, as we were mixing,
we didn't need a whole lot of it,
so, maybe it's not even
audible in the final mix,
but that's what that track is doing.
00:09:44
Now, you may have noticed that,
first of all,
I have two very light
compressors on the vocal,
but that it also
sounds really compressed,
and that could be
from one of two things:
it either could have been
recorded very compressed,
which in this case it was not.
00:10:01
The entire vocal chain
was the SM7 into a Neve 1073,
the high-pass would be at 50,
the high shelf might have been
touched a little bit,
that's it for EQ.
00:10:12
Then into an 1176 at 4:1,
and if there was more
than 2 or 3 dB of compression
I would be very surprised.
00:10:19
While tracking the vocals,
especially with Anthony
when he is being dynamic,
which he is on this song quite a bit,
I'll be riding the Input knob
on the 1176;
that's my fader.
00:10:30
Because what that lets me do
is as I ride up the Input
I'm getting more compression,
and I can pull it back
when we get to the chorus,
and sort of maintain
the level of compression.
00:10:39
So he is singing louder,
I still get a bit more level through,
but I'm actually hitting
the compressor less hard.
00:10:45
So, it helps kind of
even out the vocal
by keeping the same
amount of compression
regardless of the amount of level
that's coming out of the microphone.
00:10:53
So, it sounds a little counter-intuitive,
but I use the Input control on the 1176
as my fader while I'm recording.
00:11:00
But then, where is all
the compression coming from?
Well, if you follow the audio
from this vocal,
we come out of these two
parallel chains:
one is the clean one,
one is the crazy Pultec one,
and those get combined
into the Lead Combiner.
00:11:14
And that's just another Aux,
it has no more plug-ins on it,
it just has another L2.
00:11:20
Again, just for shaving off the top
when I was coming out of D/As
going straight to the console.
00:11:25
But then, this is where all
of the vocal sends happen.
00:11:29
Now, there are three on the end here
which are for effects:
one is 'Slap,' which is a delay,
and on this particular song
the slap is a Space Echo.
00:11:39
No big deal, it's just
a little bit of slap.
00:11:42
I can play that for you:
Very straight-ahead,
makes all the difference to me
in terms of it sounding like a rough mix
or sounding like a record.
00:12:00
That's the part that sounds
like a record.
00:12:02
Then next to that is 'Spread,'
which actually never gets turned on,
but that's like a micropitch slap.
00:12:09
But, because I'm not using it,
you don't get to see it.
00:12:12
Then a vocal reverb.
00:12:14
These are all in my template.
00:12:15
That never gets turned on,
so, again, we're not even
going to bother looking at it.
00:12:20
So the only 'effect' effect
that I am using
is the slap.
00:12:23
Then, next to that
is a send off to an Aphex,
which is exactly that.
00:12:27
It's just solo'ed on the Aphex,
there's none of the original
signal coming through.
00:12:33
And I am sending
a little bit of the vocal,
so, what that sounds like is this:
It's not like EQ
because you are actually
creating something
from other frequencies
within the sound.
00:12:55
So, it's more like harmonic distortion
than it is EQ,
but it's actually harmonic synthesis
and that's just what Aphexes do.
00:13:03
So that's helping the vocal just be
a little more present and bite through.
00:13:07
Then, these first two here
are parallel compressors, these sends.
00:13:11
So one of them is the Rear Bus,
this gets sent into the Rear Bus
so that it will interact with the guitars,
interact with everything
except the drums in that way,
so it's basically:
all instruments that sustain
and the vocal go together
into the Rear Bus,
and then, whatever is loudest
is what triggers the Rear Bus compression
and comes out on top.
00:13:30
So it's like doing a hundred mini-rides
between all of the instruments.
00:13:34
So, every single time Anthony sings,
I've turned down all the other
instruments coming out of the Rear Bus.
00:13:41
Now I don't have to ride them
out of the way of the vocal.
00:13:43
And just to show you
what that sounds like,
let me take just the vocal
going into the Rear Bus in and out
while I play the whole track.
00:13:50
The level is going to change,
but also the vocal will just disappear
because that's what's going to happen
when it's no longer interacting
inside the Rear Bus.
00:14:17
You can still hear him fine,
but there is something flat about it.
00:14:21
He is not interacting.
00:14:23
And this way the guitars and the vocal
all sound like they are
moving together, and it's just...
00:14:27
That's what shared
parallel compression does.
00:14:30
Now, here is a not shared
parallel compressor,
which is the Vocal Crush,
which, if you've watched any of mixes,
I use all the time.
00:14:38
It's an 'all buttons in' 1176,
slowest attack, fastest release,
obviously, the ratio
means nothing in this mode.
00:14:45
You've got a resistor value that is
completely out of spec for the circuit.
00:14:49
Even the attack and release
times are out of spec,
it's basically spitty distortion.
00:14:54
But mixed in, it just makes
the vocal more present.
00:14:56
Now, in this particular mix,
let me see if he is on the whole time.
00:15:02
No.
00:15:03
It's out at the beginning, and then
comes in when the drums come in.
00:15:07
So, just like the Pultec,
this is a way of having the vocal
keep up with the rest of the mix.
00:15:19
So now I'm going to play the vocal
as we go past that transition,
but I'll leave the Pultec out so you'll
hear just the Vocal Crush coming in.
00:15:42
So a big step up in level,
and also it's more aggressive,
and in the context of the track
it sounds like this:
And obviously we are not hearing
the Pultec, but if I get rid of that
now the vocal is really
going to start to get left behind.
00:16:20
So again, you can hear him,
but he is not part of the mix anymore.
00:16:25
I'll turn these back on.
00:16:39
Having heard it the other way twice,
now I feel like, 'Oh, maybe
it's too loud in that spot,'
but in the context of the song
he is keeping up
and that's what needs to happen
because the last thing I want to do
is leave the vocal behind.
00:16:50
Because that is the point of the song:
whenever he is singing, he is
the most important thing going on
and we've got to make sure
that that's always in front.
00:16:57
Second to last, but not least,
we have our background vocals.
00:17:01
So this is all Josh
and the only thing that is really
somewhat interesting about these
is that rather than spreading
background vocals,
what we decided to do
on this particular song
was to have certain parts be on the left,
certain parts be on the right.
00:17:15
Like in the first verse,
Josh is singing,
and I'm not going to talk too much
about the processing on these vocals
because it's almost exactly
the same on every vocal.
00:17:24
I've got a Phoenix for a little
harmonic distortion,
to make it sound better,
and just a high-pass
just because he was right up on the mic
and there was a lot of low end.
00:17:32
I don't remember what mic
we used on this,
it was either a C37A
which wouldn't have had
too much low end on it,
or it was a Mojave 200 because
I wanted it to be very present.
00:17:41
Those have tons of low end
and I just decided to put
a high-pass filter.
00:17:46
So that EQ is copied
basically to every single
background track
with the frequency set
slightly differently.
00:17:54
It's just to get rid of rumble.
00:17:56
Then, there's Phoenix...
00:17:58
...on these two vocal tracks,
and then I've got
compressors on these too.
00:18:02
So I'll play you all of these things,
but I just want you to know there's not
a huge amount going on right here.
00:18:08
The main background vocals are these:
Very straight harmony vocals
doubled in the verses.
00:18:27
You'll hear there's quite a bit
of effects on these.
00:18:29
What we've got going on
is all of the backgrounds
come down to this 'BG 1' Aux,
and then that Aux, very much
like the Lead Combiner,
that's what sends off
to all of the effects.
00:18:40
So, we have a couple of effects
that are exactly the same:
there is a send to the Aphex
and there is a send to the Rear Bus.
00:18:46
So this gets the background vocals
to interact with everybody else,
and it gets a little bit of that
synthesized top end.
00:18:52
On their own, without
the Aphex and the Rear Bus:
Okay, here's with the Aphex,
and you'll hear that really nice,
present, crispy top end come back:
And then, the Rear Bus on its own
is just going to be a parallel
compressor for the vocal:
It's hard to tell what that's going to do
with the Rear Bus out of context again,
but, again, what it does
is everybody is interacting
and the difference when you've got
everything in the track
is it's just a little bit easier
to hear the harmony vocal.
00:19:48
Let me drop them
in the track real quick.
00:19:50
Without the Rear Bus:
And what's really, really important
to kind of get about the Rear Bus
or any shared compression;
obviously, the background vocals
are louder there,
but to my ears, at least the way
I am hearing this mix,
they don't step on anybody.
00:20:30
They've gotten a lot louder,
but because the lead vocal
pushes them down
as the lead vocal gets louder
and the guitar strums individually
push that compressor down,
they're there whenever there's room
for them to be there,
but they're out of the way
whenever anybody else
is doing something
that has some motion to it.
00:20:48
And that's what happens
a million times
between the beginning of the song
and the end of the song.
00:20:53
That's the Rear Bus.
00:20:54
So, that's panned off to the left.
00:20:57
Later on in the song
we've got a couple of vocals
that are panned more to the right:
Some more paddy stuff,
and let me just bring in
these last few tracks.
00:21:24
They're spread out a little bit,
but this is basically
the background arrangement
minus the main harmony tracks:
All right, then we add
these guys up here:
And then, if we add
our main harmony guys back in:
A lot of moving parts,
but it's basically three parts.
00:22:18
You've got your low drone,
you've got your real harmony,
and then you've got your sort of
backgroundy harmony parts.
00:22:25
And the fact that the panning
is different on all of them
I think is what helps
those parts stay separate,
but they're...
00:22:32
It's all reinforcement, this isn't about
listening to the background vocals.
00:22:35
So another thing that is on all
of these background vocals
is quite a bit of effects.
00:22:39
So the first thing is we've got a send
off of some of the individual tracks
to a reverb.
00:22:47
Not that big a deal, but it just
gives us some reverb.
00:22:50
Here's without it:
It's just reverb doing
what reverb does,
but the main effects that you've
heard across all of these tracks:
a little bit of vocal reverb,
which now we can talk about
because I am actually using it,
though, not too much.
00:23:19
Very straight-ahead.
00:23:20
Just a filter so that the 'esses'
and the low boom don't catch the reverb,
and then into a plate emulation.
00:23:27
Very short.
Very, very, short.
00:23:29
I'll take that in and out,
and I don't even know that you're going
to hear much of a difference there.
00:23:33
Let me go back to just the verse.
00:23:46
It's actually making
quite a big difference,
you really hear them
sound like a record.
00:23:51
Vocals tend to get effects
that make them sound mixed,
other stuff I tend to do to try
to make them sound natural.
00:23:56
But, vocal effects are all about it
sounding like a record
and not like a rough mix.
00:24:00
The main effect on these
background vocals, though,
is this send here
that is off to the 'Spread,'
which is that micropitch slap
I was talking about before.
00:24:08
So down here, it's Dual H910s.
00:24:10
Not that big a deal, one is pitching up,
one is pitching down.
00:24:13
What is a big deal, though,
is that normally on a micropitch slap
the way they're set up
you have like 10 and 20 ms,
that sort of thing, very short delays.
00:24:21
10 milliseconds is technically
right at the threshold
of a human being able to differentiate
the original from the delayed signal,
so it just sounds longer
as opposed to two discrete signals.
00:24:31
Once you are in this
37 and 58 millisecond range,
you absolutely have discrete delays
on every 't' and every consonant
that has any kind of hard vowel to it.
00:24:43
You really start to hear the actual delays
as it ping-pongs left to right:
So there you have your backgrounds.
00:25:15
And again, in context,
all of this makes more sense.
00:25:18
The other thing to keep in mind about
all effects, really, but certainly
reverbs, short delays,
little pitch-shifting effects,
all that kind of stuff:
it gets eaten up
by the other stuff in the mix.
00:25:28
So, this sounds pretty wet,
and Josh loves his vocals to be wet
and I love how much personality
he leaves in each individual track,
so then, when you bury it,
stuff will start to stick out.
00:25:39
He does a lot with
the shape of his mouth,
when he is singing 'oohs' or 'aahs'
it's never just 'ooh,' 'aah.'
It's got a lot of movement to it,
almost vocoder-ish in that sense.
00:25:49
But also, spreading it out
with these delays
makes it sound like more voices,
sounds like four tracks instead of two,
that kind of thing.
00:25:55
But once you drop it back
into the track,
it just doesn't sound bone dry.
00:26:00
So, what I'll do is I'm going
to play that same verse
and I'm going to play it without
the reverb and without the slap
and without this reverb, up here.
00:26:08
And then I'm going to put
all three of those back in
and you'll just hear them
kind of spread out and go deep,
and that's what's supposed
to happen with these vocals
as opposed to being dry
and off to the left.
00:26:56
Again, that's what starts to make
a mix sound finished to me,
when the background vocals
are working in that way.
00:27:02
Sometimes the background vocal
is supposed to sound
like the other dude
in the band singing,
in which case it would be much drier,
treated much more like the lead vocal,
and panned a little bit,
whereas this is supposed to be
just another element in the song.
00:27:16
It's a musical element.
00:27:17
It could be a keyboard,
it could be a guitar,
it happens to be a vocal because
we wanted to harmonize the lyrics,
but the 'oohs' later on,
those could be anything.
00:27:25
It's great to do it with voices,
but treat them like an instrument,
not like a vocal.
00:27:30
And also, don't be afraid to put
a bunch of stuff on them sometimes.
00:27:33
Sometimes a really fast tremolo
on a vocal is great
and it will sound like an organ,
but maybe an organ would be
a really cool thing to have on the song
but do it with a vocal instead.
00:27:44
So, I'm fine with having very
effecty-sounding effects on vocals.
00:27:48
I kind of stay away from
everywhere else, as it turns out.
00:27:51
We now have the Chili Peppers
playing the song.
00:27:56
But wait!
There's more! There's strings.
00:28:01
Very quickly, let me solo up the strings
sort of in the body of the song
and you can hear what they're doing.
00:28:06
It's a really nice arrangement.
00:28:08
What I like about the string
arrangement is it's not pads,
it's not playing like somebody
playing a keyboard.
00:28:14
This is very much
a string quartet arrangement,
and it was actually written by one
of the members of the string quartet.
00:28:20
So, she knew exactly
who she was writing for,
there was a lot of input from Josh
about wanting to follow
that bass riff, things like that,
but really wanting the strings
to be their own thing.
00:28:31
They're not here just to support,
they're as important as any
of the other instruments in the song.
00:28:37
In that verse, for instance,
here's what they're doing.
00:28:39
This will be a little bit more paddy.
00:29:04
So it's taking...
00:29:05
...all of the sort of musical...
00:29:08
...motifs, but that's not
necessarily the right word
because I don't even necessarily
mean just melodies
or strings of notes
or things like that,
but all of the elements of the song
both rhythmically and melodically,
and weaving them into
a quartet version of the song,
but that all works
with the other instruments.
00:29:26
You'll see there are
quite a few tracks here,
basically what's going on is
I tracked the quartet
twice.
00:29:35
So these tops of the tracks
is one take,
the bottoms of the tracks
is another take, they are identical.
00:29:39
I've got close mics on the four players
only because we were working
on the arrangement as we go.
00:29:44
I would normally try and just use
a stereo pair to capture them,
but because we were working
on the arrangement,
I wasn't positive I wasn't going
to have to rebalance as we went,
or possibly, even try
and lose a player, which...
00:29:55
They would be bleeding, but I would
still have a lot more control,
so these mics are relatively close.
00:30:00
So I'm just going to solo up
the four close mics
and play a little bit of that.
00:30:17
Nothing special going on there.
00:30:19
And then,
down here we've got
two sets of room mics:
Close and Far.
00:30:25
So, the Room Close
is actually more of just a stereo pair
picking up the quartet,
and that sounds like this:
And then, what you would
traditionally call a room mic, which,
these are much further away,
these are probably M49s or M50s.
00:30:50
Something large, omni,
just trying to capture the whole room.
00:31:05
And together, just the two rooms:
And again, here's the whole quartet
with the rooms:
Very natural, not terribly wet,
nothing like that.
00:31:32
How did I not have phase problems
putting eight microphones
on four players in one room?
I got lucky.
00:31:39
I may have moved
something at one point.
00:31:42
The close mics are pretty close,
so there won't really be much bleed
between the four close mics.
00:31:47
Those are really spot mics.
00:31:50
Yeah, and I just got lucky,
I turned up the rooms and they worked,
and if they hadn't, I would have
tried flipping the polarity,
and if that didn't work
I would go out and move the mics.
00:31:58
I mean, that's all you can do
when you're multi-miking that way.
00:32:00
Same thing you would do
with drum room mics...
00:32:02
Whatever, they either add up in a good way
or they add up in a bad way.
00:32:06
And these happened
to add up in a good way.
00:32:08
Now, the second set of tracks
is just for two things.
00:32:13
One is for doubling.
00:32:15
I'll mute them first,
and I've got this one
section in the breakdown:
Which sounds fine, but,
in this part of the song, all we have
is the arpeggiating guitar,
the high guitar kind of
reverby pitch-shifty thing
as a pad, and strings.
00:32:49
And bass. That's all you've got.
00:32:51
There are no drums, there are
no background vocals,
so the strings are going to be
a major feature here
and it just sounded
like too few players, basically.
00:32:58
We wanted this to be more of a section.
00:33:00
All I did in that section
was to use the other take of the song
and use it as a double.
00:33:07
Let me unmute.
00:33:23
There you go! Octet.
00:33:26
Two for the price of one!
Well, that's not true.
00:33:28
It's a union gig. It's all paid
properly, don't worry about it.
00:33:31
Then the other thing that we did
at the end of the song
was to reinforce where the strings
are doubling the bass.
00:33:39
So, you might remember
from the bass track...
00:33:47
...those triplet runs.
00:33:54
And what we did is on the second take...
00:33:58
...it's just those runs.
00:34:05
So we got those clean
so that I could reinforce those
and try and make them come out.
00:34:09
Because obviously,
it's about the bass there,
but we've heard the bass do it
on its own, earlier in the song,
and we thought,
'Well, let's point out the fact
that this is part of the
string arrangement.'
And while we were recording the strings
we just weren't getting enough of it,
so it's a double there.
00:34:24
The only other thing
we're doing with the strings
is the intro of the song
became about the strings.
00:34:29
And what we did was basically
tell them where to end
and have them play this cloud,
and as I talked earlier,
we just recorded it with no click.
00:34:37
And then I took two passes of it,
layered them, so this is just
one take up here,
one take down here,
of them doing exactly
the same thing.
00:34:45
And if you listen individually,
this one sounds like this:
Right? And then, this top one
is the same idea but a totally
different performance:
So, put them together
and you just have double the chaos.
00:35:27
And we'll get to why it sounds
the way it sounds, in a second.
00:35:49
I just want to stop very briefly
and say that everybody should have
a ridiculous amount of respect
for composers like Penderecki,
off the top of my head,
who would actually notate
things that sound like that.
00:36:00
Getting complete chaos
out of a string section,
but actually have it be
repeatable chaos
is
amazing!
Anyway,
what we decided to do
was to build this intro,
and we loved the idea of it,
but as I was mixing
I was having real trouble with it.
00:36:16
It just felt too long, so I'm going
to get rid of the reverb for a second
and I'll let you just listen
to the strings doing this:
Which musically was really cool
and it fit the idea we wanted,
but it just felt too long,
and so, I started chopping the front,
just fading in, and it just felt
a little short, and it just...
00:37:02
It started to feel gimmicky,
and then, I don't know
where the idea came from
but I'm very happy I thought of it,
was, 'Well, let's have it start further
away and get closer and closer,
so as it resolves harmonically,
it will also sort of resolve sonically.'
Trusty old D-Verb,
and all I'm doing is I'm automating
the Wet/Dry control,
so this is the way the intro
sounds on the record:
Et voilà!
And what that does is,
just by changing
the sound field that's in it,
it just lets it be as long
as it needs to be.
00:38:08
I don't think that there is anything
that is specific to doing it with reverb.
00:38:13
I'm sure there are other ways
you could think of to do it,
but it's just about
trying to make something feel right.
00:38:21
So, sometimes doing
something very unnatural
can actually be the way
to make something work in a mix.
00:38:27
And I'm just glad I thought of it,
because otherwise we probably
would have either ditched the intro,
or let it play shorter,
or it would have felt
too long or whatever,
whereas I love the effect
of starting in this murk,
and then everything
coming into focus.
00:38:43
And now, at the end of that intro,
you get the incredibly dry
clean acoustic guitar
and we are off:
So that is all of the musical
elements in the mix,
you've seen exactly
what I'm doing to them.
00:39:06
The strings themselves
have nothing on them,
there's just an L2,
I don't know why, for no good reason.
00:39:11
This is a reverb that is used
in the body of the song
just as a room for the strings,
and then, they hit the Rear Bus.
00:39:19
That's it, so there is no EQ, nothing.
00:39:21
I probably EQ'ed a little bit
as I was recording them.
00:39:24
Also, there are some bypassed
plug-ins here which are Z-Noise,
so there was some hum
on a few of the microphones
which I cleaned up using some
noise reduction plug-ins.
00:39:34
The last thing that I did
on this particular mix
is automation,
and there's automation on the strings,
there's automation on a couple
of the guitars, I think.
00:39:44
Let's look at that. Yeah.
00:39:45
In the middle eight
I am automating a little bit,
but it's really just to keep things
interesting more than anything else
until we get to the end of the song.
00:39:54
Because the end of the song,
which I'll play a little bit of,
if you remember,
there was that one spot
where I had to drop in
the Pultec on the vocal
to have the vocal keep up,
and then we start adding
background vocals,
and then, by the end, we've got the three
cascading bits of background vocals.
00:40:10
We've got a full string section going,
plus reinforcement,
we've got the pianos,
everybody is playing at the end,
but, again, you've got to follow
the vocal all the way through,
so all of the automation is to do that.
00:40:22
The automation on the drums
are just to push drum fills,
the automation
on the guitars at the end
is pretty minimal.
00:40:29
I'm just riding
the 'fx' guitars, basically.
00:40:33
I could probably have not
bothered to do that,
but what I decided to do
was bring them out
when there was time to bring them out
if nothing else was happening,
like, 'Oh! I can bring up
the fx guitars!'
I also automated Anthony's vocal
all the way to the end
just to make sure you could hear
what he was saying,
but I didn't want to do it
by making him louder and louder
because what can really help
a loud song sound epic at the end
is having the vocal start to get lost,
because the track has gotten
so big around it
and you get this emotional response
of having to kind of lean in
to listen for the vocal,
and it just really helps the song
sound even louder than it already is,
whereas if you push the vocal,
now the track sounds small again.
00:41:11
So there's automation just on certain
words to make sure you can hear it,
there's quite a bit of automation
on the strings
to just have them pop out,
especially in those two spots
where they're doubling the bass.
00:41:23
And that's kind of what lets
the end of the song work,
so I'm going to play from where
the build starts back up
until the end of the song,
and I'm going to scroll around
so you can kind of see
this automation working.
00:41:33
But I think if you really listen
to individual elements,
you'll hear them sort of
take over one after another,
but hopefully you never lose
the vocal, which is the point.
00:42:50
You can hear that really
the vocal stays there,
but every once in a while it starts
to sound a little bit swallowed up,
which is exciting,
but, it only starts
to sound swallowed up
on lyrics that are easy to understand
and ones we've heard before.
00:43:03
So, more of the extended notes,
because that's where it's fine
to let other stuff happen.
00:43:08
The other thing is
I opened up the 33609,
which is the compressor on the
mix bus as that was going,
and you could see
I'm almost hitting that 4 dB
compression line,
and so that's where it sounds good.
00:43:21
Now, really quickly,
let me just use this Master on my Router,
and I'll turn it up a couple of dB,
and I'll turn it down a couple of dB.
00:43:29
And for me, what's going to happen
is the end is going to sound crushed.
00:43:32
I'm going to do 2 dB up,
and I can tell you right now
it's going to sound too compressed.
00:43:36
And when I pull it down 2 dB,
the end might sound okay
but a quieter part of the song
will probably just sound a little unglued.
00:43:43
So, let's go louder first.
00:43:46
-7.9, to be precise.
00:43:49
Oh, come on.
00:43:50
-8, to be precise,
because that's where I let go
and I'm too lazy to keep doing that.
00:44:58
Ugly!
So, it starts to fall apart.
00:45:01
Now, this is not to say
that I get my mix done
and then I go looking for the sweet spot.
00:45:07
The way this happens is:
I work on the drums because
you've got to work on the drums
and make them sound
like an instrument
before you can really get
the rest of your balance,
and I very quickly try and get
everything else in.
00:45:18
Fixing problems, if I've got
to suck midrange out of cymbals,
or if there is boom on a guitar
that should go away,
get all that done,
figure out some panning,
get a rough balance.
00:45:27
By that point,
my mix level is pretty much set
because I would have to move so many
things for the mix level to change,
so that's right when I would
go start listening to the mix.
00:45:38
If I don't notice anything,
I might never come down
and turn this Master fader down.
00:45:44
Invariably,
by the time I get the vocals and I realize
like, 'Wow! I'm just slamming this thing!
It sounds as though
I'm sucking all the life out of it,'
and I'm starting to get depressed
about the way my mix sounds,
it's not that I say, 'Oh, I think
I am compressing too much,'
it's that I started getting my balance
and thought everything
sounded really cool,
and now, all of a sudden,
it sounds like a mess.
00:46:05
It just sounds smashed up, and terrible,
and, 'What have I done wrong?
Did it ever sound good?
I suck! I need a new job!'
And then I'd say, 'Wait a minute!
It's probably just too loud!'
and I come down,
turn down this Master fader,
and, 'Ahhh! There it is!
It's back again!'
Most of the time I don't
even look at the plug-in,
I never even bother opening it
because it's so easy for me to hear it.
00:46:26
Now, to me, those 2 dB
of difference were massive.
00:46:30
For you, maybe it was
a little bit subtle,
you just train your ears.
00:46:34
I mean, anything that you do
over and over,
you'll start to hear the process.
00:46:38
The easiest way to explain that is,
think about Auto-Tune:
when it first came out, everybody
just thought it was absolute magic,
and about 6 months later
everybody started to hear the artifacts.
00:46:47
And it's only because they've managed
to make the algorithms better
that we can all deal with the amount
of vocal tuning that we do.
00:46:53
If you're not going for an effect,
you can still tune a vocal
and have it be very natural-sounding.
00:46:58
But if you went back to the original
version of Auto-Tune right now,
you would hear it a mile away.
00:47:03
I hear that bus compressor a mile away
and I know when it's in the sweet spot.
00:47:08
And if I can't find the sweet spot,
then I know my drums are no good.
00:47:12
There's something wrong,
something about the kick
is sustaining too much,
or something like that,
because it's not letting that
compressor do what it does.
00:47:19
And every once in a while,
on a very acoustic song,
it's the wrong compressor
and I just get rid of it.
00:47:24
But 90% of the time it works,
but only when it's in the right spot.
00:47:29
Now, I probably have about a dB,
I can move it,
and it will be fine for me.
00:47:33
So, it's not this crazy, precise,
'oh my god' thing,
it's also impossible to measure.
00:47:39
I can't tell you what level should be
going into that compressor
because it depends on
how thick is the mix,
how transient is the mix.
00:47:48
What are the kick and snare doing?
Are they very loud? Are they quiet?
How thick are the vocals?
Are there tons of double vocals,
or is it a single lead vocal?
All of that stuff will affect how much
of that compression you can get.
00:48:00
That said, I will bet you if you're
hitting this 4 dB of compression line,
you've gone way too far.
00:48:06
If it's really not moving
in the loud sections,
you're not getting the benefit,
and you might as well not bother
or look for a different compressor.
00:48:13
So I suppose it's a little
unfair for me to say,
'I can hear the difference,
and maybe you can't,'
so what I'm going to do
is go back to those 3 different levels
and I will try and describe
where to listen.
00:48:24
So,
I'm going to play a little bit of it,
and then I'm going to say,
'Blah, blah, blah,'
and then I'm going to play it again,
and hopefully you'll be able to zone in
on the couple of things that I mention.
00:48:35
It's...
00:48:37
...vaguer than that,
it's an emotional reaction
to the way the mix feels,
but I'm going to try and actually come up
with a couple of very specific things.
00:48:44
Here's our good level,
I'll just play that for a bit:
To me, the obvious thing
is it sounds a little distorted
because of how much it's compressing,
but what it's doing
is it's driving the lead vocal
up to the forefront too much,
which is weird.
00:49:30
'We're compressing the mix more,
but I'm getting more vocal?'
Well, it's because of where that
release time is, and things like that.
00:49:37
It's grabbing drums, the kick drum
sounds completely blown up
as opposed to sounding kind of cool.
00:49:42
I mean, all I've done to the kick
is try and blow it up, right?
I've added distortion,
a bunch of low end,
parallel compressors,
stuff on the mix bus,
two 'happy face' EQs,
partridge in a pear tree,
all of which are trying
to blow up the kick,
but when it's too blown up,
it's starting to destroy the rhythm.
00:49:59
So I feel like the interaction
between the kick,
the cymbals and the guitars
is destroyed,
and I feel like all of a sudden
the vocal is just sticking out like crazy.
00:50:06
So here it is again:
So this to me is almost
just the opposite of that,
which would make sense.
00:51:04
It doesn't sound bad to me at all,
it's fine.
00:51:07
And if this is where
it happened to be set,
I don't know that I would have gone
looking to push it more.
00:51:12
I'm sure in the quieter parts
of the song I probably would have,
but we're just going to stay
in this part of the song.
00:51:18
But what I'm hearing
in terms of it being the opposite
is that the transient material
is now poking through too much.
00:51:23
The kick is too loud,
the snare is too loud,
and it's actually kind of
pumping the vocal,
whereas when you compress
a little bit more than this,
it sort of hangs here.
00:51:32
Instead of bouncing
between nothing and a little bit,
you're bouncing between a little bit
and a little bit more,
and it just really helps kind of glue
everything together,
so that's what I like about this level.
00:51:42
So I'll play it a little more,
I'll play a little bit
of the level we left it at,
and then we'll leave it at that.
00:52:18
And listening between those two,
I might, if I were still
mixing this song,
end up a tiny bit lower than I am now
because the kick has started to blow up
the tiniest bit at -9.9,
so I would go to -10.5
and see how that would work,
but that's the general
thing that I hear.
00:52:34
Now, this -9.9 is a completely
arbitrary number.
00:52:37
Like I was saying before,
I build my balance
and then I realize,
'Oh my god, my mix is too loud!'
In my template,
that Master fader is at 0.
00:52:45
What the Master fader lets me do
is just take that waveform
and pull it down
so that it fits through
my 2-bus chain.
00:52:52
And...
00:52:53
remember it's not about
the meter on the compressor,
it's just about what it feels like.
00:52:58
And the real difference on this song
is the feel of the vocal
versus the transients of the drums,
but it could be anything.
00:53:04
And it really...
00:53:06
...is something where you've got to
turn off the technical part of your brain
while you're doing one of the most
technical parts of your mix,
which is setting the actual level
through your 2-bus.
00:53:15
And you just have to listen
and decide if it's cool.
00:53:18
And then you have
to go back and listen
and make sure the quiet part
of the song is good,
as well as the loud part, because
you might have to automate something.
00:53:26
There is nothing more important
than what it sounds like
and what it feels like at the end,
so, if you're going to have
to do something really invasive
that's going to take you a long time
to make it awesome, then that's fine.
00:53:37
And if you can get away without doing
anything and it's awesome, even better.
00:53:42
So, speaking of awesome,
Chili Peppers!
There you go! 'Pink As Floyd.'
And, it's available on 7" vinyl.
Once logged in, you will be able to read all the transcripts jump around in the video.
- Smack
- Lo-fi
- Scheps 73
- EQ III
- UAD Pultec
- CLA-2A
- CLA-76
- Roland RE-201 Space Echo
- bx digital v2
- RBass
- RVox
- UAD Helios 69
- JLM LA500
- dbx 160
- UAD EL7 Fatso Jr
- H-Reverb
- L2
- FilterBank F202
- Soundtoys Little Microshift
- ReVibe II
- Fairchild 660/670
- Massey L2007
- UAD Neve 33609
- UAD Neve 31102
- UAD 1176AE
- UAD EMT 140
- Phoenix II
- Aphex Vintage Exciter
- H910 Dual Harmonizer
- D-Verb

Andrew Scheps is a music producer, mixing engineer and record label owner based in the United Kingdom. He has received Grammy Awards for Best Rock Album for his work on Red Hot Chili Peppers' Stadium Arcadium, Album Of The Year for Adele's 21, and also Best Reggae Album for Ziggy Marley's Fly Rasta.
Andrew started as a musician, but found that what he enjoyed most was working behind the scenes. This led him to study recording at the University of Miami. After graduating, he spent some time working for Synclavier, and then on the road with Stevie Wonder (as a keyboard tech) and Michael Jackson (mixing live sound). But he found his home in the studio, and he honed his craft working for producers such as Rob Cavallo, Don Was and Rick Rubin.
Andrew collaborated with Waves in order to create his own line of plug-ins which include the Scheps 73 EQ and the Scheps Parallel Particles.
Andrew is one of the best known mixing engineers in the world, well-known for his Rear Bus mixing techniques that he developed working on his 64 input Neve 8068 console and his love for distortion of any kind. If you are watching pureMix videos you will see that he managed to carry his analog sound signature over to a fully portable digital rig. These days, Andrew mixes completely In The Box as it allows him much greater flexibility and the ability to work on several project simultaneously.
Beyonce
Lana Del Rey
Red Hot Chili Peppers
U2
Michael Jackson
Green Day

Red Hot Chili Peppers is an American funk rock band formed in Los Angeles in 1983. The group's musical style primarily consists of rock with an emphasis on funk, as well as elements from other genres such as punk rock and psychedelic rock. Currently, the band consists of founding members vocalist/rhythm guitarist Anthony Kiedis and bassist Flea, longtime drummer Chad Smith, and former touring guitarist Josh Klinghoffer.
Pink as Floyd
CLICK_HEREMusic CreditsPink as Floyd
By Red Hot Chili Peppers
Red Hot Chili Peppers is an American funk rock band formed in Los Angeles in 1983. The group's musical style primarily consists of rock with an emphasis on funk, as well as elements from other genres such as punk rock and psychedelic rock. Currently, the band consists of founding members vocalist/rhythm guitarist Anthony Kiedis and bassist Flea, longtime drummer Chad Smith, and former touring guitarist Josh Klinghoffer.- Artist
- Red Hot Chili Peppers
Parts of this site and some files are only accessible to pureMix Pro Members or available to purchase. Please see below our membership plans or add this video to your shopping cart.