It's critical to be organized when you're mixing. The more tracks you're dealing with in a session, the more important that organization becomes. In this excerpt from the video "Chris Lord Alge: Mixing Rock in the Box," CLA is organizing tracks in preparation for mixing the song "Indestructible" by ViFolly. He was not involved in the tracking of the song, and just received the session file, and thus his first task is to get it configured in a way that matches his own workflow.
Although this mix will be entirely in the box, he configures it similarly to when he's mixing through his SSL console. In this excerpt, we see him changing the order and routing of the drum and keyboard tracks to fit his analog-style system.
BOOM BOOM
"I'm going to organize the drums the way I like to see them," he says, and proceeds to do just that. His preferred order is kick, snare (a sampled snare, in this case), toms, overheads and room tracks. After that, he likes to put other samples or hi-hat and ride and then any additional drum elements. He explains that any tracks he decides not to use in the mix, he will hide and make inactive.
The Hide and Make Inactive command is Pro Tools-specific, but most DAWs offer ways to remove or hide tracks from a session. If for some reason your DAW doesn't, a workaround is to save a copy of the session with all the tracks, as a safety, and then go ahead and delete them from the active mix session.

Here you see the drum tracks (in red) after they've been put in CLA's preferred order.
2. Grouping Synths and Keys
In addition to reordering tracks to fit what he's used to, another way in which CLA is mimicking his analog workflow is by sending groups of tracks to aux busses. He says he's assigning them to aux numbers that correspond to the channel numbers on his SSL where he typically routes the various mix elements.
He uses the auxes to combine groups of similar track types from Pro Tools into stereo pairs on the mixer. If he were using his SSL for this session, he'd route those to specific channels on the console. He's doing all of this so that he can mix in a familiar setup, which helps him work as efficiently and comfortably as possible.
CLA moves to the synth tracks and starts by inspecting them visually, and grouping together tracks to send to particular auxes based on whether it looks like they'll work together. He hasn't listened to them yet, so how does he decide that from just a visual inspection? He explains that one method is to see if their parts are overlapping or not. If they aren't, he'll put them in the same group. If they are, he prefers to route them to different auxes.

Here, CLA is grouping keyboard tracks (green) and sending them to particular aux busses.
"If there are sonic changes [necessary], we can do it internally," he says, "We may treat them the same." By "internally" he means that he can apply processing to an individual track before it gets to its aux-bus destination.
He explains that what he's doing here is just a first step. Eventually, he'll listen to the tracks and then decide how to treat them and whether to change their aux routing.
CUT 'EM UP
He also asks his assistant engineer Nick to cut away unused portions of some of the synth tracks. Again, in a session with so much going on, such as this one, the more visually clear it is, the easier it will be to deal with.
Next, he looks at another group of four synth tracks and sends them to a different aux bus. When he gets everything configured, all the instruments and vocals will be grouped into aux busses.
He asks his assistant to go through each track and enter its bus destination into the comments section (a note field available for each track in Pro Tools). Having the aux numbers listed there helps him quickly see which bus fader to use when he wants to adjust for a given group of tracks.
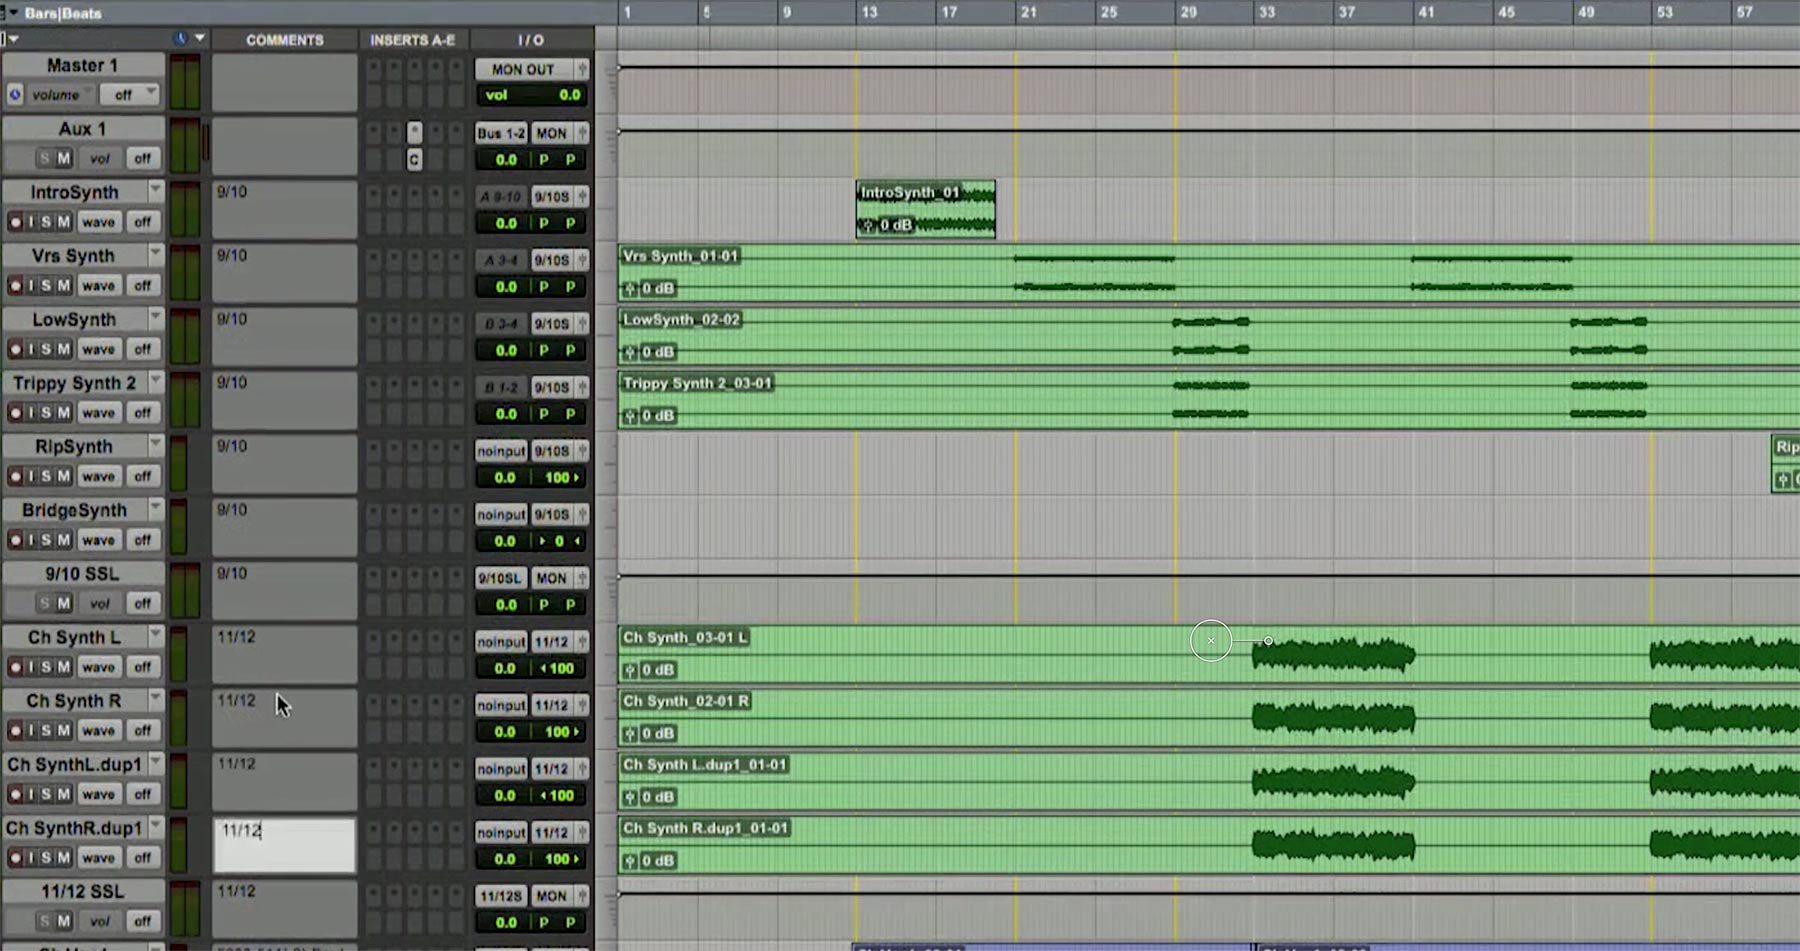
One way CLA helps keep things visually organized is to enter in each track's Comments section, its aux bus destination.
He mentions that if he makes a comp of several tracks, he'll commit them (bounce them internally) to reduce the number of tracks he's dealing with. It's all about making things as simple as possible.
3. Add Colors
The main takeaway from this excerpt is that CLA is used to mixing in a certain way and adapts the sessions he's sent to fit his system. That consistency helps him work faster and more efficiently. If you apply a consistent setup strategy to your own mixes, it will help you be more productive.
You probably noticed from the video that CLA has a color-coding system for his tracks. All the drums are one color, the keyboards another, the vocals another and so forth. If you don't already do something similar with your sessions, it's highly recommended. It doesn't matter which colors you choose, as long as you do it the same way from one session to the next. The idea is that after you've memorized your color scheme, you'll be able to tell at a glance what type of track you're looking at without even having to read its name.
CLA likes to have the tracks in a particular order for mixing because it keeps things consistent for him from session to session, which is a good strategy to emulate. The particular order is up to you, what's important is the consistency. Again, familiarity and routine help with productivity. If for every mix you have the drums in a particular internal order, and also the various groupings of tracks in the same order relative to each other (for example you could have, left to right in your mixer: drums, bass, guitars, keyboards, vocals, etc.), you'll have a helpful visual grasp of the structure of your session when you look at your mixer.
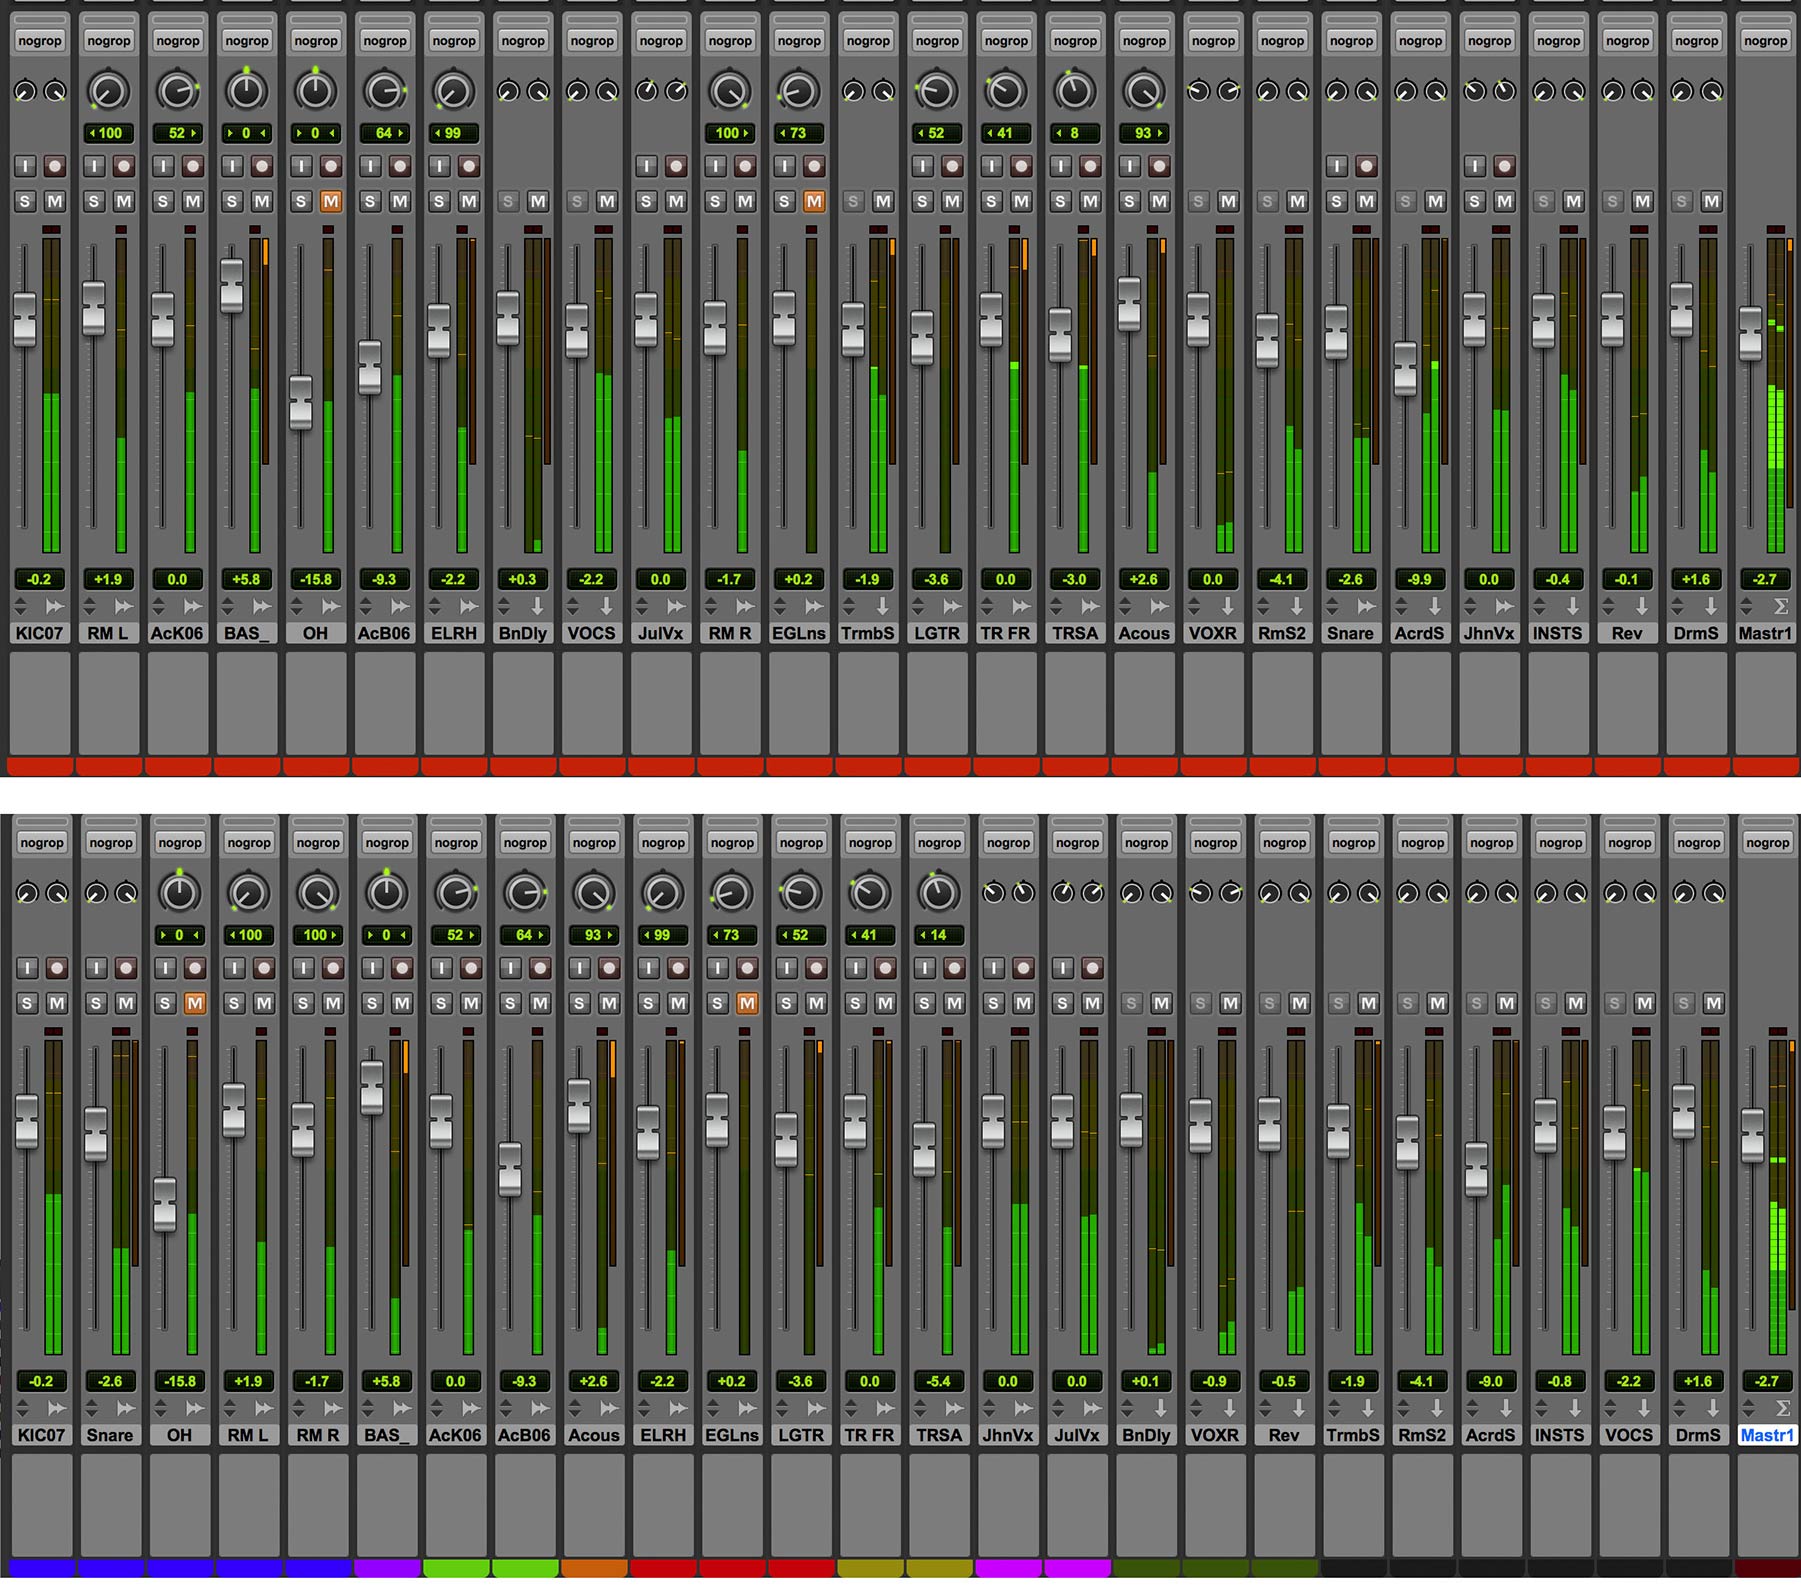
The mixer on the bottom has color coded tracks that are organized by type, the one on the top has no color coding and no particular order. Which one would you rather work with?
Creating a session template is a helpful way to make sure your system is in place from the get go. Have your track types already created and color-coded (you can erase ones you don't use on a given session). Using a template also allows you to preconfigure your go-to reverbs and delays on aux tracks, so you don't have to set them up each time. Plus, any other routing that you routinely end up configuring—subgroups for drums, instruments and vocals, for example—you can include in your template, so they're immediately available for every session.
4.ORDER FROM DISARRAY
Mixes are chaotic by nature because they consist of numerous disparate elements (tracks, plug-ins, subgroups, etc.) that all must be made to work together harmoniously. One way to keep the chaos in check is to be as organized as possible.
CLA did just that in this excerpt. He took a session that was set up completely different from what he's used to and conformed it to his system.