Although you can record an excellent electric guitar track using a DI and then processing it with an amp modeler, there’s nothing quite like the tone of a well-mic’ed guitar amp. But getting successful results requires a lot more than just sticking a microphone in front of an amp and hitting record.
You have lots of variables to deal with, including the quality and sonic characteristics of the amp and the mic (or mics) and the placement. In this excerpt from “Start to Finish: Jacquire King - Episode 4 - Chris's Guitar And Bass Setup” Jacquire shows how he approaches mic placement on a guitar amp as he sets up for the Oak and Ash tracking session at Flux Studios in New York City.

Using a phone flashlight to see the speaker clearly.
Here, There and Off-Axis
When the excerpt starts, you see one of the Flux engineers pointing a flashlight at the front of a Fender “The Twin” amp. He’s doing that so Jacquire can see the speaker through the grille cloth in order to position the Shure SM57 mic the way he likes. He says he typically starts with the mic pointed at the perimeter of the speaker’s center dust cap.
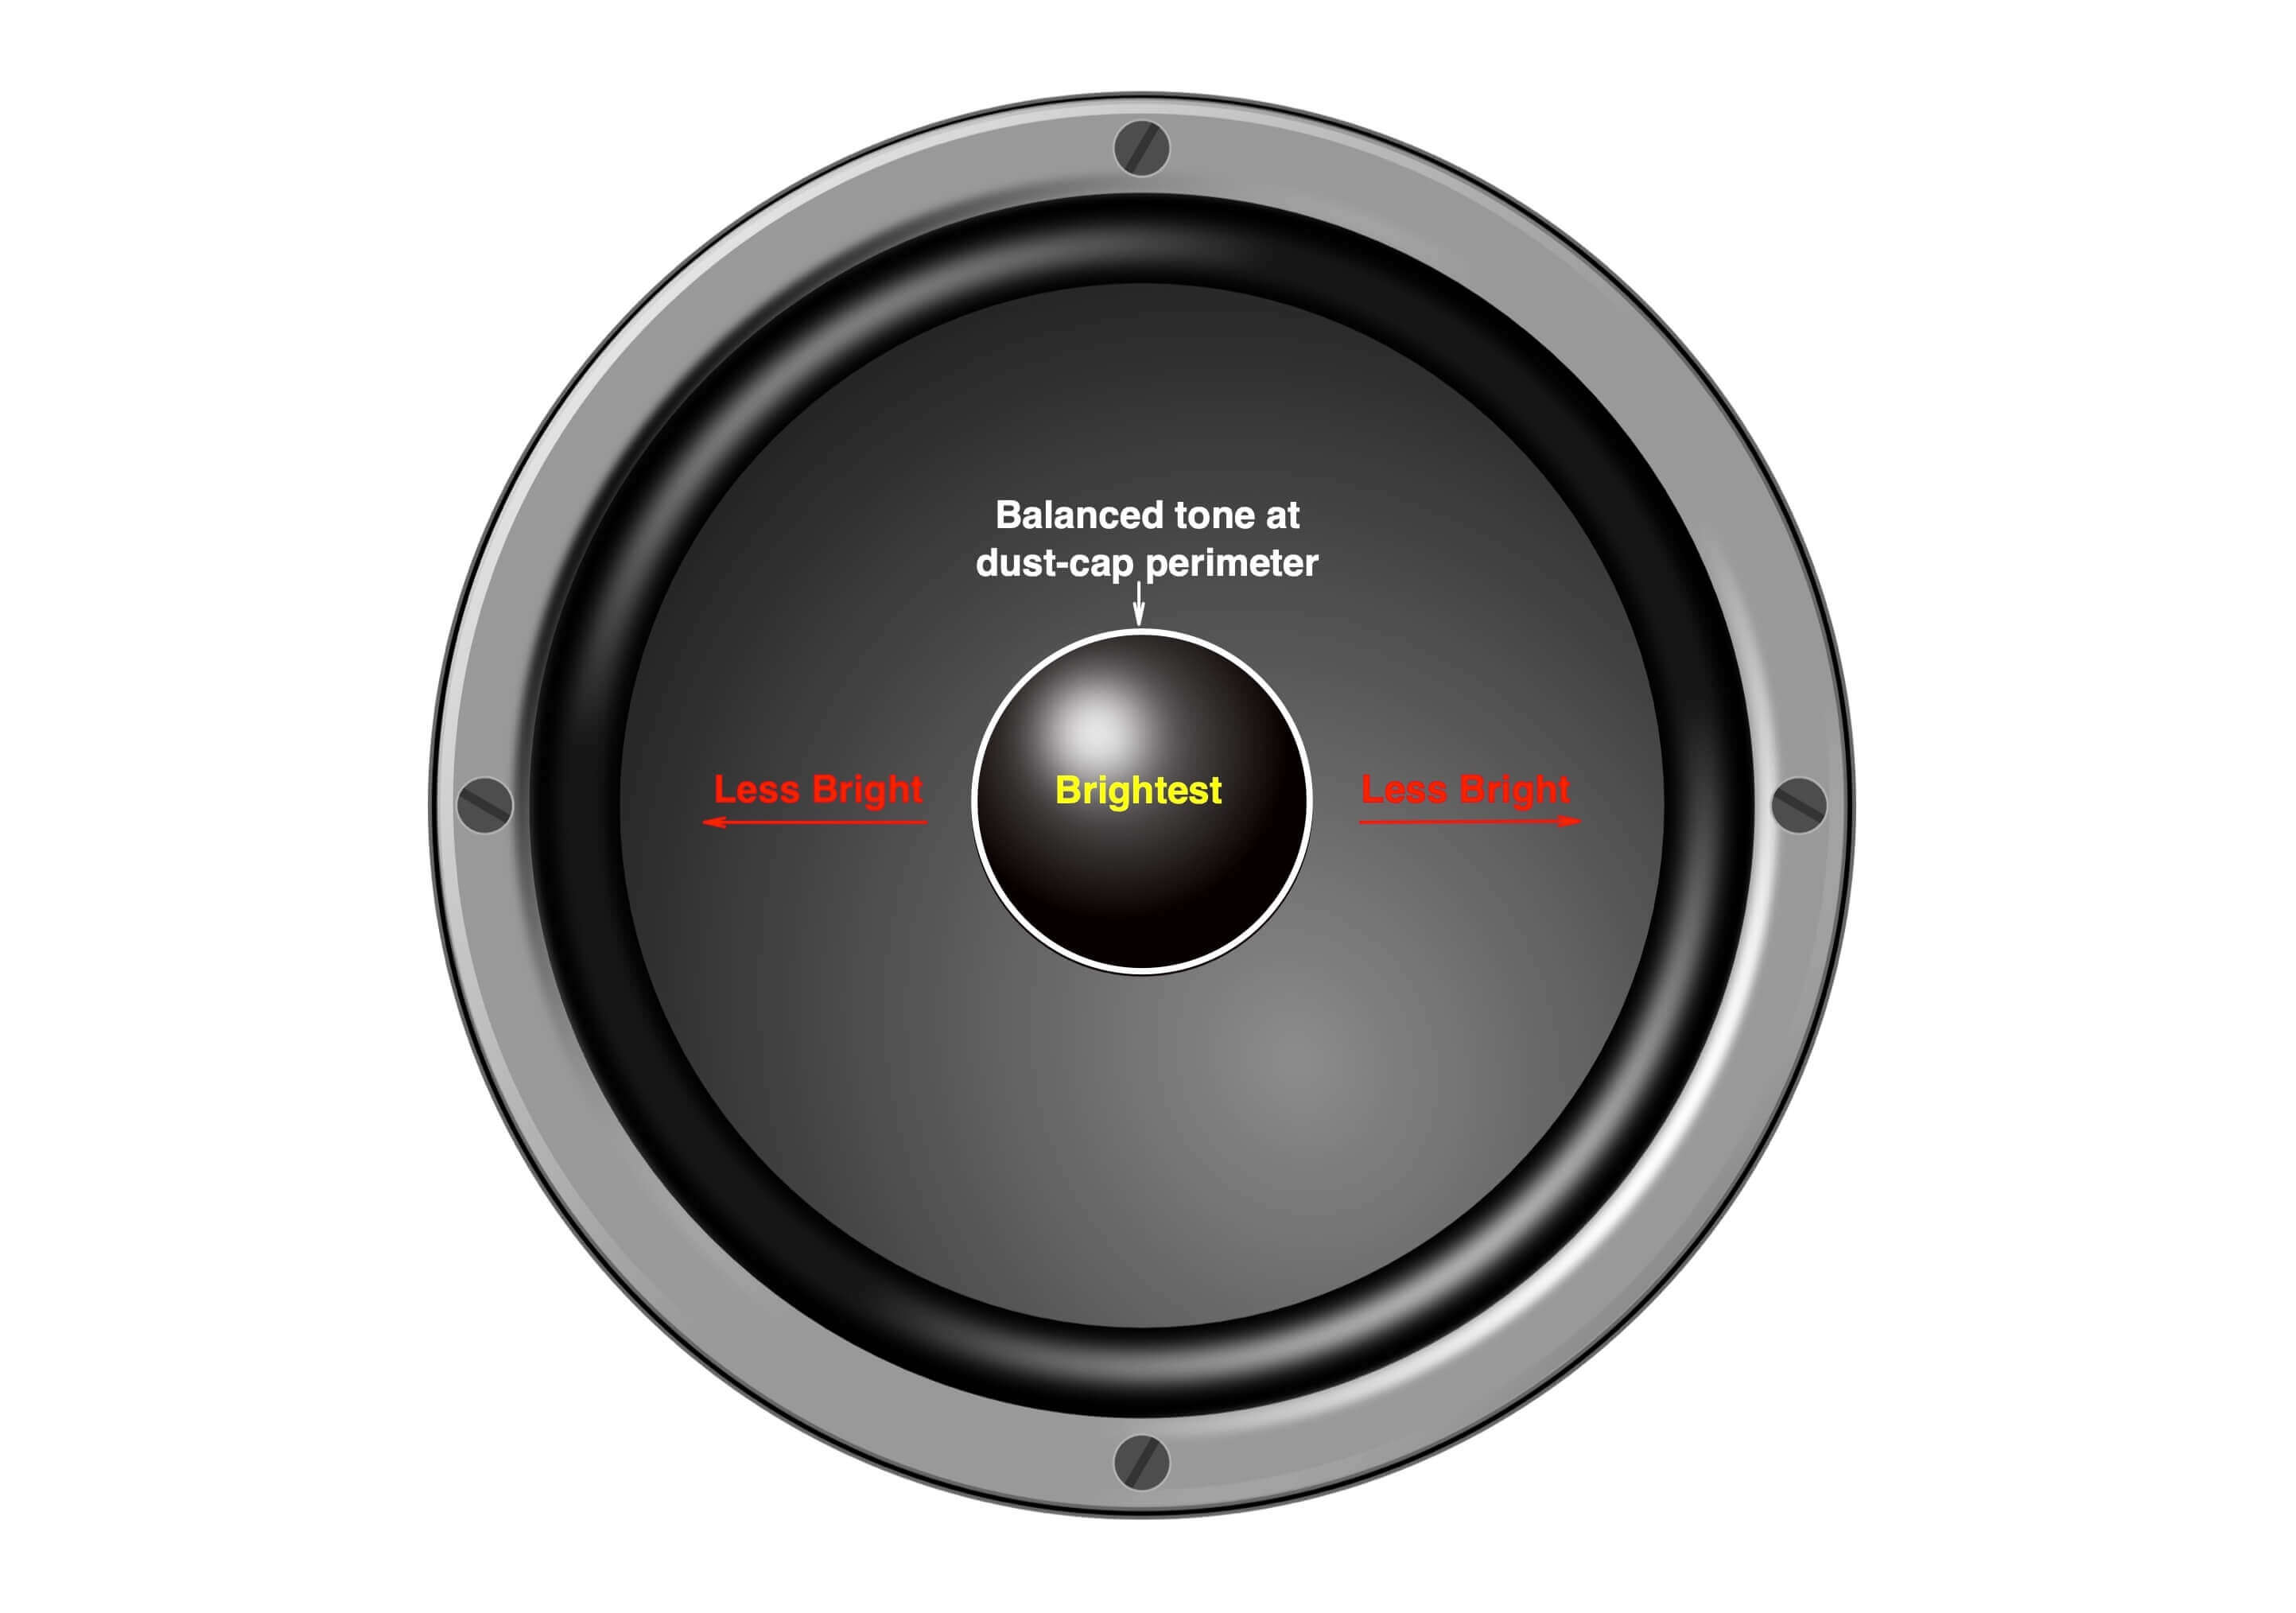
Jacquire likes to point the mic at the dust cap’s perimeter, which is circled in white in this diagram.
If you were to aim the mic directly at the center of the dust cap, you’d get the brightest possible sound. Jacquire says pointing it at the perimeter of the dust cap yields a more balanced tone. If you angle the mic away from the center of the cone, it will be less bright with more mid and low frequencies.
Jacquire also aims an AKG C-414 at the amp’s other speaker. He explains that if you’re going to use two close mics, you want to put them both at the same distance from the speaker to ensure the best phase alignment when you combine the two—assuming you’re combining them on a single, mono track.

Angling the mic away from the center of the speaker reduces brightness.
Back and Forth
Not only does the aim of the mic matter, but so does the distance from the speaker. This time, Jacquire places the mics about an inch back from the grille cloth. That allows a little more “air” into the sound compared to putting the mic right against it. The latter gives you a more “in your face” sound and also captures more low end. This bass boost is due to the proximity effect, which increases the amount of bass frequencies captured the closer a mic is to the source (unless you’re using a mic with an Omni pattern, in which case there is no proximity effect).
Consider also that as you move a mic away from a speaker, it will capture less direct sound and more room reflections. In situations where you’re mic’ing an amp while tracking a band or other ensemble, you may opt to put the mic right up on the speaker to minimize bleed from other instruments.
Two mic setups are common for recording guitar. Sometimes it’s one mic per speaker (if the amp has more than one speaker). Other times, both mics will be positioned on the same speaker. Yet another option is to use one close mic and one room mic placed well back from the amp. Similar in concept to a drum kit’s room mic, you’d use the room mic to blend with the close mic to add some natural space and dimension to your track.
How successful that will be depends on the sound of your room. If you have a room with subpar acoustics, adding a room mic into the blend is probably not advisable. However, if your studio has a good sound, the room mic could add natural ambience. You also have to be careful about possible phase issues between the two mics when they’re spread apart like that.
Going for It
The following are two sets of examples that demonstrate how positioning affects tone. The first set is derived from a clean electric part, played on a Strat through a Fender Twin Reverb and reamped so that the performance is identical in each example.
On most of the examples, the amp was mic’ed with a Beyerdynamic M160, a ribbon mic that works well on guitar cabinets. Others feature a Mojave Audio MA-300 tube condenser. All the examples were processed lightly with EQ and compression and a little bit of reverb.
The first example features the M160 set similarly to how Jacquire positioned the SM57. It’s one inch back and aimed straight at the perimeter of the dust cap.
Here is the example with the M160 angled to the left. It’s pointing into the main part of the cone, making the sound a little darker.
This time, right up on the grille, straight in at the perimeter, making it more bass-heavy and “in your face.”
Here, the aim stayed the same as in the previous example, but the M160 was moved back about 8 inches.
In the excerpt you saw Jacquire use two mics on the guitar amp, giving him extra tonal options. This next example offers a similar setup. It uses both the M160 and the MA300, placed identically, on each of the Twin Reverb’s two speakers. The mics were aimed at the perimeter at a distance of one inch from the grille cloth.
Distorted Reality
The next group of examples features distorted lead guitar part. Again, we’ll start with the M160 placed one-inch back and aimed at a spot on the dust cap’s perimeter. Each example was processed with a little bit of reverb as well as EQ and compression.
This time you’ll hear only the MA300 positioned ten feet back as a supplementary room mic. By itself, it doesn’t sound particularly good.
Here are the two mics blended, which sounds warm and full.
In summary, mic placement can significantly impact the sound of your recorded electric guitar tracks. It helps to make your placements carefully and experiment with different options until you find the sound you like best for a given part. The results you’ll get are worth the extra time spent.