In this week’s excerpt, which is from "How To Listen: Reverb Edition," Fab Dupont talks about the pre-delay parameter in reverb plug-ins. He explains that pre-delay was developed in the early days of digital reverb to compensate for hardware units that didn’t have enough processing power to create authentic-sounding early reflections.
Before going further, let’s quickly review the way reverb works in the natural world, which is what reverb processors simulate. Here’s an example: You’re in a large room, and drop coin onto the cement floor. The first thing to reach your ears is the direct sound of the coin hitting.
Next, you hear the early reflections of that sound, from the waves hitting the various room surfaces and bouncing back to your ear. There are so many reflections occurring so close together, that you perceive them as one sound, even though it’s actually many bouncing sound waves arriving at slightly different times. The larger the room, the longer it takes for the early reflections to reach your ears. The early reflections also give your ears information as to the direction the sound is coming from and how far away it is. Then you hear the rest of the reflections and the decay of the reverb, which is referred to as the reverb tail.
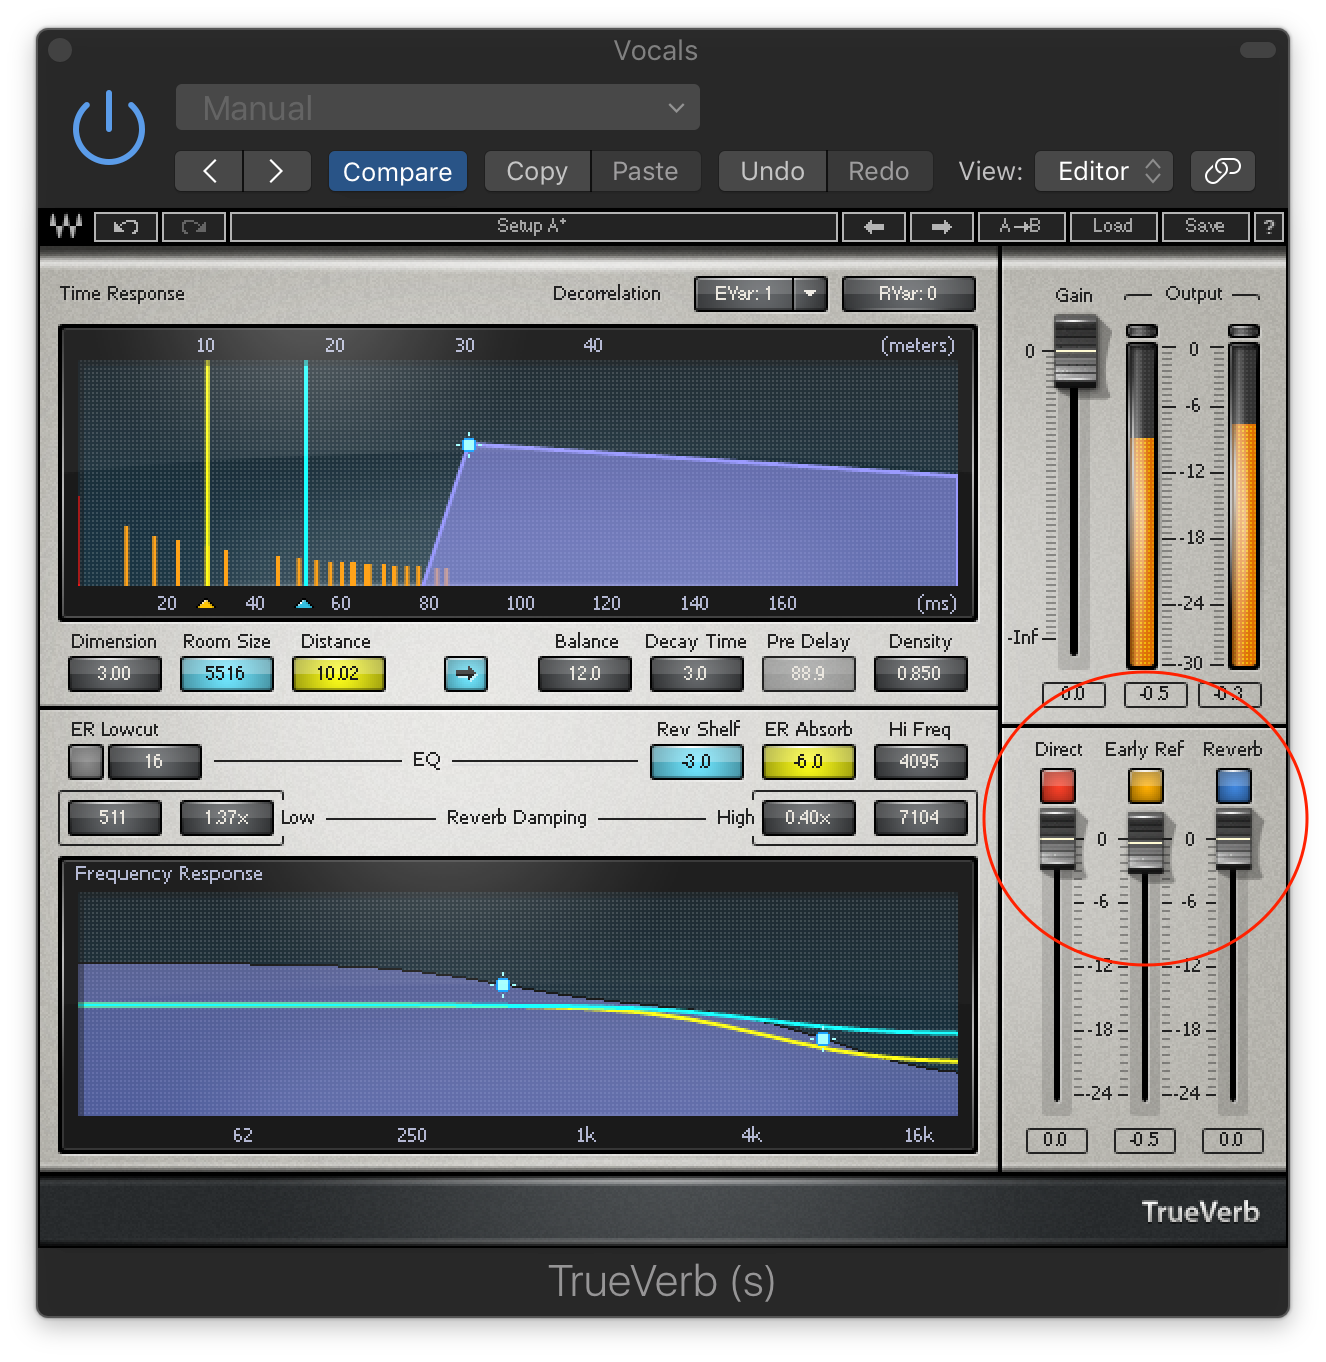
The direct sound, early reflections and reverb tail are the three main components of reverb. Waves TrueVerb is a plug-in that provides separate level controls for each of them - (circled).
A SPACE IN TIME
Let's return to what Fab was saying in the video. Because the early digital reverb units were so underpowered, somebody came up with the idea that delaying the onset of the reverb could help create the illusion of a larger space where it takes longer for those early reflections to arrive. This made it possible to simulate a longer reverb when working with limited DSP power.
According to Fab, it’s debatable how useful that workaround is. However, he points out that you can use pre-delay for another purpose, to create some space between the direct and reverberated sound on whatever source you’re using it for. He demonstrates this with a vocal track and shows how you can move the bloom of the reverb so it doesn’t push up against the singer’s voice as much.
By adding the pre-delay, Fab is allowing the direct sound of the vocal to pop through a little before the reverb starts, which can make it stand out more, especially in a crowded mix.
Fab says he doesn’t use pre-delay a whole lot in his work, but he hears it a lot on records because many mixers who were around during the early days of digital got used to mixing with pre-delay. In Fab’s opinion, unless you’re trying to recreate that old-style-digital-reverb effect, it’s probably not necessary to add pre-delay.
DON’T REFUSE TO DIFFUSE
Reverb plug-ins can come with a pretty wide range of adjustable parameters, but the selection differs widely from one product to the next. All have some form of the basics such as wet/dry mix and reverb time (aka decay time or RT60), most have pre-delay and some EQ or other frequency control options (for example the Input Filter and EQ section on the EMT 140). Beyond that, however, you get a lot of variation.
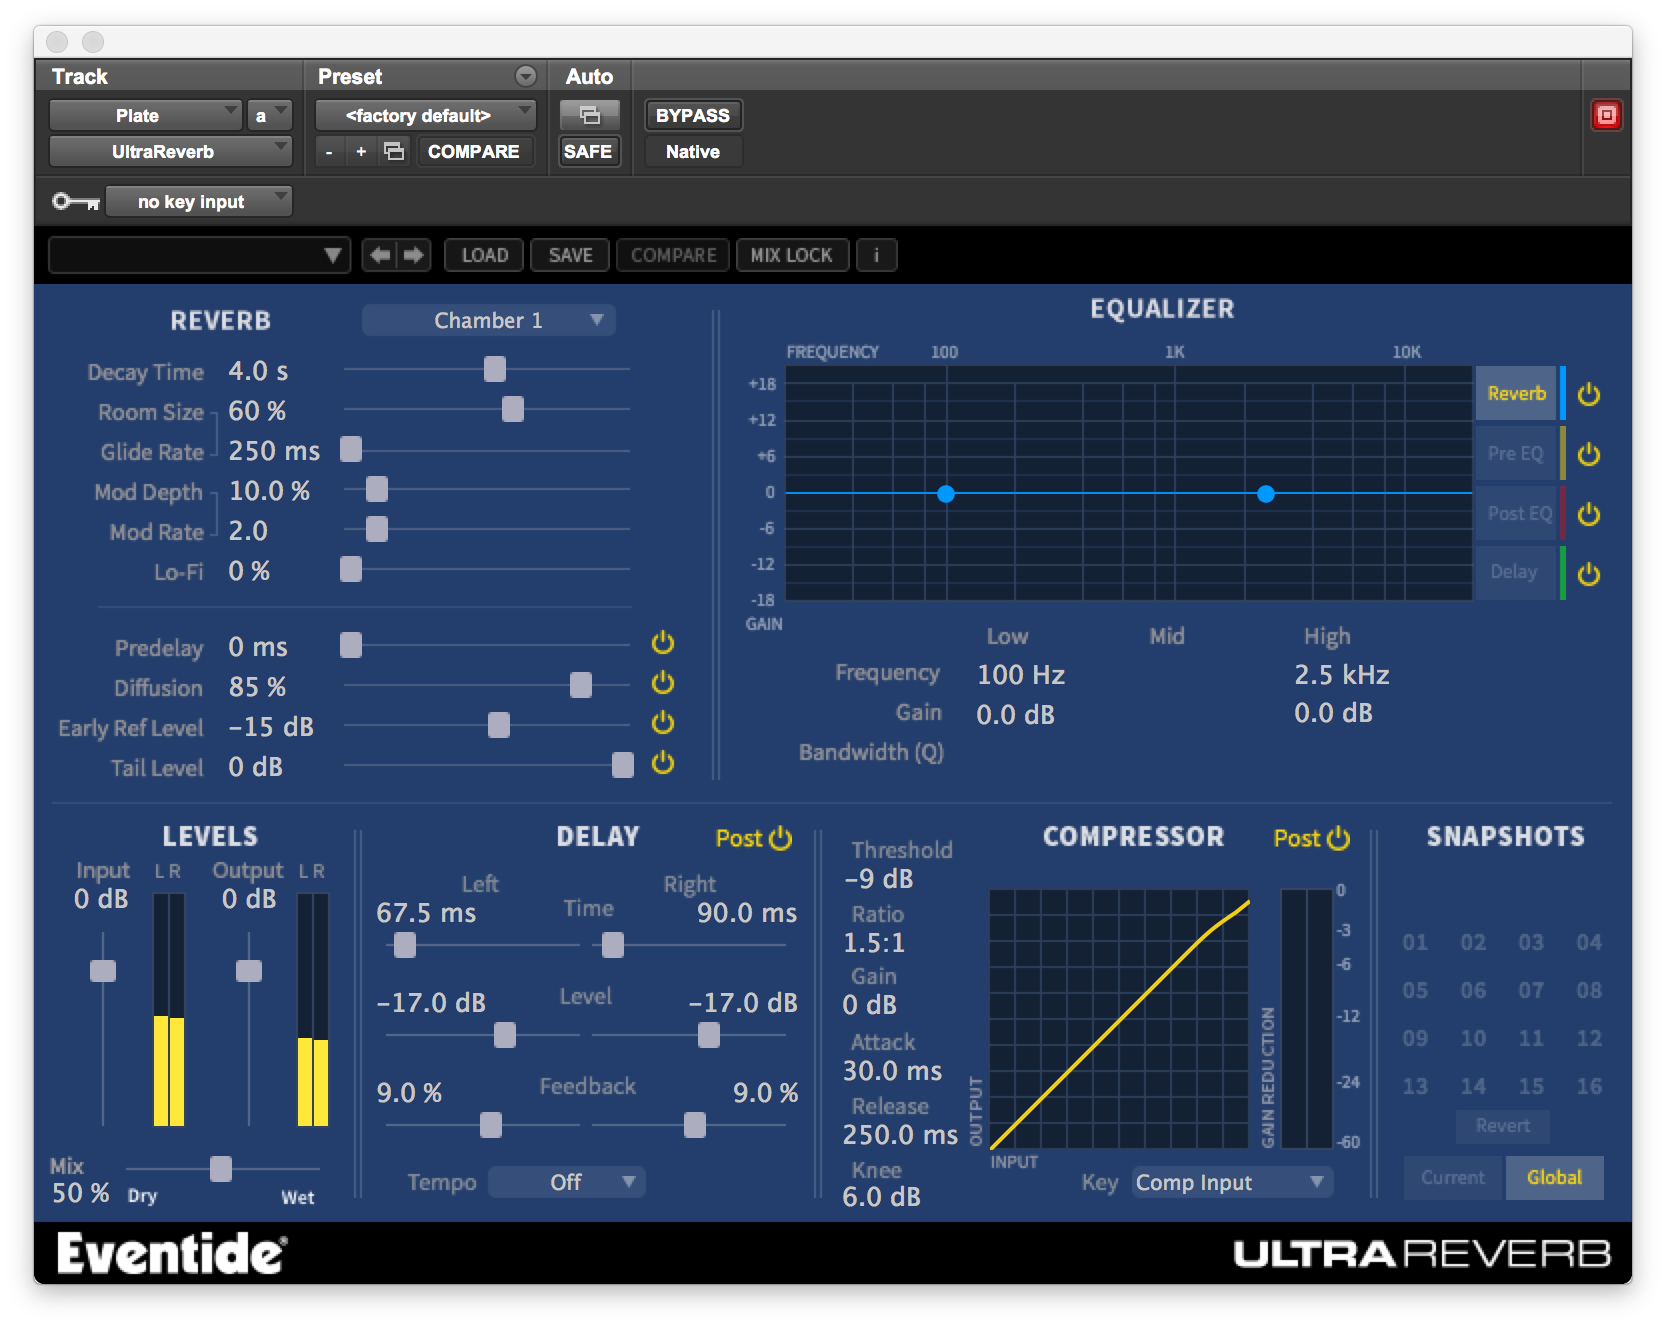
Eventide’s Ultra-Reverb is an example of a reverb plug-in with a lot of additional effects built in. It offers modulation, EQ, compression, delay and a Lo-Fi option.
Diffusion is a parameter that you see fairly often, although it’s far from ubiquitous. It controls the density of the reverb reflections. Higher diffusion settings create a thicker reverb where the reflections are more numerous and thus sound more homogenized. Lower settings have fewer reflections and accentuate the individual ones more.
Example 1: Here’s a drum kit with the snare routed through an aux send into Rob Papen’s RP-Verb with a reverb time of 1.4 seconds. For the first two measures, the Diffusion parameter is at its lowest setting; for the second two, at its highest. No other parameters change. Notice the difference in the density of the reverb.
Example 2: To better hear the impact of the diffusion, here’s the same example, except you’re not hearing any direct snare, just the reverb return by itself. No other parameters changed. You can clearly hear the difference the higher diffusion setting makes.
CRUSH THAT SEND
Some reverbs offer ancillary effects such as delay, modulation or distortion to modify the reverb sound further. But even if your reverb plug-in doesn’t provide such extras, and you’re using it on an aux return rather than as a direct track insert, you can add additional effects after it on the aux return to create some cool textures.
One way to add a subtle sheen to the vocal is to add some distortion or saturation to the reverb. The direct part of the vocal remains clean, and only the reverberated part gets affected. If you dial it in judiciously, it adds subtle saturation to the overall vocal sound. If the distortion plug-in has a mix control, experiment with different settings to vary the effect.
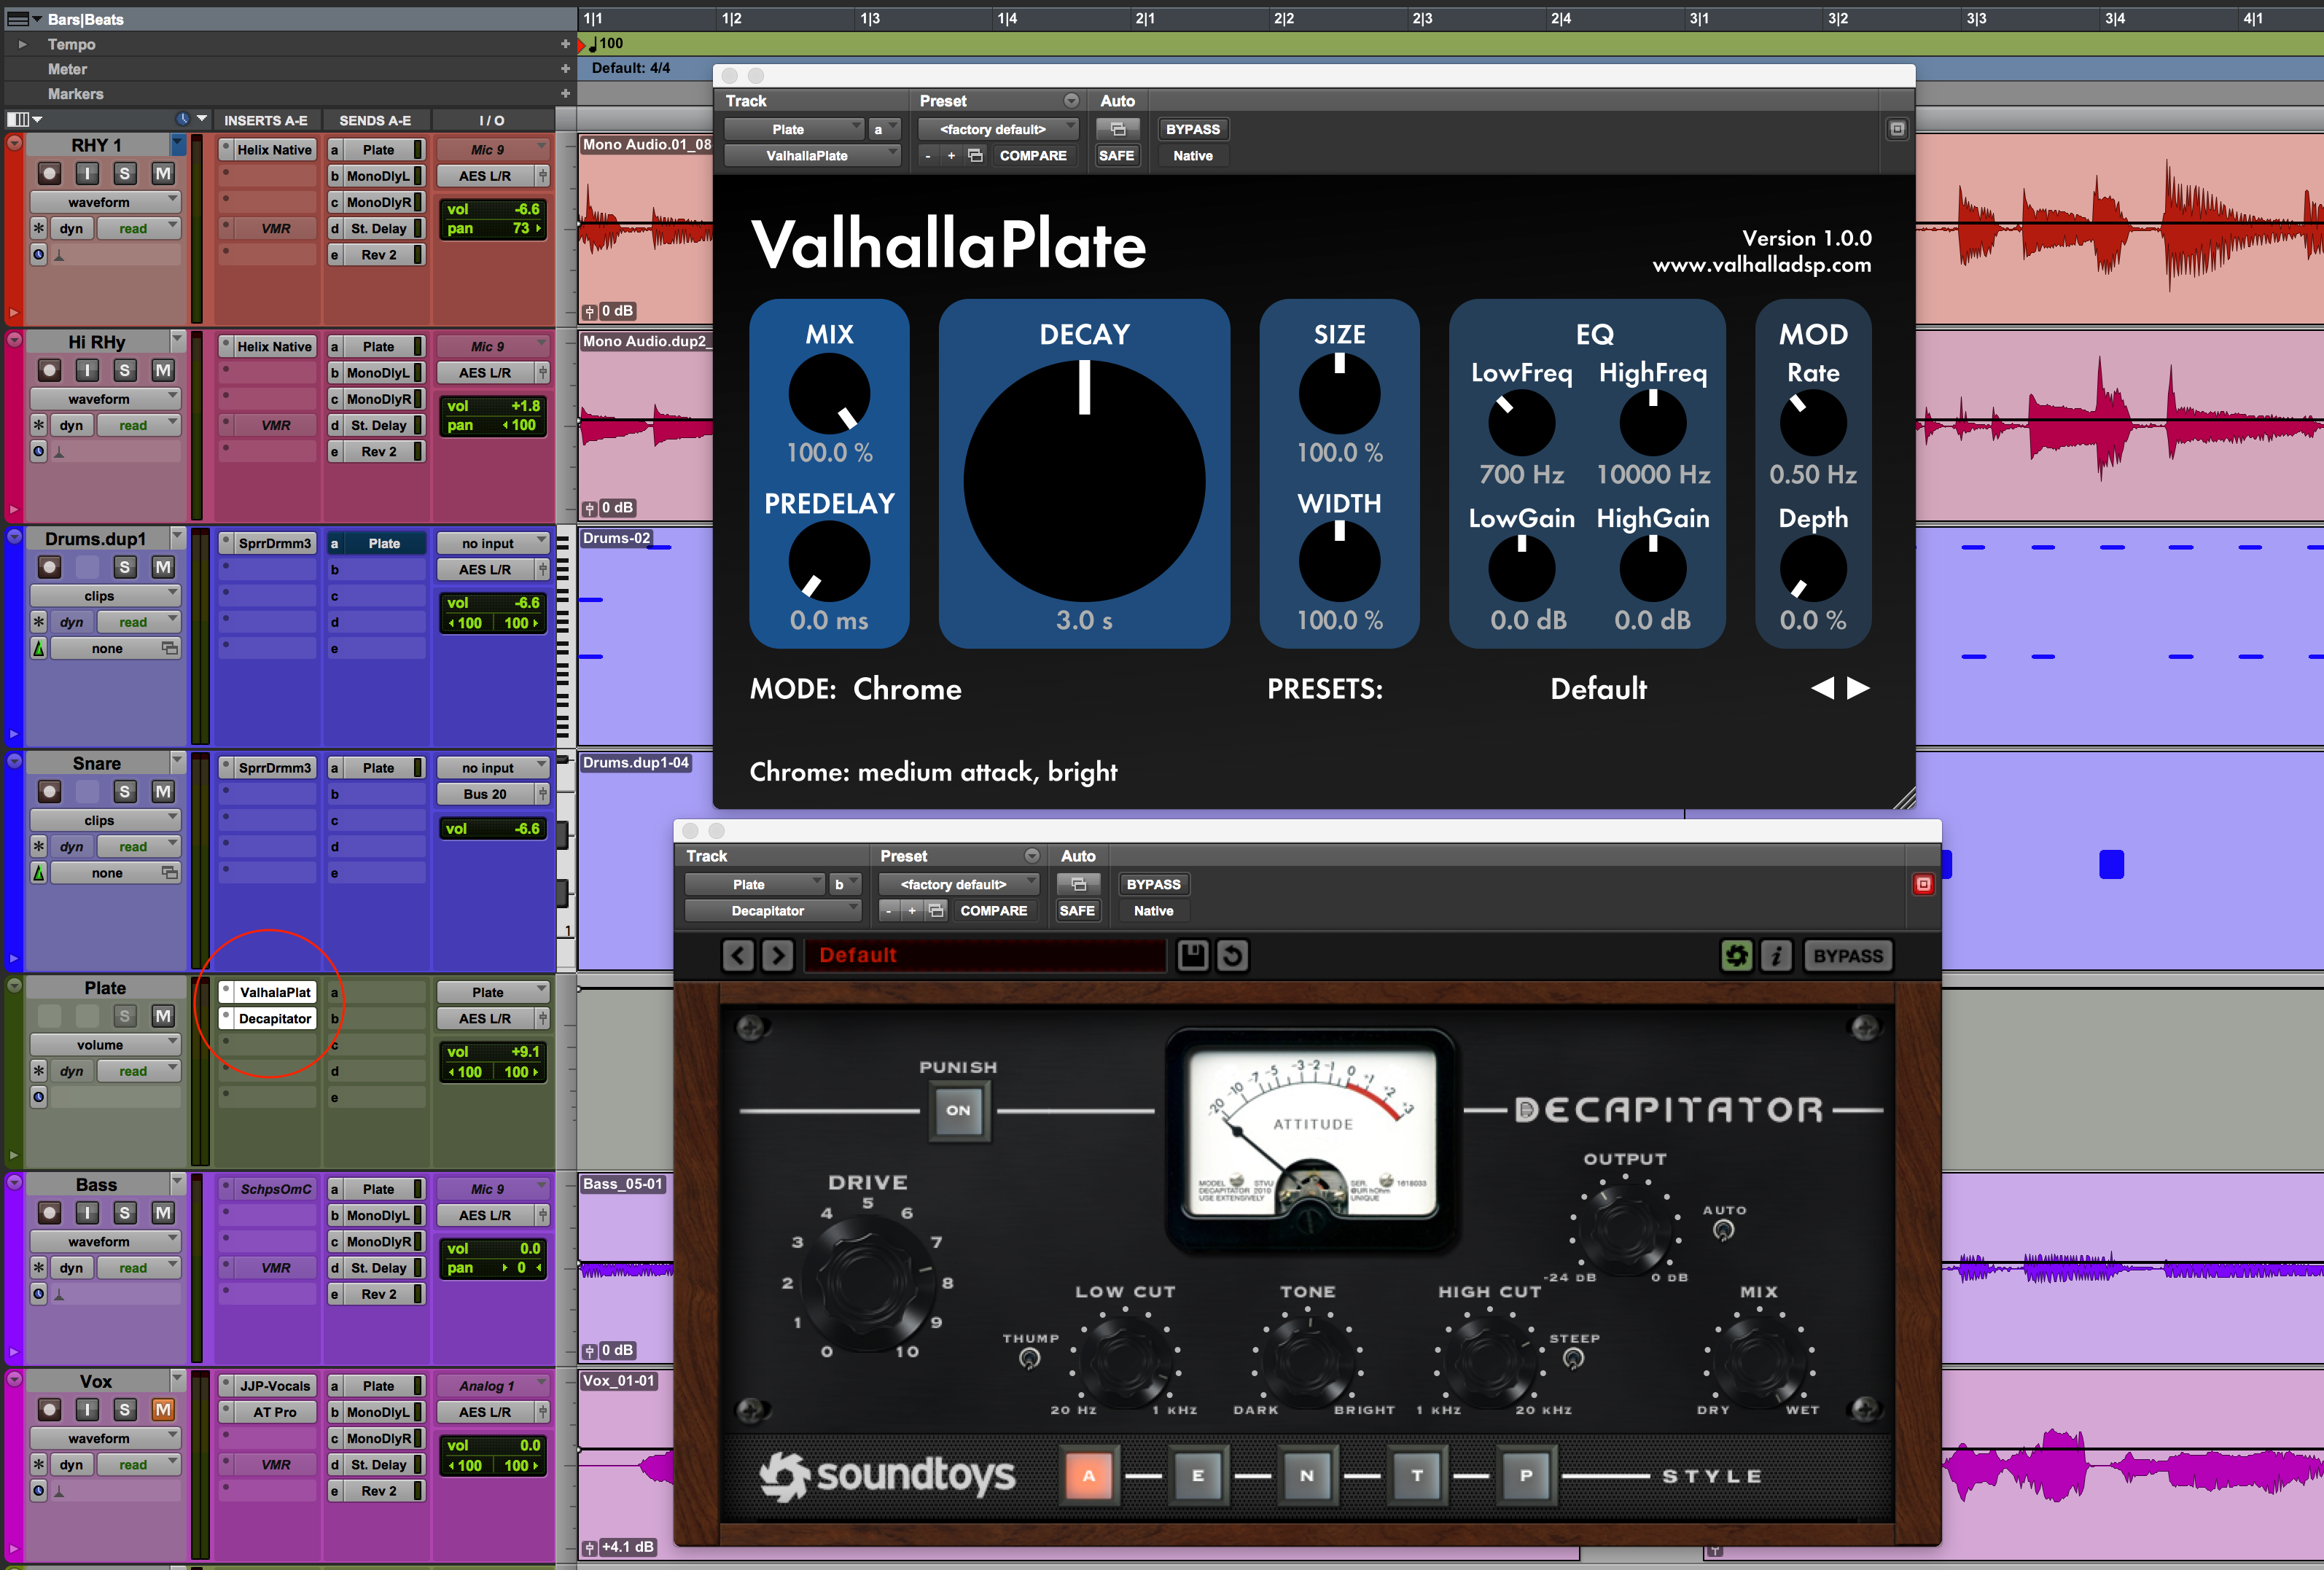
A distortion or saturation plug-in, such as Soundtoys Decapitator, can be inserted after a reverb on an aux send as shown here (circled), so it will only process the reverberated signal.
Example 3: Here’s a section of a soloed vocal track. First, you hear it with just reverb (Valhalla DSP’s Valhalla Plate), and when it repeats, with Soundtoys Decapitator on the aux send after the reverb.
FADING AWAY
Especially for electronic music, rock, and styles where you’re not trying to make everything sound organic, adding effects to your reverb opens up some pretty cool sonic options. Try it on some of your tracks. If nothing else, it’s a lot of fun to experiment with.