
Hitting the “gain staging” wall is a lesson that everyone remembers. Mine was in 2005: I was finishing a video scoring project at Musicians Institute and I was re-scoring the trailer for Hellboy, as part of my final. I had lots of electronic sounds, a virtual orchestra with percussion... it was a huge session. I reached a point where things sound the way I like: “I only have to bring in the electronic percussions and I am done”, I think.. overly-excited for being able to go home early, that day.
As soon as I brought those additional tracks in, my double basses disappeared. "Mh.. let’s bring them up.. now the cellos are weak.. I wish I had a bit more timpani.. what’s that grinding sound? Ah! My mix buss is clipping. I'll bring its input down.. now I am no longer clipping but the mix sounds off-balance, lifeless and dull."
My idea of going home early started vanishing in front of my eyes, I had no idea how to get back to that “ok”-sounding mix, and in the distance I started hearing the sad sound of a viola solo. It was clear that it couldn't get any worse.
The issue - that day - was partly due to my lack of knowledge of gain staging.
What Is Gain Staging?

If you ask me, gain staging is the technique of consciously managing the gain of one or more tracks across the entire path of their described audio signal. Being aware of how gain affects your audio signal and your final result is a basic, yet fantastic (and often overlooked) skill to possess in recording, mixing and mastering.
In a Digital Audio Workstation (DAW), the headroom of our session is determined by the amount of bits available. Since waveforms are described by numbers, those bits determine the maximum value for a waveform that the system can describe. The higher the gain, the louder the waveform, the more bits are used, the bigger the number. Once all of the bits are used, the system can no longer describe the waveform, a red light turns on to indicate that you are “clipping” and the waveform you are recording/hearing will suffer from unwanted distortion.
In the analog domain (think of a tape machine) things are different. The analog device has a sweet-spot (0 VU on its meter, usually) of operation and its tone and color change when hitting it lower or higher than that. If you keep going higher by adding gain, you will reach a point where things will sound clearly distorted, because the device cannot capture your intended signal with its “analog” counterpart (e.g. electric to magnetic, on a tape machine).
Without going too deep into headroom, bits (floating-point and so on for you witty heads at the rear of the classroom), it’s clear that gain staging is going to improve our use of the available headroom:
- we can prevent hitting the full scale value and avoid distortion/clipping
- we can decide the intensity for hitting an analog (or virtual analog) device to get the color/tone that we want
Have you ever got to the point where you would like the drums to be a bit louder, but:
- you make the drums louder: the mix distorts and sounds terrible
- you make everybody else softer: the mix lacks life, sounds completely different and needs re-doing?
If yes, then let’s go:
Gain Staging At Session Start

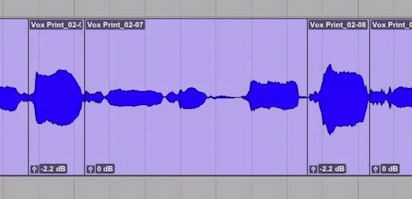
How many times you get a session, you load it in your DAW, press Play and it sounds like this:
..or like this:
It’s a mess. I don’t like it when that happens and it tells me the recording engineer has not cared much about gain staging (especially when musicians are recorded as overdubs).
I like to send and receive recorded sessions (meaning “ready to be mixed”) in a way that, when someone presses Play, they will be intelligible and easy to understand. Sure, they will sound “rough” and unmixed, but it’s important to give the next engineer the best possible scenario for understanding what the intentions of the artist/band are. If things sound like the example above, can you determine whether the guitars or the keys have to be predominant in the song? This alone is a huge thing, really!
That’s why my rough mixes sound like this:
Ah! Much easier now to get the general vibe. No matter how rough things are, you can always make them sound better by just gain staging the session.
The Kick/Snare Pivot Trick

To do so, over the years, I’ve developed a general approach that seems to work all the time. I set my bass drum and snare drum levels to hit just a bit of the “yellow” area in Pro Tools - which turns out is around -24 dBfs RMS on the meter (peaks hitting from -6 to -3 dBfs). You can take this information to any DAW and build your visual reference.

As a second step I set my monitoring volume to a comfortable amount. I have a stepped switch on my monitoring controller so I can almost always put it at the right level without even playing the music. Once set, I would recommend you keep it there and generally not touch it, or at least make an effort to bring it back to the original position whenever you touch it.

If your monitors output enough volume, you will not be tempted to push the volume of your tracks in order for things to be heard. We’re mixing! The focus here is to “mix” the tracks, there’s little interest in the absolute volume level of the actual track. That’s why we created mastering engineers!
At this point I can start bringing in all the elements of the mix and set general volumes, while the bass drum and snare drum are playing (always with those!). Important: I don’t set the track volume with the volume fader of that channel! I keep that at zero and use a “trim” at the beginning of the channel, instead.

A “trim” is a general volume knob or fader whose purpose is only to change the gain of a signal. This way I reserve my main track fader for automation and further changes at the end of the channel processing. Since the resolution on that fader is higher when closer to zero, keeping it around unity gain value is the best way to make use of its maximum resolution.
If you don’t want to use a plug-in, a great way to do it is to change the gain of the clip itself. Every DAW these days can do it and it’s a fantastic way to keep your session clean and sounding “right” from the get-go.
By following this method, things will fall into place according to their loudness relation to kick and snare and once all the tracks are in.. look at the meter of the mix buss: it will probably be around -18 to -12 dBfs RMS. Plenty of headroom in case you need to bring somebody up a dB or two to be heard. Your mix will breath better, your automation will sound better and you’ll stay well away from the dreaded red light of clipping.
Again, it makes all the difference.
Using Buses As An Additional Staging Point

Grouping separate tracks together by routing them to a bus is a great way to control the overall sound of that group. Drums, bass, guitars, keys, vocals and effects all go to separate busses, in my example. This way I can:
- monitor their individual level
- apply processing to the group
- trim the volume of each buss, if need be, 100% transparently (thanks, digital!)
As you can see, I wanted a bit less vocals and a bit more effects. One quick way to do it was move the faders on the busses.. sometimes I even put a new Trim plug-in on those busses, input the values and then reset the faders to zero.
Gain Staging For Analog Outboard And Plug-Ins
You should be aware that gain staging is important even when just using an analog or digital device (especially when they pretend to emulate analog!). Beware: it's mostly subtle, but it's there!

Listen to how drums and guitars sound through my pair of API 550A (great EQs!) with different gain staging. All of these examples end up with the same amount of final volume, but the input and output gains are set differently through my master console (analog stepped knobs for both the IN and OUT):
Every example has a different quantity of “current” flowing in the actual EQ circuitry. This makes the EQ sound slightly different from, for example: IN+12 OUT-12 (lots of gain pushing into the EQ) and IN-12 OUT+12.

Are plug-ins any different? I tried the same with the UAD 550A plug-in:
As you can tell, there’s still some difference, although maybe even smaller than in the hardware version. Knowing these subtleties will allow you to find out the level at each piece of analog hardware likes to be hit for a specific sound!

Let’s go back to my busses and let’s put a compressor plug-in on all of them. I’ve used the Brainworx Townhouse Compressor on all of them, with different settings for each bus. This unique piece of hardware has a great story and it would be a dream to have six of them in a rack, so since "one can dream" I made my own personal, virtual Townhouse rack (added geeky-ness: the cables at the bottom are an actual picture of the back of one of the racks, here at Fuseroom).

First off, let’s send a 100 Hz sine wave through it. You will notice the yellow line being the normal sine. Now check what happens when we push gain through the compressor while engaged: the harmonic distortion of the emulation re-creates the changes that, supposedly, the hardware introduces. This means that, going into this plug-in louder or softer will not only affect the compression amount (hence the tone) but also the harmonic distortion applied to the track (the "tone of the box"). I told you gain staging was important!

It gets more interesting: the output knob of this plug-in has a sound of its own and is not linear. Look at the two pictures comparing a +13.5dB output gain done with a transparent Trim plug-in in Pro Tools or done with the output knob of the Townhouse compressor (yellow vs violet). This means that even that output gain knob is generating some color/tone.
This becomes apparent if we play the song with different trim values before and after those compressors. By trimming all the buses down of the same amount (and then compensating) we're hitting the compressor differently, getting different amounts of compression and therefore a different tone and "glue" of the mix.
Gain Staging On Your Mix Buss

At the end of your chain is your mix buss and nothing more than that can get affected by your gain staging. I always like to have control on my ways IN and OUT of that mix buss. In Pro Tools you can do it with Master Channels (as you see in this picture, the red ones surrounding the green Mix Buss channel are respectively the way IN and OUT). The important thing is to have something completely transparent that handles the amount of gain in and out of that bus.

As you can see, I loaded a generic mix buss chain that I like, from my template. What I am using is not important, but here goes:
- UAD Shadow Hills Mastering Compressor
- Slate Digital FG-Red Compressor
- UAD K-Stereo
- UAD Precision Equalizer
- DUY Valve
- DUY Tape
- UAD Precisi