Automation is a powerful tool for adding motion and interest to music production. In this excerpt from the Puremix video, "Fred Everything Creating DJ Edits," Fred creates a lot of interest and variation in the lengthy percussion intro of a remix he's doing, by merely automating a filter and a reverb.
He's working on a remix where he only has the full mix to work with—no individual tracks or stems. Therefore, the processing he adds affects the entire mix. The song starts out with a long, 48-bar intro of Latin-style percussion on top of a four-on-the-floor drum beat that builds a bit in intensity as it goes along.
FILTERED AND VERBED
Fred begins his processing by inserting a Sonalksis Creative Filter plug-in on the track. He sets the Filter Type to high-pass, which means it will roll off everything below the Cutoff Frequency. He keeps the Resonance at its Low setting, which will minimize the boosting around the cutoff frequency that can create phasey and harsh sounding results when set high. He sets the Slope to 12/dB per‐octave, which is relatively gentle, and will keep the processing gradual as the frequency is increased.
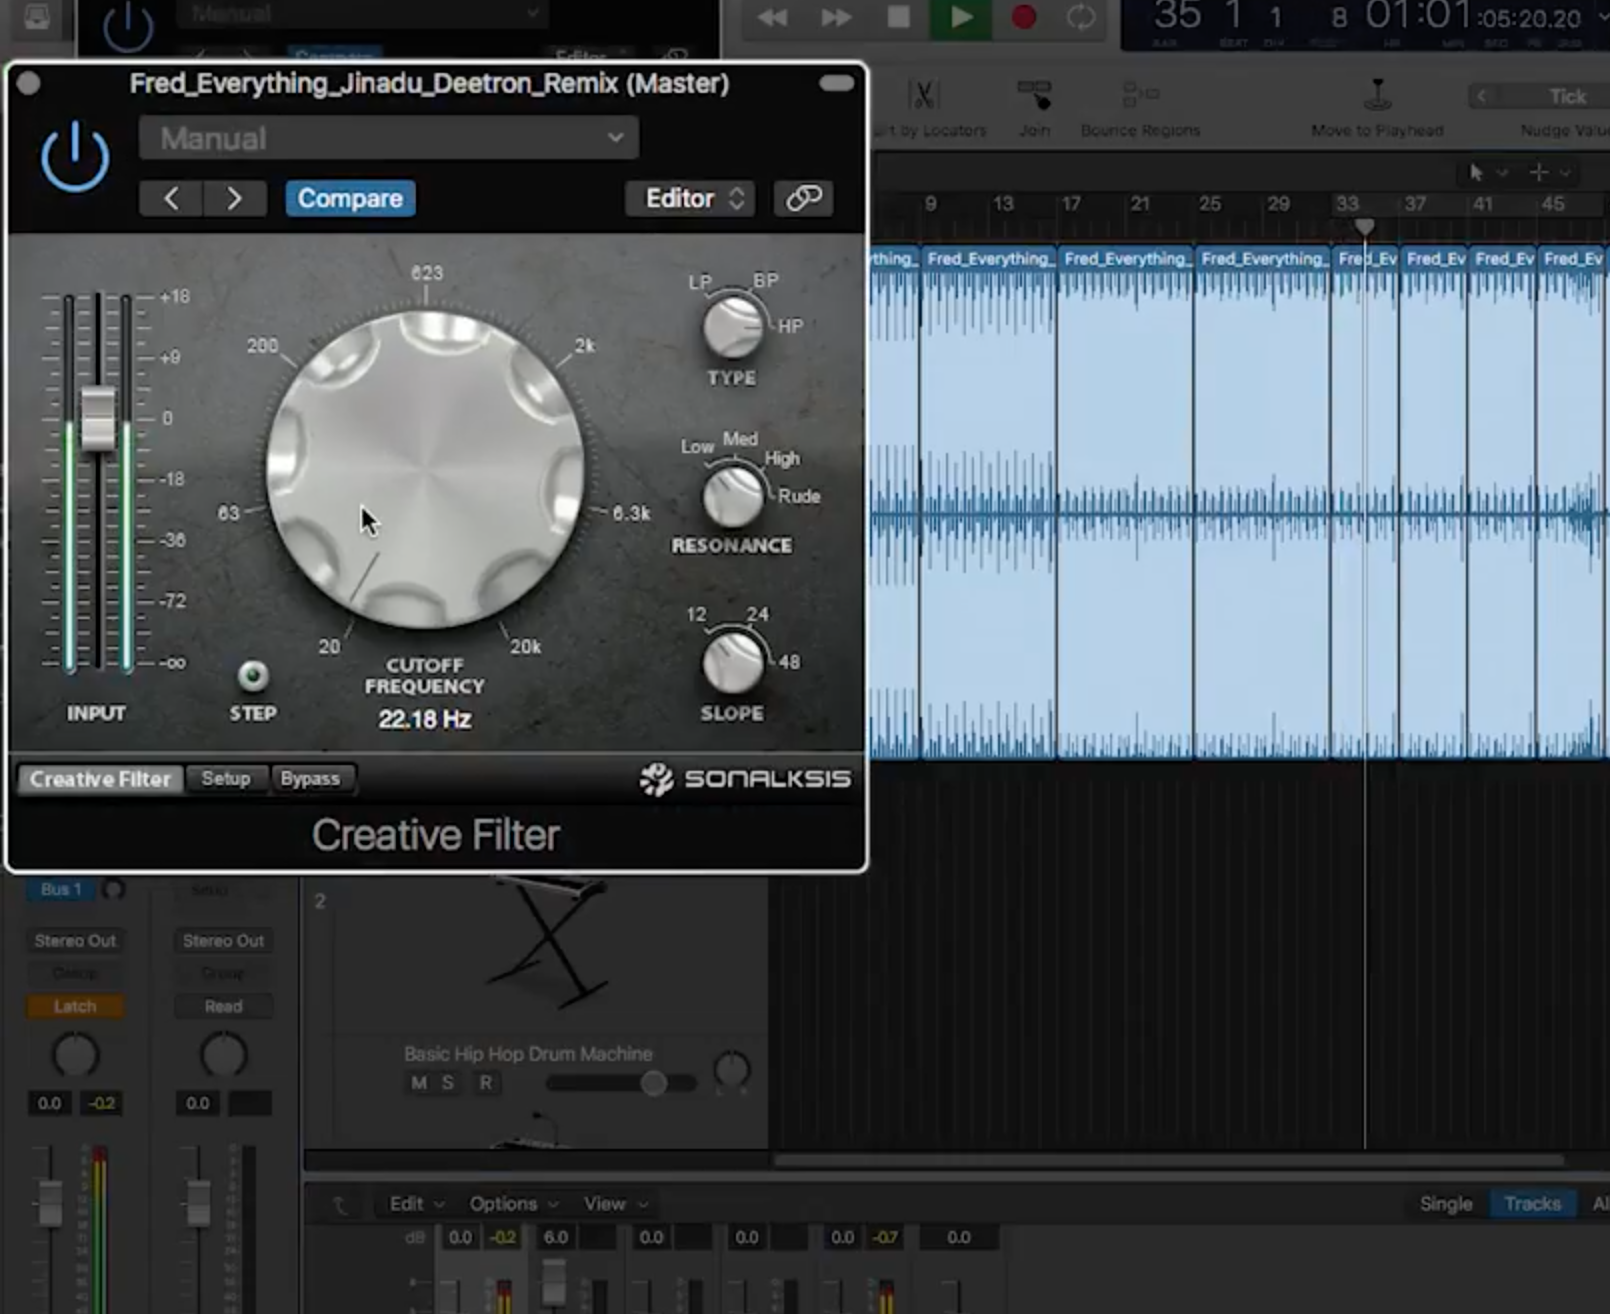
The Sonalksis Creative Filter plug-in Fred uses is set to high-pass, so that it rolls off what's below the cutoff frequency. As he moves it higher, it thins out the track.
Fred explains that he's using Latch mode for the automation. In Latch mode, when you move a fader or knob or flip a switch, it stays at the new value until you move it again. For the automation he's doing here, he prefers Latch mode to Touch mode, where the knob would revert back to its starting point if he released it.
He starts moving the Cutoff Frequency knob from its lowest setting 20 Hz, starting at about bar 34. He gradually and steadily raises it until he gets to a high point of 726 Hz at bar 47. He then turns it more quickly back down during bar 47, thickening up the sound as a transition into bar 48, where the bass, synths and other instruments come in. Because he's using a high-pass filter, the higher he turns it up, the more it thins out the track.
Next, he wants to automate a reverb. He chooses Valhalla Vintage Verb, which emulates early digital reverbs from the '70s and '80s. Instead of inserting it directly on the track, he uses it on an aux bus. That way, if he wants to modify the just the reverb with another plug-in, he can do that. Also, he can use the bus send to automate the amount of reverb he's adding.
He sets the Vintage Verb on a Concert Hall setting with a long, 4-second decay time and a 20-second pre-delay. He again uses Latch mode and starts bringing up the reverb send, starting at bar 41 until it reaches its highest point, almost halfway up at bar 47. As he did with the filter, he then brings the reverb down quickly leading into bar 48, where the other instruments come in.
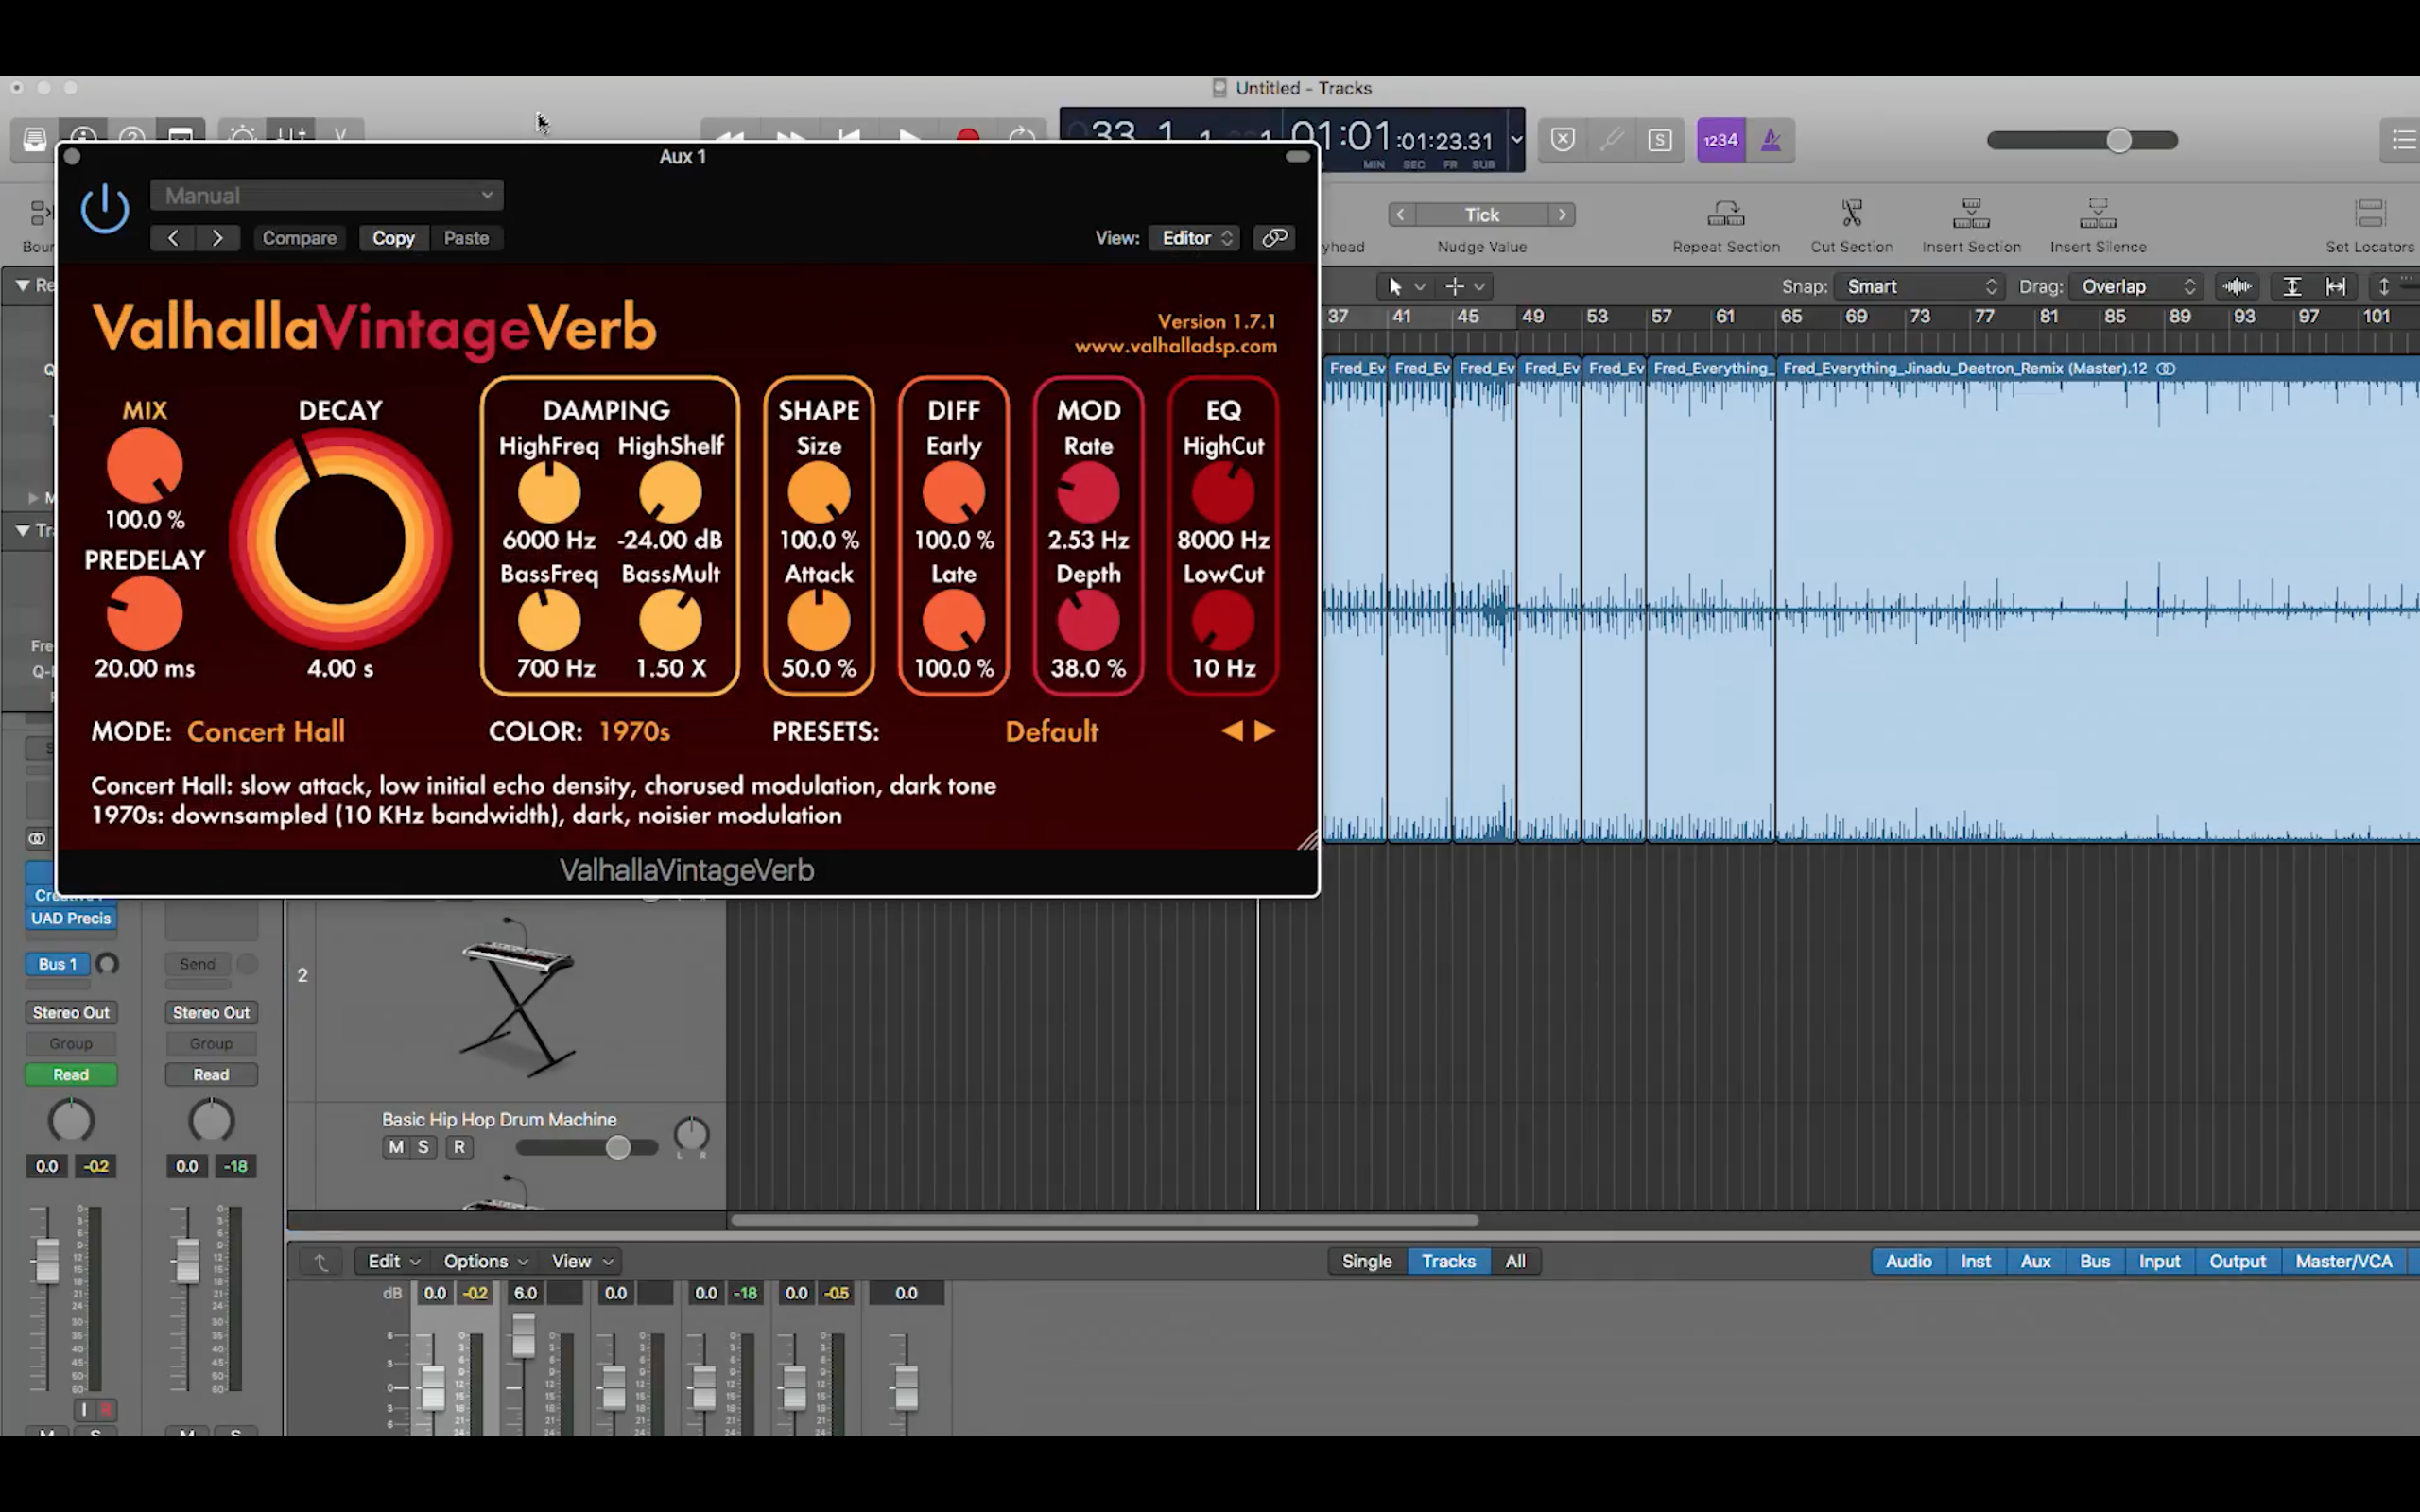
Fred automates Valhalla Vintage Verb to create the increasing reverb effect.
The gradually increasing reverb, in conjunction with the automated filter, makes the whole track seem to recede towards the back of the soundstage until it gets to its peak where it almost sounds like it's in a cave. The overall effect of automating both processes is to create extra drama that keeps the long intro section more interesting.
THE SHAPE OF THINGS
Whether you're processing a full mix like Fred did or working on individual tracks, automating effects gives you a great deal of control over your audio. Not only is it useful for changing the way something sounds, but the ability to precisely edit how a parameter changes over time is really powerful.
In the video, Fred recorded the automation by hand, just turning the knobs with Latch mode on. That's an easy way to get the initial automation pass done, and if you feel you need to tighten it up, you can easily edit it in your DAW. Most DAWs have both freehand-line and straight-line tools. The latter is great for creating smooth and even movement of a parameter.
Many DAWs also provide tools that allow for drawing in other types of waveshapes such as triangles, squares and so forth. You can use these to create unusual automation effects that are synced to the song's tempo. For example, you could use a triangle shape to draw in an autopan effect on the automation lane for the track's panning. To draw it evenly, you typically have to turn on the DAW's snap-to-grid feature and set the quantize value to the duration you want each cycle of the shape to be in. Then you can just draw across the automation lane.
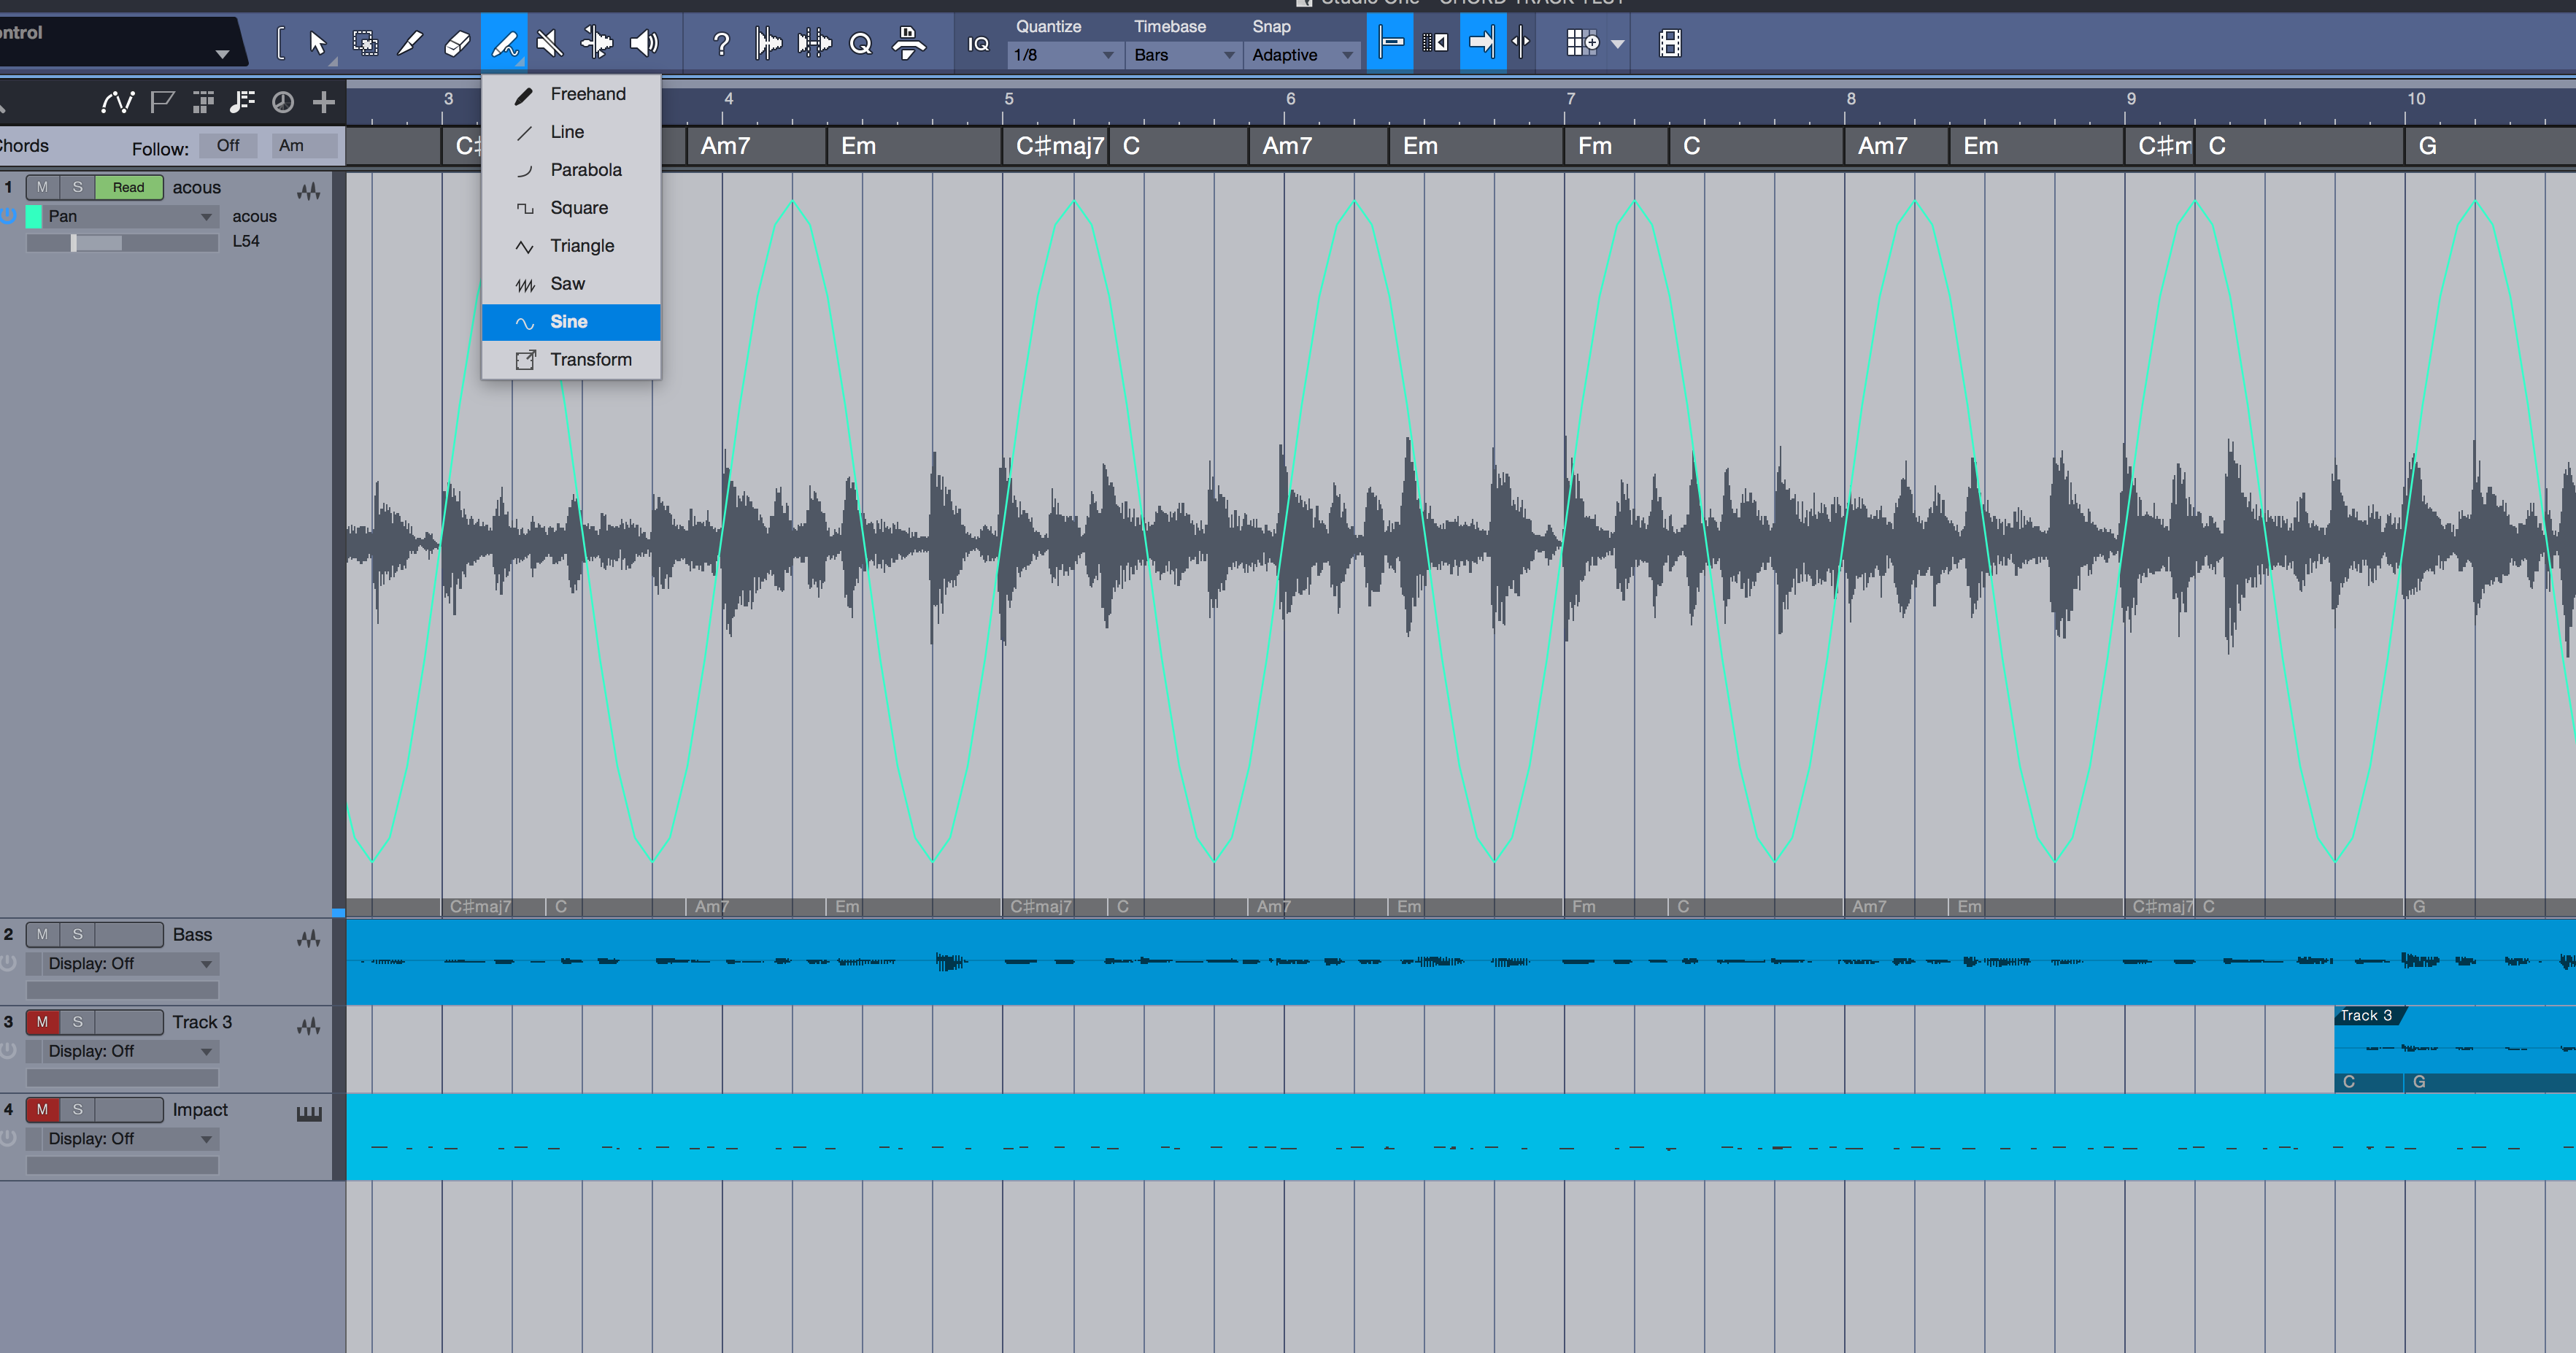
In PreSonus Studio One 4, you can choose from a number of waveshapes to draw in automation with. This track has pan data drawn in with a Sine Wave shape.
AUTOMATION STATION
You can use effects automation to create dramatic effects like filter sweeps and phasers growing in intensity, but you can also apply it in more subtle ways that help create different textures between different song sections.
For instance, say you were working on mix and wanted more reverb on the vocal track during the choruses than during the verses, you could automate that with the reverb send. And you could change the character of the reverb slightly by changing one of its other parameters—even the reverb type if your plug-in supported it.
TIME FOR A CHANGE
Effects automation is useful for controlling how a sound changes over time, which is essential in both mixing and remixing and is particularly helpful with transitions between different parts of a song. Both the effects that Fred automated in the video were building up to the transition where the rest of the instruments entered.
Let's check out some audio examples featuring effects automation.
Example 1: This one starts off with a four-measure keyboard-and-bass loop. A Waves MetaFlanger is inserted on the loop, with the Mix and Feedback controls set quite low. Both parameters rise gradually and reach their peaks at bar 8, with the Mix all the way up and the Feedback at almost 70%. When the drums enter at bar 9, the Mix drops down to 50%, but the Feedback remains high. Meanwhile, a distortion plug-in, FabFilter Saturn, on its Clean Tube setting, was also automated on the same track. Its Drive parameter is turned completely down until bar 5, when it starts rising steadily to bar 9, where it gets close to 50%, which is where it stays until the end, giving the loop a crunchy warmth.
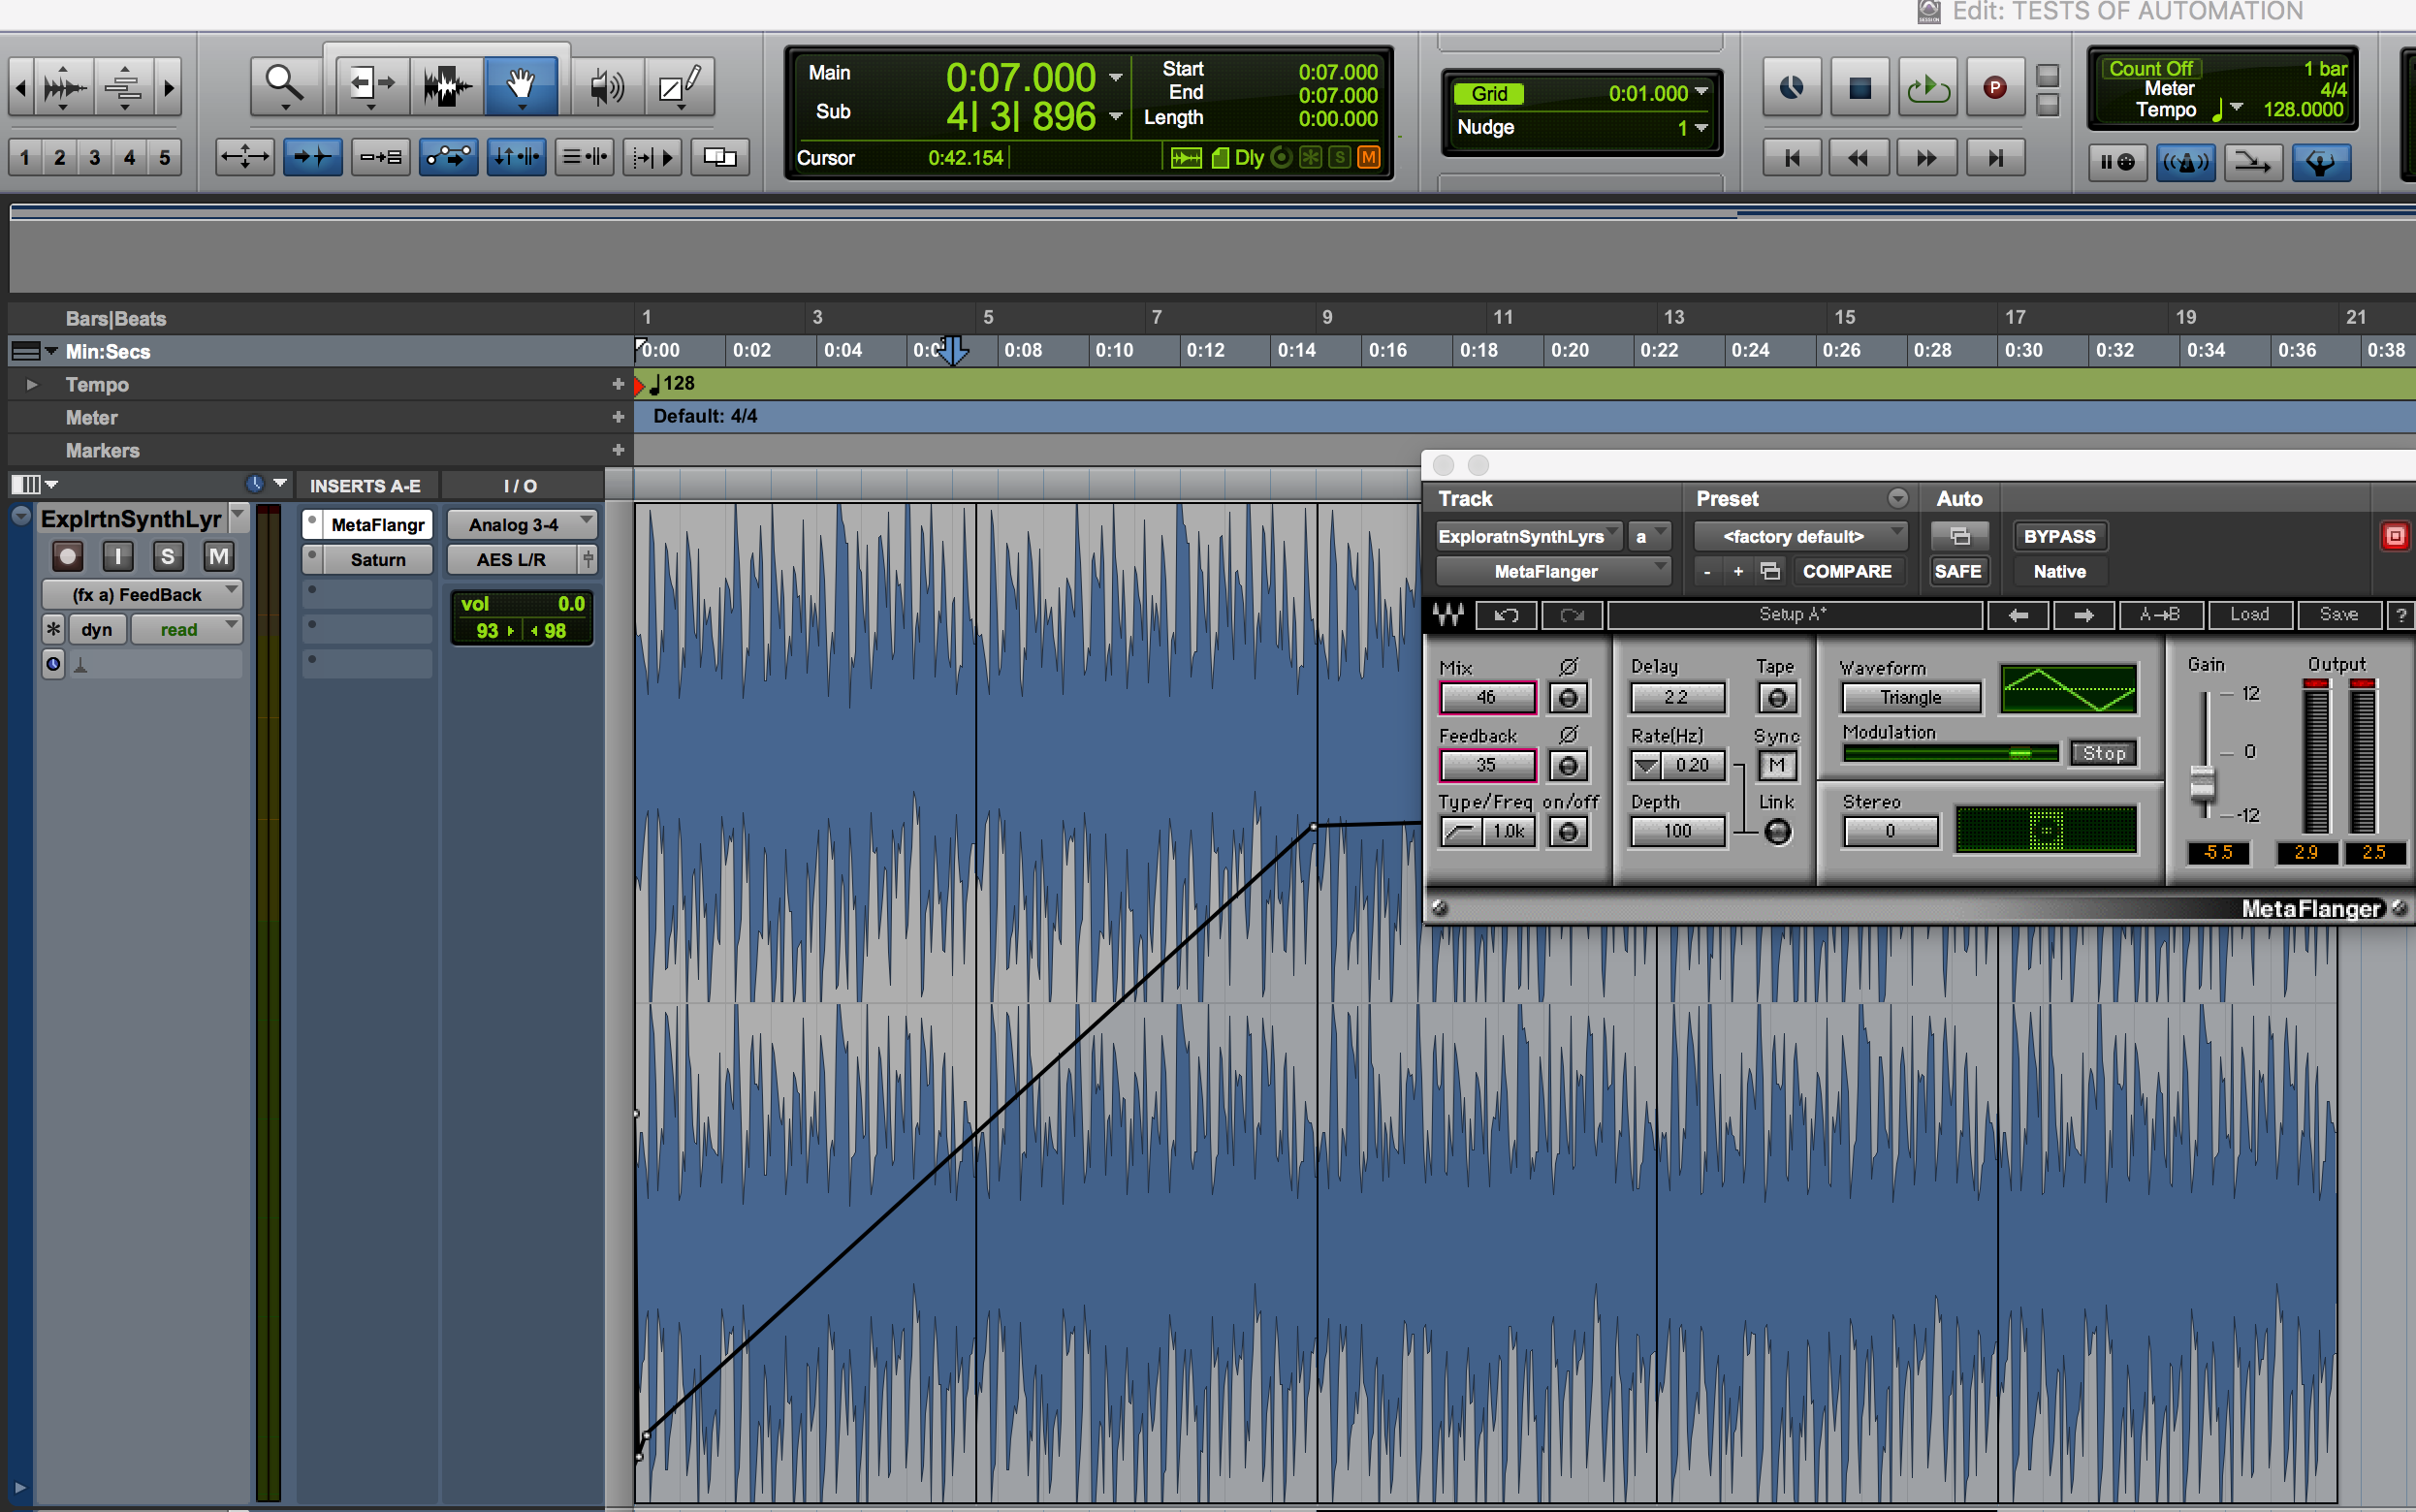
This shows the automation on FabFilter Saturn's Drive control in Example 1.
Example 2: This shows how you can use an automated Delay to create more complexity and variation in a static drum part. A four-measure drum part with a fill in bar 4 repeats five times. A Soundtoys Echoboy Jr. delay plug-in is inserted on the drums. It has two automated parameters: the Mix and Feedback controls. The former is used to bring the delayed signal further to the front and the latter to increase the repeats, and therefore the complexity. The delay is set to an eighth-note ping-pong delay. The ping-pong setting gives it movement and stereo width. The Mix control starts at roughly 25% and moves up a bit every four bars or so throughout the example. The Feedback starts almost all the way down, but increases significantly to create fills at bars 8, 12, and 16, dropping after each one. The bar 16 fill seems the most intense and complicated because of the combination of the Feedback rise and the Mix being at its highest point.
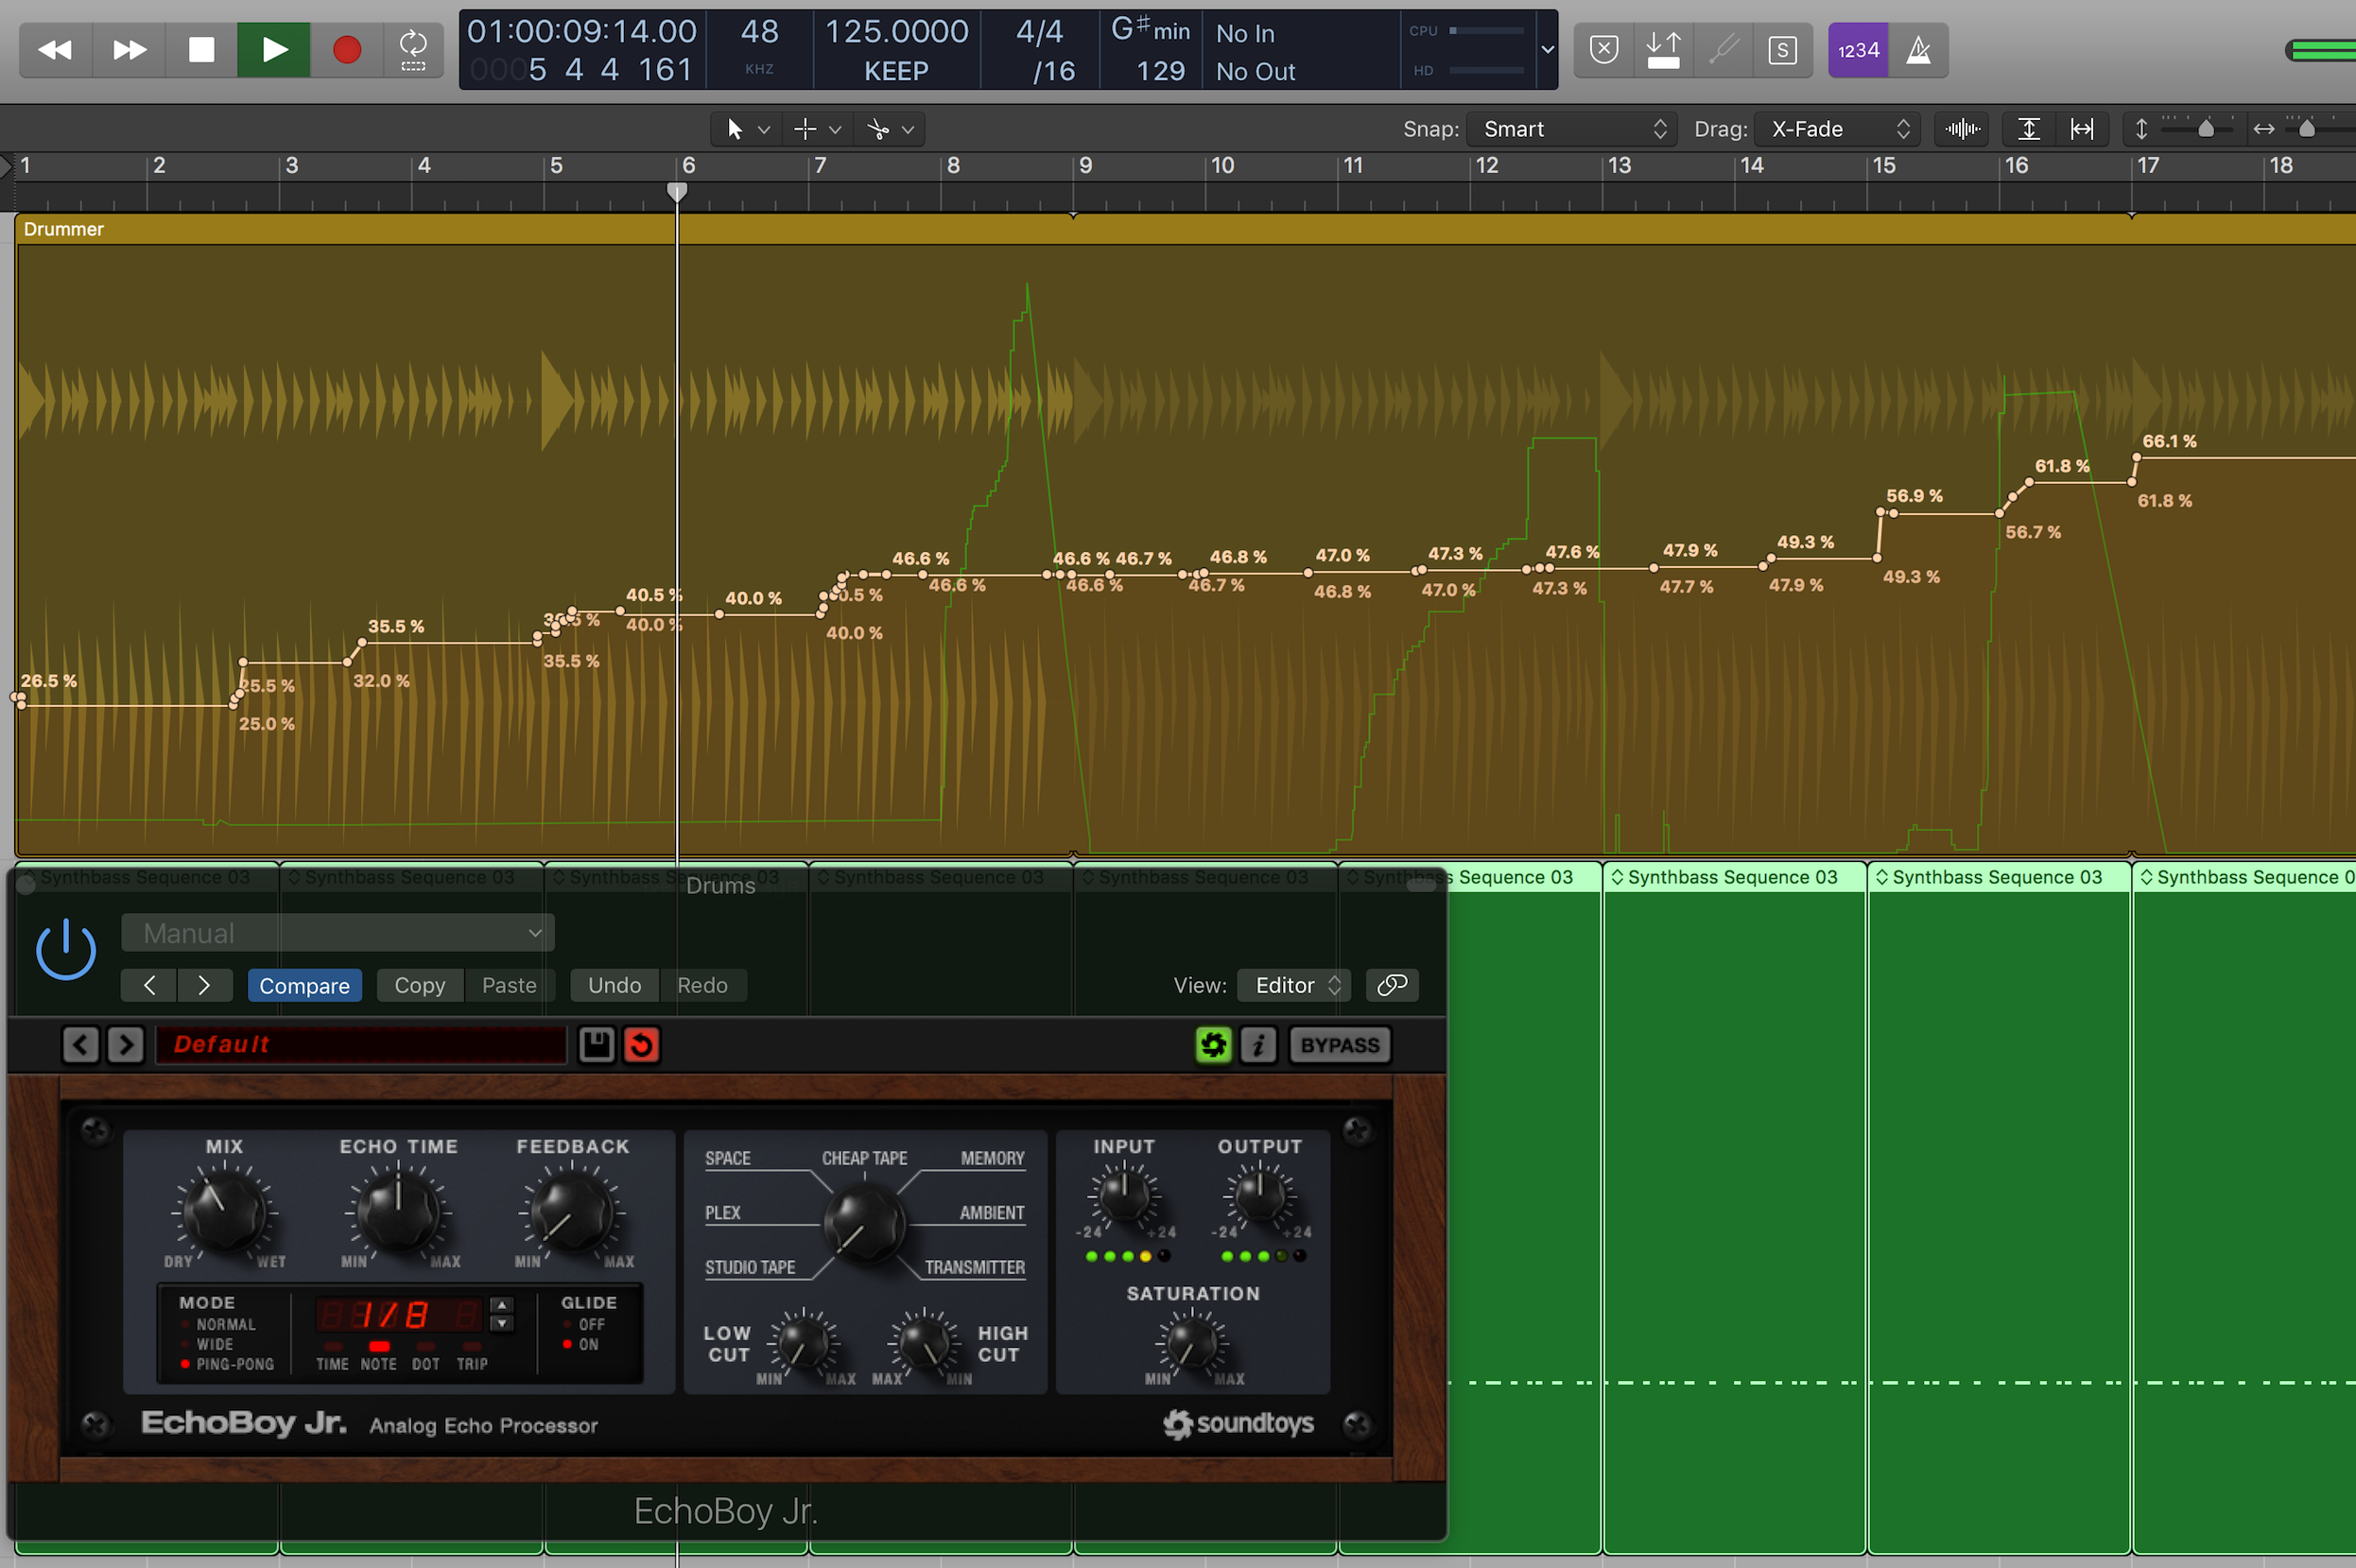
The beige line represents the automation of the Delay Mix and the green line the Feedback in Example 2.